A leaky faucet is not only an annoyance but also a potential drain on your budget and a source of damage to your home. However, tackling this common household issue can be manageable. With the right knowledge and tools, you can easily diagnose and repair a leaky faucet, ensuring a well-maintained and efficient home. In this article, we will provide a detailed seven-step process to guide you through the repair process.
Before you begin the repair, it’s important to identify the type of faucet you’re dealing with. The main types of faucets include compression, cartridge, ball, and disc faucets, each with its own unique mechanism and repair approach. By recognizing your faucet type, you can streamline the repair process and ensure that you have the necessary tools and replacement parts.
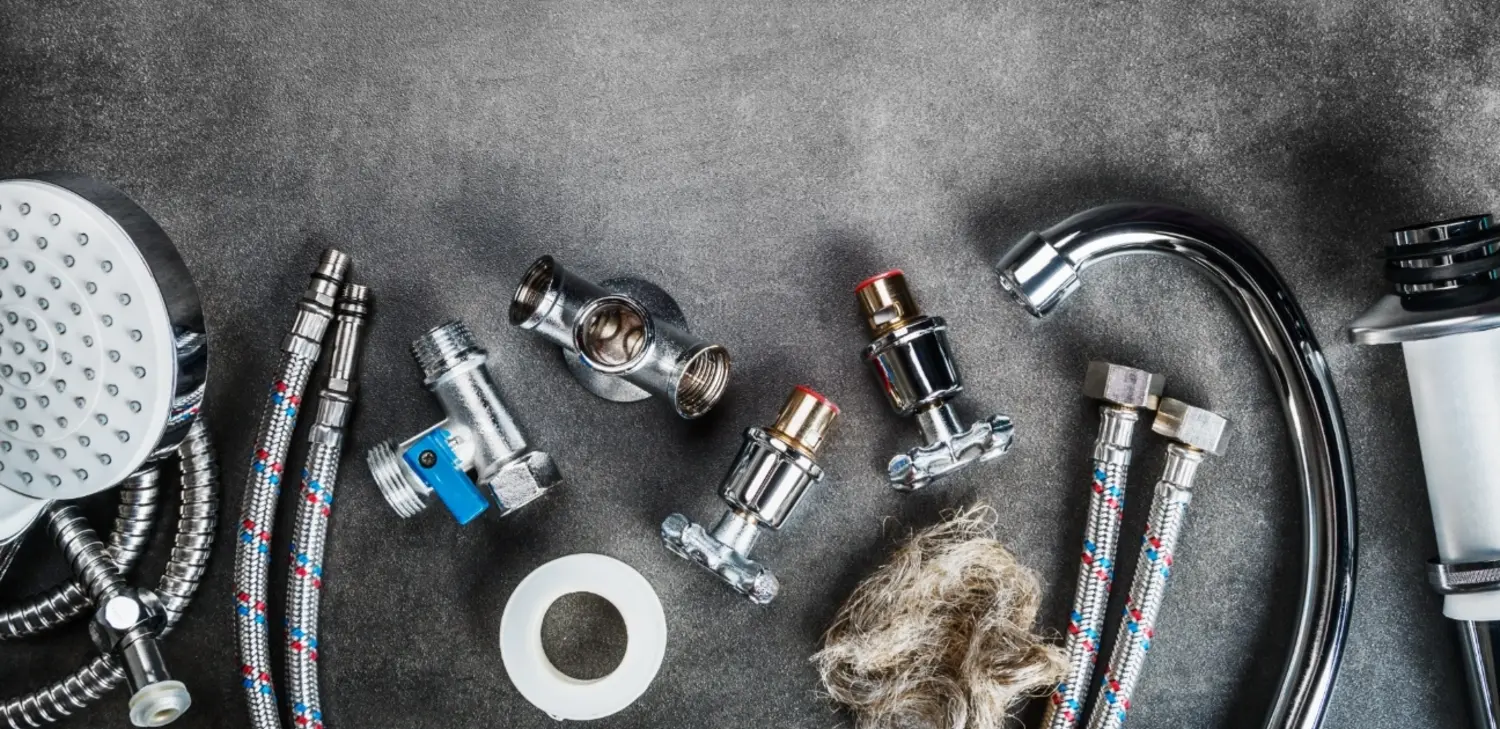
To successfully repair a leaky faucet, you’ll need the right tools and materials. Some common tools include an adjustable wrench, screwdriver, replacement O-rings, and possibly specific parts like a new cartridge. It’s also advisable to have a plumber’s tape and a protective cloth on hand to prevent any damage during the repair process. Gathering all the necessary tools and materials beforehand will make the repair process smoother and more efficient.

Before you begin disassembling the faucet, it’s important to turn off the water supply. This can usually be done by turning the shut-off valves located under the sink clockwise. Once the water supply is turned off, open the faucet to release any trapped water and relieve any pressure in the system. This step is crucial for your safety and to prevent any water damage during the repair process.
Carefully disassemble your faucet. Compression faucets involve unscrewing the handle and removing the valve stem to access the washer. With ball, cartridge, and disc faucets, the process can vary, usually involving removing the handle and a retaining nut to expose the internal parts. Keep track of each component and its order for reassembly. Use the rag to clean any residue from the parts as you go.
Once you can access the internal components, look for signs of wear or damage. Common issues include worn-out washers or O-rings, a corroded valve seat, or a damaged cartridge. These are usually the culprits behind a leak. Inspect each part carefully; even small imperfections can cause leaks.
Replace any worn or damaged parts with new ones. For washers and O-rings, make sure the replacements are the exact size and shape. Apply plumber’s grease to O-rings and washers if recommended. If you have a cartridge or disc faucet, you may need to replace the entire cartridge or specific parts according to the manufacturer’s instructions. Remember, using the correct parts is crucial for ensuring a good repair.
Once you’ve replaced the necessary parts, reassemble your faucet, reversing the disassembly steps. Make sure everything is tight and secure, but avoid over-tightening, which can damage the parts. Turn the water supply back on and test your faucet. If done correctly, the leak should be fixed. It’s normal to make minor adjustments, so don’t worry if you need to tweak a few things to get it just right.
However, If you notice any persistent leaks, it may indicate the need for professional assistance. In such cases, it’s best to reach out to a reliable handyman service like Kaminskiy Care and Repair.
Repairing a leaky faucet is a rewarding DIY task that can save you money and conserve water. However, it’s important to recognize when a repair is beyond your expertise and requires professional intervention. In such situations, Kaminskiy Care and Repair is the top choice for homeowners who value quality and reliability. Our team of professionals is ready to tackle any plumbing challenge and help you maintain a pristine home environment.