
Restoring old furniture can breathe new life into cherished pieces. Whether you’ve got a family heirloom or a thrift store find, furniture restoration is a rewarding project. With some basic tools and know-how, you can transform worn-out items into beautiful statement pieces for your home.
Proper preparation and patience are key to successful furniture restoration. Start by cleaning the piece thoroughly to remove dirt and grime. Then, assess the damage and decide on your restoration approach. Depending on its condition, you might need to sand, repair, or refinish it.
Refinishing often involves sanding the surface to remove old paint or varnish. You can then apply a new stain or paint to give the piece a fresh look. For minor repairs, the wood filler can fix scratches and dents. With some creativity and effort, you can save money and create unique, personalized furniture for your home.

Before restoring furniture, it’s crucial to assess the piece, gather necessary supplies, create a suitable workspace, and properly clean the surface. These steps set the foundation for a successful restoration project.
Start by closely examining your furniture. Look for structural issues like loose joints, dents, gouges, and scratches. Check for water damage or discoloration. Determine if you’re working with solid wood or veneer.
Be extra cautious when buying antique furniture. Some imperfections add character and value, so consider whether full restoration is necessary.
Take photos to document the piece’s current state. This will help you track progress and serve as a reference if needed.
Identify any areas that need special attention. Note any missing hardware or damaged parts you’ll need to replace.
Collect essential tools for your project. You’ll need sanding tools like sandpaper in various grits, sanding blocks, and possibly an electric sander.
For stripping, gather chemical strippers, a paint scraper, and a putty knife. Choose a stripper suitable for your furniture’s finish. Citristrip is a popular, less toxic option.
Other supplies include primer, tack cloth, mineral spirits, safety gear (goggles, gloves, dust mask), paintbrushes, and clean rags.
Make a checklist to ensure you have everything before starting. This prevents interruptions mid-project.
Choose a well-ventilated area for your project. Good airflow is crucial when using chemical strippers or sanding.
Protect your work surface with a drop cloth or thick plastic sheeting. This will catch drips and make cleanup easier.
Ensure you have proper lighting. A bright, even light source helps you spot imperfections and achieve a smooth finish.
Keep your tools organized and within reach. A rolling cart or nearby table works well for this.
Set up a separate area for drying pieces after stripping or applying finishes. This keeps your main workspace clear.
Start by thoroughly cleaning. Use a mild soap and water solution to remove dirt and grime. For tougher buildup, try a specialized wood cleaner.
Dry the piece completely with clean rags. Moisture can interfere with sanding and finishing.
If stripping is necessary, apply your chosen stripper following the product instructions. Work in small sections and use a paint scraper to remove the old finish.
After stripping, neutralize the surface according to the stripper’s directions. This often involves wiping with mineral spirits.
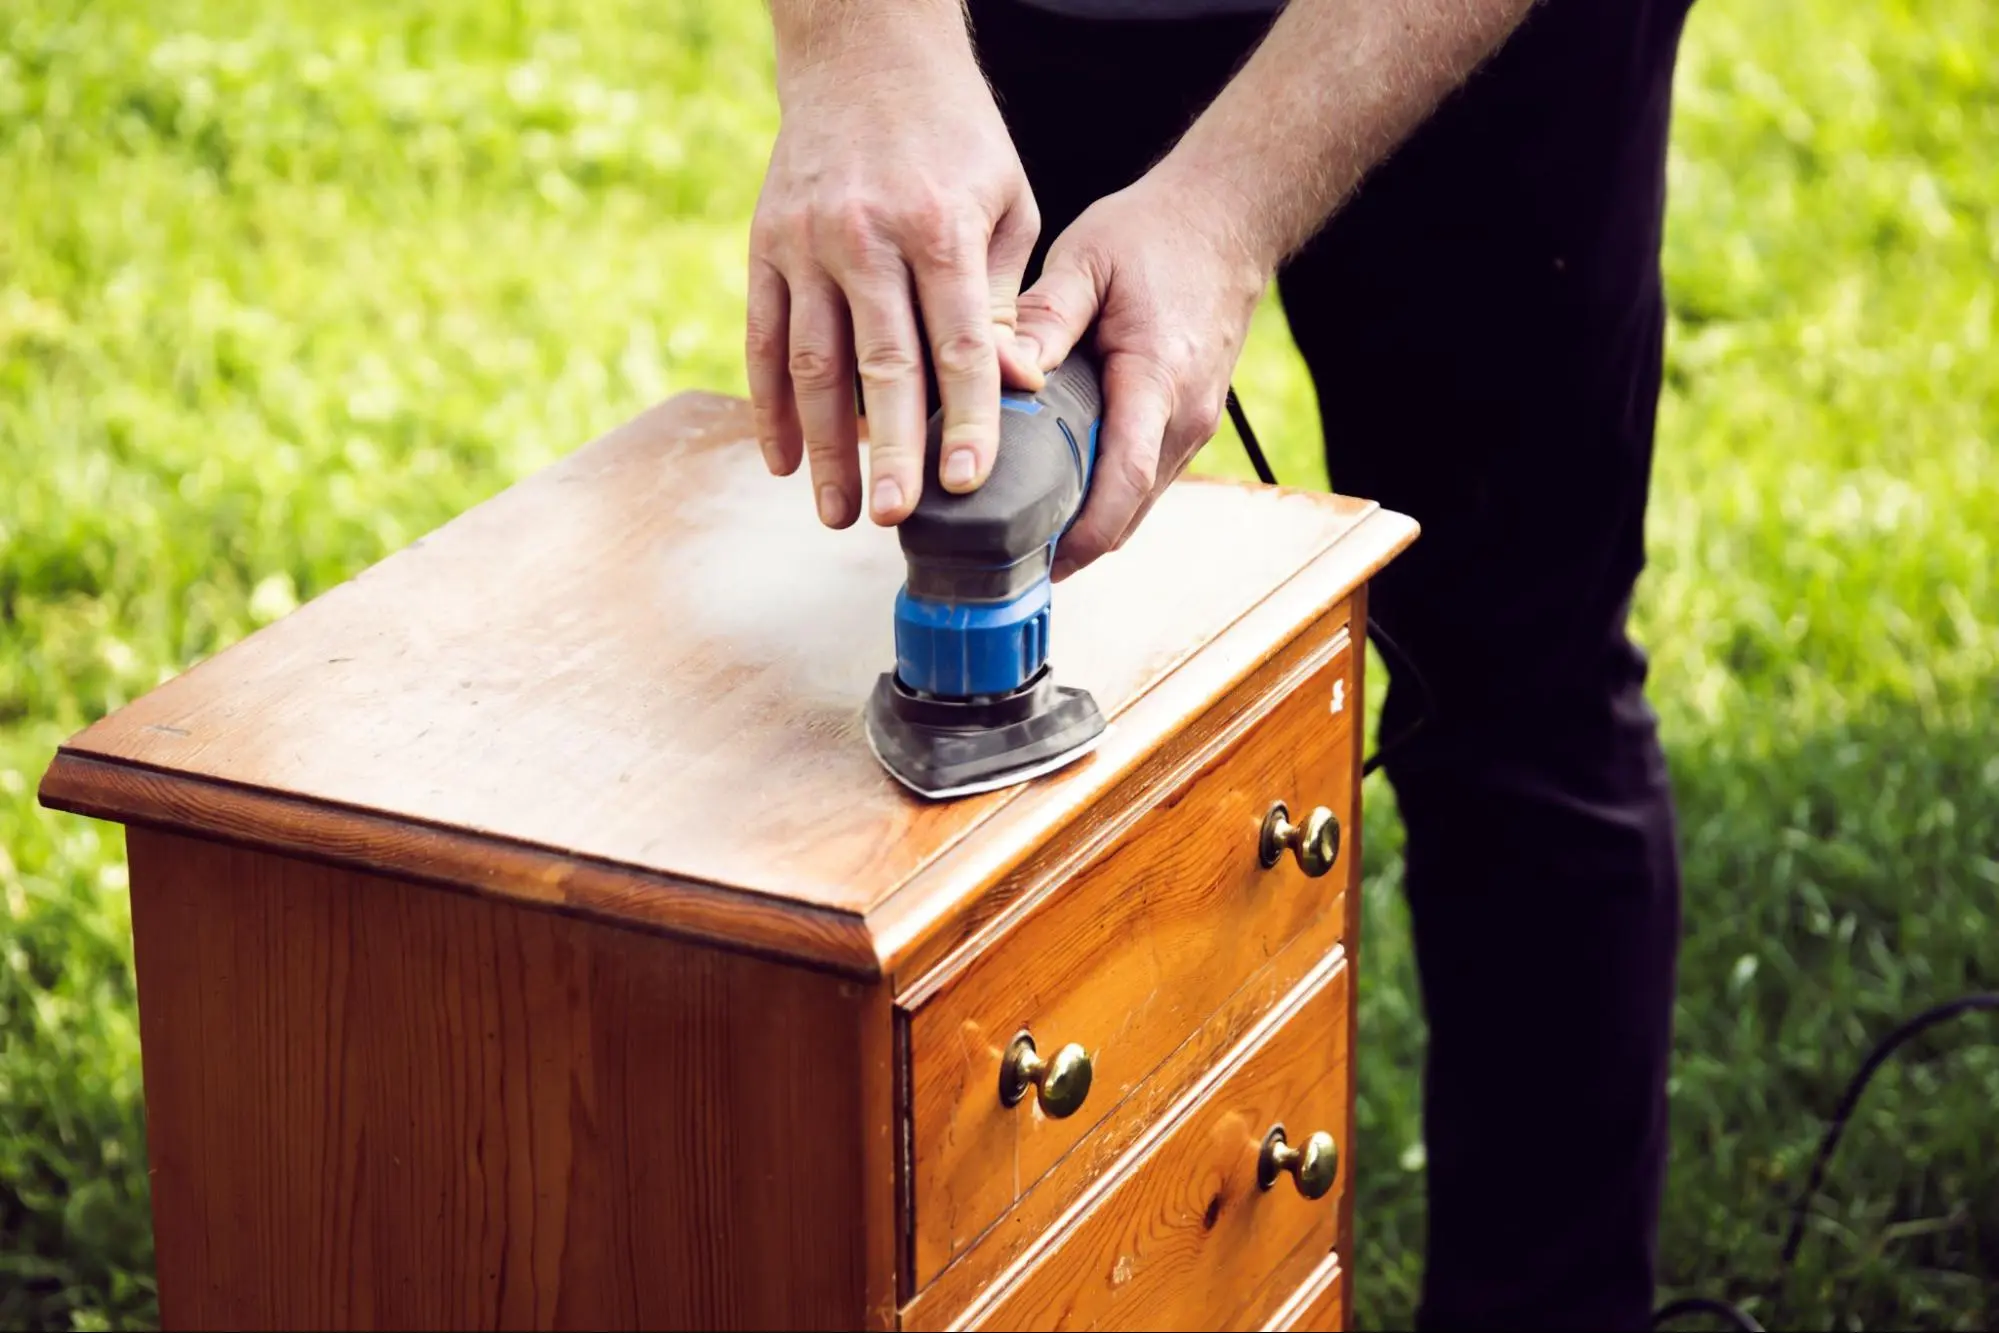
Once clean and dry, sand the surface. Start with a coarser grit and progress to finer grits for a smooth finish. Always sand in the direction of the wood grain.
Wipe away all dust with a tack cloth between the sanding stages. This ensures a clean surface for your new finish.
Refinishing and repairing furniture can breathe new life into old pieces. With the right techniques, you can transform worn items into beautiful focal points for your home.
Start by removing the old finish. Apply a chemical stripper with a paintbrush and let it sit for the recommended time. Scrape off the loosened finish with a plastic scraper. Be gentle to avoid damaging the wood.
For stubborn areas, use steel wool dipped in a stripper. Wipe away the residue with clean rags. Repeat if needed until all old finish is gone.
Ventilate your work area well. Wear gloves and eye protection when using strippers.
Fill small cracks and holes with wood filler. Choose a color that matches your wood. Apply with a putty knife. Let dry completely, then sand smooth.
For deeper gouges, use epoxy. Mix two parts of epoxy and press into the damaged area. Level it off. Sand after it hardens.
Fix loose joints with wood glue. Clamp until dry. Replace badly damaged parts if needed.
Choose between stain for a natural look or paint for a bold change. For stains, apply with a brush or rag. Wipe off the excess after a few minutes. Let dry between coats.
Start with a primer for paint. Apply thin, even coats with a brush or roller. Sand lightly between coats for a smooth finish.
Gel stains are great for vertical surfaces as they don’t drip. They also work well on woods that don’t easily take traditional stains.
Seal your work with a clear, protective finish. Options include polyurethane, lacquer, or varnish. Each has pros and cons for durability and sheen.
Apply thin coats with a high-quality brush. Sand lightly between coats with fine-grit paper. Dust off before the next coat.
For extra protection, consider a paste wax top coat. It adds shine and helps repel water and stains.
Allow plenty of drying time. Follow the product instructions for the best results.
Furniture restoration is a rewarding DIY project. You can bring old pieces back to life with some basic skills and tools.
Start by thoroughly cleaning the furniture. Remove dirt, grime, and old finishes. Next, repair any damage. Fix loose joints, fill holes, and sand rough spots.
Choose your finish carefully. Options include paint, stain, or clear coats. Apply the new finish in thin, even layers. Let each coat dry fully before adding more. Protect your work with a final clear coat. This helps the finish last longer.
Endeavor to be patient throughout the process. Rushing can lead to poor results. You don’t always need to strip old finishes completely. Sometimes, a light sanding and a new topcoat are enough.
With practice, you’ll develop an eye for potential in old furniture. Soon, you’ll transform worn pieces into beautiful focal points for your home.
To begin furniture restoration, you’ll need some essential tools and materials. These include sandpaper of various grits, wood filler, paint brushes, and cleaning supplies. A screwdriver set, hammer, and pliers are also helpful for repairs.
Depending on your project, you’ll want to have wood stain, paint, or varnish on hand. Protective gear like gloves and a dust mask is also important for safety.
Using a gentle cleaning method, you can refinish wood furniture without stripping. Start by washing the piece with soapy water and a soft cloth. This will remove dirt and old polish.
Next, lightly sand the surface to create a good base for a new finish. Apply a fresh coat of stain or paint directly over the cleaned and sanded surface.
Gentle cleaning is key when restoring antique furniture. Use a soft brush to remove dust and dirt, and avoid harsh chemicals that might damage the wood.
For repairs, use wood glue to fix loose joints. Fill small cracks with wood putty. When refinishing, choose products that match the piece’s era and style.
Start by thoroughly cleaning the furniture and removing all dirt and grime. Next, repair any damage, such as loose joints or scratches.
Sand the surface to create a smooth base for the new finish. Apply your chosen finish, whether paint, stain, or varnish. Allow each coat to dry thoroughly before adding the next.