Maintaining an aging home requires a proactive approach to prevent small issues from becoming major problems. As a homeowner, regular maintenance is your best defense against wear and tear that can degrade your living environment and your home’s value. An effective preventative maintenance checklist is a comprehensive tool that maps out the care needed for different parts of your home throughout the year, from the foundation to the roof, ensuring nothing is overlooked.
This checklist is essential because it helps you anticipate and address the unique challenges that come with an older home. Whether it’s the shifting of a foundation, the sealing of drafty windows, or the cleaning of gutters, staying ahead with a seasonal maintenance routine can save you time and money. Additionally, integrating regular inspections and upkeep of appliances and systems will prolong their lifespan, ensuring your home runs efficiently and safely. Integrating comprehensive strategies for cleaning, decluttering, and enhancing safety is crucial for creating a comfortable living space that stands the test of time.
The stability of your aging home largely depends on the integrity of its foundation and exterior elements. Specifically, ensure the roof, gutters, siding, and pathways are regularly inspected and maintained to prevent structural damage.
Inspect your roof at least twice a year for any signs of wear or damage. Look for missing, loose, or damaged shingles as well as any breaches around vents or chimneys. Prompt attention to these areas can prevent water damage and extend the life of your roof. For a more detailed analysis, consider consulting the Home Maintenance Checklist for Every Season provided by Redfin.
Keep your gutters and downspouts clear of debris to ensure proper water flow away from your home. This helps prevent water from accumulating around the foundation, which can lead to structural issues. Besides cleaning, check for rust, holes, or detachment from the eaves, and repair as necessary.
Examine your home’s siding for evidence of damage or decay. Addressing these concerns early on prevents moisture intrusion and insulation problems. Additionally, ensure all caulking around windows, doors, and other openings is intact to maintain energy efficiency and safeguard against water damage. The importance of caulking in preserving the structural integrity of your home is highlighted in resources like the Foundation Inspection Checklist by RS Foundations.
Regularly evaluate your driveway and walkways for cracks and uneven surfaces. Small fissures can rapidly expand if water gets in and freezes, which can result in costly repairs. Maintaining these areas not only improves curb appeal but also ensures safety.

Prioritize the integrity and functionality of your home’s interior systems. Addressing each critical area will ensure a safer, more efficient living space.
Check and replace HVAC filters every 1-3 months to maintain air quality and system efficiency. Seasonally, ensure air vents are unobstructed for optimal airflow and have a professional conduct an annual inspection of your heating and cooling systems.
Inspect faucets and pipes for leaks or drips to prevent water damage and waste. In colder months, take steps to prevent pipes from freezing. It’s also recommended to check the water softener and replenish salt as needed, a task often overlooked in home maintenance.
Regularly examine electrical cords for damage or wear. Test all ground-fault circuit interrupters in your home to prevent electrical shocks. Adequate lighting is crucial, so replace any burnt-out bulbs and consider upgrading to LED lights for better energy efficiency.
Ensure your home’s safety by regularly testing smoke alarms and carbon monoxide detectors, and replacing batteries as necessary. Check that your fire extinguishers easily accessible, has an intact seal, and is not past its expiration date; this can be crucial in preventing small fires from spiraling out of control.
The distinct changes in weather across seasons directly influence the maintenance needs of your aging home. Addressing seasonal tasks ensures your home remains in optimal condition year-round.
Start your spring home maintenance with a thorough spring cleaning. Open windows to ventilate, dust off winter’s remnants, and deep clean your living spaces. Check your home’s exterior for winter damage: inspect roofing for loose shingles and clean out gutters. Services like Zillow provide a detailed checklist that includes tasks like aerator cleaning and inspecting outdoor siding.
Prepare your home for summer’s heat by servicing your air conditioning system. Ensure all filters are replaced or cleaned to maintain air quality. Trim overgrown trees or shrubs to prevent damage to your home’s structure and inspect for pests that can cause issues. The AARP Foundation suggests checking for slippery areas on decks and patios that could benefit from weather-resistant treatment.
Fall is key for weather stripping and sealing gaps in windows and doors to prevent drafts. Check insulation, and service your heating system to gear up for colder months. Drain outdoor faucets and store hoses to prevent freezing. Guides like Better Homes & Gardens recommend replenishing salt in water softeners and checking safety devices such as smoke alarms and fire extinguishers.
When winterizing your home, focus on protecting pipes from freezing—insulate exposed piping and locate your water main in case of emergency shut-off. Keep heaters and generators in working order and stock up on essentials like salt or ice melt.
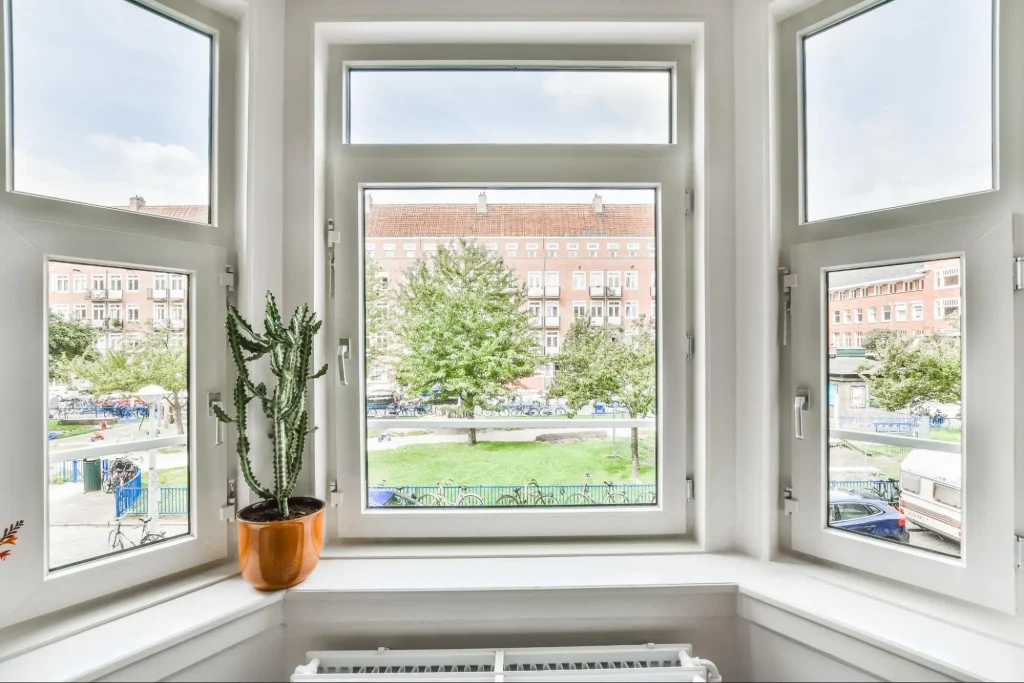
For aging homes, maintaining your windows, doors, and attic is essential to prevent leaks, and unwanted drafts, and to ensure overall home efficiency. Regular checks and upkeep can save you from costly repairs in the long run.
Windows: Annually examine your windows to identify and rectify any imperfections or damage. Look for signs of moisture around the frame, paint cracks, or warped materials. If there are issues with sliding sashes or locks, these need immediate attention. A properly maintained window not only improves aesthetics but also security. For further guidance on how to maintain your windows, read these window care and maintenance tips.
Doors: Check exterior door hardware regularly. Fix squeaky handles and loose locks as soon as possible. Door hinges should be tight and secure, and the door itself should sit properly in its frame without dragging or sticking.
Ensure window screens are free from tears and holes to protect against insects and debris. Consider replacing screens that are beyond repair. Weather stripping around windows and doors in older homes should be checked every year. If you detect drafts or see visible gaps, it’s time to replace the weather stripping. This not only helps with insulation but also reduces your energy bills.
Your attic can be an indicator of various issues affecting your home. Inspect your attic for any signs of leaks, particularly after heavy rainfall or melting snow. Proper attic insulation is crucial; it prevents heat loss in the winter and keeps your home cooler in the summer. Additionally, ensure there are no signs of ice dams, which can cause water damage to your home. If you notice water stains or moisture, addressing these issues promptly with a professional may be necessary. For guidance on potential signs of trouble in your attic, consider checking out this checklist for winter household maintenance tasks.
Maintaining your home requires not only fixing and repairing but also a continuous effort to clean and declutter. This process is essential to both the functionality and the safety of your living space.
Diligent attention to general interior cleaning is a staple in home maintenance. Weekly vacuuming or mopping of the kitchen floor can prevent debris buildup. Similarly, you should regularly clean windows and dust furniture to keep the living spaces fresh and allergen-free. Incorporating this into your home maintenance schedule helps to ensure no task is overlooked.
The garage and basement are often neglected areas in your cleaning routine. Start by decluttering to create a more organized and accessible space. Dispose of unnecessary items that have been accumulating over time and organize what remains. Regularly check your garage door to ensure it’s free of dust and operational debris. For the basement, monitor for dampness and use a dehumidifier if needed to protect against mold and mildew.
The exterior is your home’s first line of defense against the elements, and its maintenance is critical. An annual wash of the home’s siding can prevent the buildup of dust and grime that may lead to damage over time. Keep an eye out for areas in need of touch-up paint or stain to uphold the integrity and aesthetics of your home’s facade.
Remember to regularly inspect and declutter each area, adding these tasks to your ongoing maintenance checklist to ensure your home remains a safe and pleasant living environment.

Maintaining your yard and outdoor areas is vital to preserving the curb appeal and structural integrity of your aging home. Pay close attention to landscaping, outdoor structures, and essential systems to ensure your home remains safe and visually appealing.
Remember, as a homeowner, staying on top of these tasks will not only keep your outdoor living space hospitable but also prevent the costly repairs that often accompany neglect.
When maintaining an older home, addressing safety concerns is a critical aspect of preventative maintenance. Your vigilance in this area can prevent property damage and ensure the well-being of all inhabitants.
Termites and other pests can cause significant damage to your home’s structure, often before you even notice an infestation. To prevent such risks, schedule regular inspections and treatments with a reputable pest control service.
A neglected chimney can lead to dangerous fires, while a well-maintained fireplace ensures a safe and cozy environment.
Maintaining your home’s heating, ventilation, and air conditioning system is crucial for both comfort and safety. Proper maintenance ensures efficient operation and prevents hazards like carbon monoxide leaks.
Always keep fire extinguishers accessible and check carbon monoxide detectors regularly to ensure they are functioning correctly. This will help you respond effectively to emergencies and maintain a safe environment in your home.
Regular professional inspections and specialized maintenance play a pivotal role in extending the lifespan of an aging home. It’s crucial to involve experts in detailed evaluations and repairs to safeguard your home against potential damage.
Your house requires a comprehensive inspection at least annually to assess its condition. During a professional inspection, all the home’s critical systems are examined, including the HVAC system, plumbing, roofing, and electrical systems. Ensure the inspector examines the HVAC system for efficiency and safety, and that plumbing is checked for leaks or blockages. Roofing should be reviewed for structural integrity and potential water damage.
Following the inspection, certain areas may necessitate specialized repairs to maintain the home’s integrity. It’s imperative to address issues like electrical problems or a compromised roof promptly to avoid extensive and costly damage. Regular upkeep, such as cleaning your gutters, can be found on a monthly home maintenance checklist while others might be reserved for annual care.
By adhering to a routine of detailed inspections and relying on professional services for specialized repairs, your home will be well-equipped to stand the test of time.
Maintaining an aging home requires diligence and an understanding of the unique challenges these beautiful structures present. By adhering to this preventative maintenance checklist, homeowners can protect their investments and enjoy their historical homes for many years to come. Remember, the key to preserving an aging home’s charm and functionality lies in regular care and attention to detail. For specialized assistance in maintaining your home, Kaminskiy Care and Repair offers tailored services that ensure your home’s longevity while respecting its architectural heritage. Always consider consulting with professionals when dealing with complex systems like electrical and plumbing to ensure safety and compliance with local codes. With proactive maintenance from trusted providers like Kaminskiy Care and Repair, your aging home can continue to be a source of pride and joy.
You should perform routine maintenance seasonally to address specific needs arising from weather changes. Additionally, a comprehensive annual inspection is recommended to stay ahead of potential issues.
to clean.
During annual home maintenance, prioritize inspecting your roof, foundation, plumbing, electrical systems, and HVAC. Pay close attention to signs of wear and potential safety hazards.
Your seasonal checklist should include clearing gutters, checking for drafts, inspecting the heating system before winter, and monitoring your air conditioning before summer. Also, look for any weather-related damage.
Regularly cleaning and inspecting your gutter system can prevent water damage, while sealing any cracks in your home’s exterior can ward off moisture and pests. Also, ensure your sump pump is functioning correctly to avoid basement flooding.
Selecting the right flooring for your kitchen is more than just a matter of taste. It’s a balancing act between functionality, style, and budget. Your kitchen floor must be able to withstand the rigors of everyday use, from spills and crumbs to heavy foot traffic. It’s the foundation that brings together your kitchen’s aesthetic and this high-traffic area’s functionality. With so many materials to choose from, each with its unique benefits and considerations, finding the perfect fit for your lifestyle and design vision requires careful thought.
The market offers a plethora of kitchen flooring options, ranging from budget-friendly choices to premium materials. While some might prioritize durability and ease of maintenance, others might lean towards visual impact and comfort underfoot. Similarly, installation can be a DIY project for some materials, while others might necessitate professional installation to ensure longevity and performance. Understanding these variables will help you make an informed decision about which flooring material is the best for your kitchen.
Ceramic tile is a popular choice for kitchen floors due to its durability and water resistance. Available in a vast range of colors, patterns, and sizes, ceramic tiles can be laid in various intricate designs to create a unique look. They are also very easy to clean, making them ideal for a space where spills are common

Hardwood floors bring warmth and a timeless look to any kitchen. Whether you choose oak, maple, or walnut, hardwood can be finished in various stains and styles to match your home décor. Additionally, if they get scratched or worn, hardwood floors can be refinished rather than replaced.
Vinyl flooring is a budget-friendly option that doesn’t skimp on style. Modern vinyl comes in sheets, tiles, or planks and can mimic the look of natural materials like hardwood and stone. It is also softer underfoot compared to tile and wood, providing more comfort during long cooking sessions.
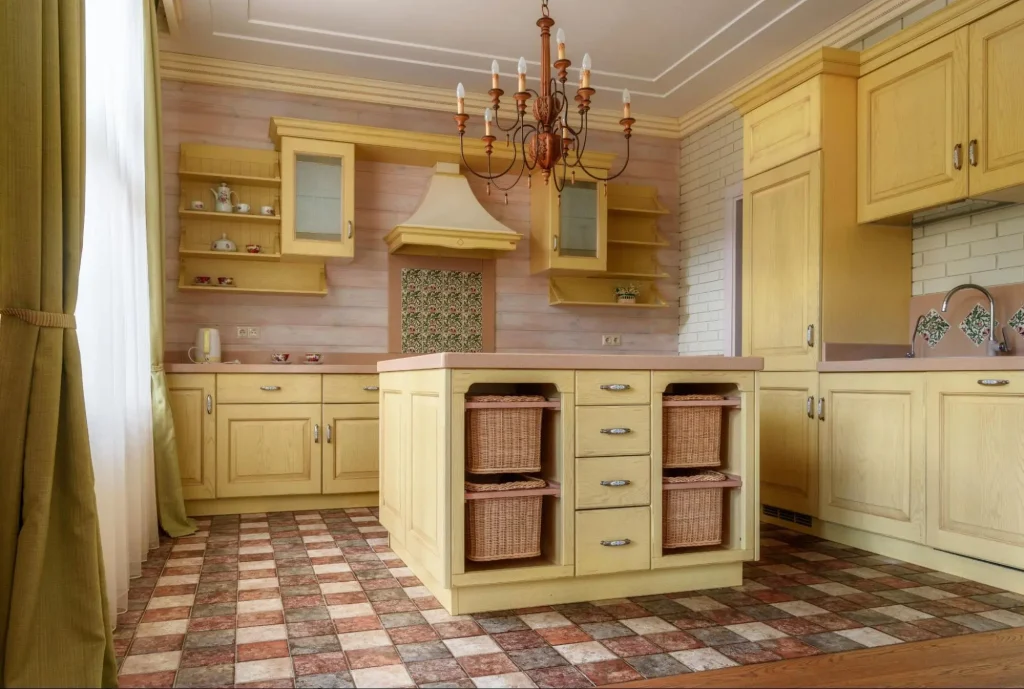
Linoleum is made from natural materials, making it an environmentally friendly option for the eco-conscious homeowner. It’s biodegradable, anti-bacterial, and comes in a variety of colors and patterns.
Concrete flooring offers a sleek, modern look and can be stained, polished, or textured to enhance your kitchen’s design. It is extremely durable and provides a seamless look.
Porcelain tiles are denser and more water-resistant than ceramic tiles, making them ideal for kitchens. They are also very hard-wearing and less prone to scratches and chips.
Bamboo flooring is another eco-friendly option, known for its strength, durability, and stylish appearance. It offers a unique look and can be a conversation starter due to its sustainability.
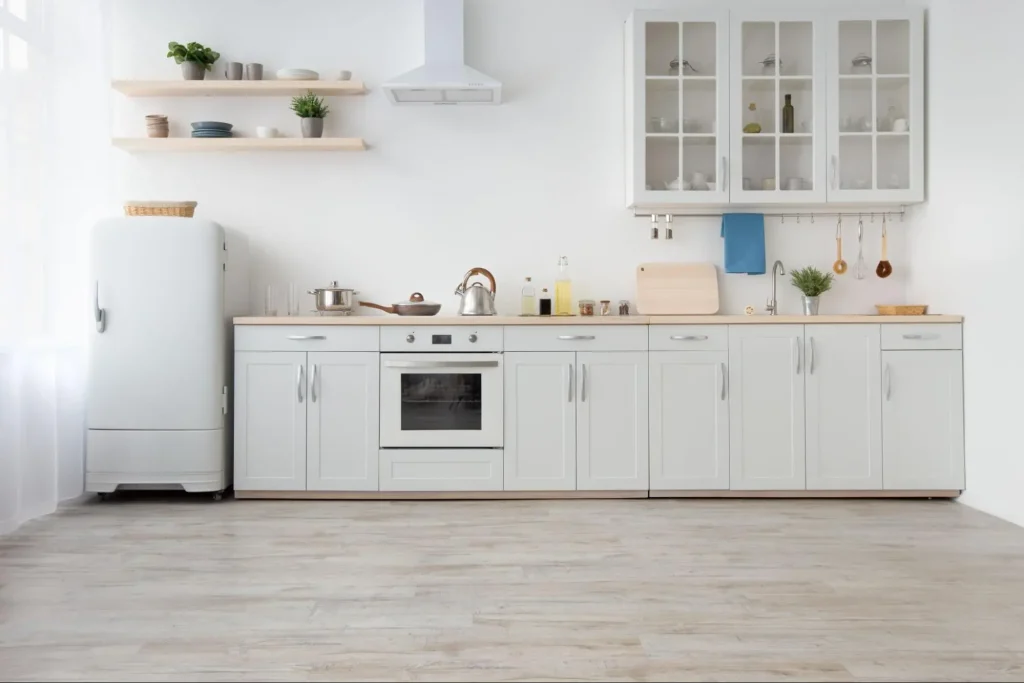
Selecting the right flooring for your kitchen hinges on understanding your lifestyle and how you use your kitchen. Your choice should withstand the demands of traffic and harmonize with your kitchen aesthetics.
Your kitchen is a high-traffic area, often standing as the busiest room in your home. Durability is a must. When considering kitchen flooring materials, opt for options that can handle the wear and tear of heavy foot traffic. For families or frequent entertainers, scratch-resistant and easy-to-clean floors like high-quality vinyl or tile can be especially beneficial.
For busy households, choose materials known for longevity and ease of maintenance.
In homes with pets, slip-resistant and scratch-proof options should be a priority.
Traffic Patterns:
Note that the pathways most traveled in your kitchen and select flooring that accommodates constant use.
When choosing the perfect flooring for your kitchen, it’s important to weigh the advantages of each material against your household’s specific needs and preferences. Consider factors such as durability, maintenance, comfort, and aesthetic appeal. Whether you prioritize eco-friendliness, ease of cleaning, or the timeless beauty of natural materials, there’s an option that will align with your lifestyle and enhance the heart of your home.
In summary, your kitchen flooring decision should balance practicality with personal style, creating a space that feels both inviting and efficient. Remember, the right flooring can transform your kitchen into a welcoming hub for cooking, dining, and socializing, while also boosting your home’s value. If you’re ready to take the next step in remodeling your kitchen, reach out to Kaminskiy Care and Repair today. We offer professional advice and services to help maintain the quality and extend the life of your Kitchen flooring.
For high-traffic areas in your kitchen, consider materials like ceramic tiles or concrete flooring, which are hard-wearing and easy to clean.
Hardwood and natural stone are among the most durable choices, offering robustness along with timeless appeal. These materials can withstand the rigors of a busy kitchen when properly sealed and maintained.
Waterproof flooring options ideal for kitchens include vinyl tiles and luxury vinyl planks. Their water-resistant properties make them suitable for areas prone to spills and moisture.
As the leaves begin to turn and the air becomes crisp, it’s a clear sign that cooler weather is on its way. These changes signal the need for homeowners to start preparing their homes for fall. Engaging in fall home maintenance not only helps safeguard your property against the coming winter but also ensures that you can enjoy the season’s comforts without any unwelcome surprises. Taking proactive steps can be the difference between a well-protected home and costly repairs down the line.
The transition into fall is the perfect time for an exterior home inspection. Look for signs of wear on your roof, siding, and foundation. Sealing gaps, cleaning gutters, and touching up paint are just a few ways to prevent water damage and maintain the integrity of your home’s exterior. Inside your home, ensure that your heating system is serviced and ready for increased use. Additionally, checking for drafts and adding insulation where necessary can increase comfort and reduce heating bills.
Before the chill of fall sets in, a thorough exterior home inspection can safeguard your home against the elements. This process will include checking the integrity of the roof, ensuring your gutters are clear, weatherproofing windows and doors, repairing any siding and paint issues, and securing the foundation.

As the fall season approaches, preparing your landscape and garden is crucial for ensuring their endurance through the cooler months. This preparation includes caring for your lawn, securing trees and shrubs, and getting your garden ready for the cold.
Your grass’s health during fall influences its revival in spring.
Trees and shrubs are vulnerable during winter’s harsh conditions.
Fall is a time to protect and enrich your garden soil.
By following these specific steps, you ensure your outdoor space is well-maintained and primed for when warmer weather returns.
As colder months approach, ensuring your home’s warmth and safety is crucial. Specific attention to your heating system, fireplace, chimney, and pipes will greatly reduce your risk of discomfort and costly emergency repairs during winter.
Before the chill sets in, schedule a professional inspection of your heating system. It’s essential to verify that it operates efficiently and safely. Change your furnace filter regularly to maintain air quality and system performance. Consider adding a humidifier to your setup, as it can enhance the heat’s effectiveness by adding moisture to the air, making it feel warmer at lower temperatures.
Ensure your fireplace and chimney are clean, free of obstructions, and in good repair. A chimney sweep is not just quaint folklore; it’s a safety necessity to prevent chimney fires and carbon monoxide buildup. Check the flue for a tight seal when closed to prevent drafts. If you have a gas heater, make sure it’s serviced and that all connections are secure.
Frozen pipes can burst and cause significant water damage. To prevent pipe freeze, insulate pipes, especially those that run along exterior walls or in unheated areas of your home. During particularly cold snaps, keep cabinet doors open to allow warmer air to circulate the pipes, and consider letting faucets drip slightly to prevent freezing. Set your thermostat to a consistent temperature day and night to aid in this.
Remember to test your carbon monoxide detectors to ensure they are functioning correctly, as heating appliances can emit this deadly gas. Regular maintenance and foresight can keep your interior comfortable and prevent emergencies throughout the fall and winter seasons.
As fall approaches, ensuring your home is secure and energy-efficient is paramount. From checking alarms to weatherproofing, these steps can significantly reduce risks and save on heating bills.
Regularly check your smoke detectors and carbon monoxide detectors to ensure they’re in working order. Replace batteries at least twice a year or as needed to maintain functionality. A functioning alarm system is crucial for your safety, especially as the use of heating systems increases during cooler weather.
Begin by replacing your air filter to improve the efficiency of your heating system. Sealing gaps with weather stripping can also prevent heat loss and reduce fuel consumption. You might want to consider having a professional inspection of your heating system to prevent unnecessary heating bills and ensure it is operating at peak efficiency.
Prepare for unexpected weather by stocking up on resources such as shovels, salt, and emergency fuel sources. Keep a list of emergency contacts in a readily accessible place. Don’t forget to assemble an emergency kit with essentials like flashlights, extra batteries, blankets, and non-perishable food.
Preparing your home for cooler weather is a proactive way to ensure comfort, safety, and efficiency throughout the fall and winter. Following this fall checklist will help you cover all the essential tasks to protect your home from the cold and potential damage. For homeowners looking for professional assistance, Kaminskiy Care and Repair provides expert services to help with your home maintenance needs. Our experienced team can handle everything from furnace inspections to exterior repairs, ensuring your home is perfectly prepped for the season. With your checklist completed and Kaminskiy Care and Repair at your side, you can enjoy the cooler months with peace of mind, knowing your home is well-prepared.
As temperatures start to fall, it’s crucial to take specific actions to protect your home. These FAQs cover essential winterizing steps to ensure your home remains safe and warm during the cooler months.
Prepare your home for the drop in temperature by cleaning your rain gutters to prevent blockages and inspecting your heating system for efficiency. Sealing gaps around doors and windows can also greatly reduce heat loss.
To prevent the risks associated with a hard freeze, insulation of your water pipes is vital to prevent them from bursting. Ensure that your heating system is in good working order and that you have an emergency kit ready in case of power outages.
For safety, you should check your smoke and carbon monoxide detectors and ensure you have a fire extinguisher. Additionally, you should have a professional inspect your fireplace and chimney before use to protect against house fires.
If you’re leaving your house unoccupied, it’s critical to set your thermostat no lower than 55°F to prevent pipes from freezing and to inspect your driveway for cracks that may worsen with freeze-thaw cycles. It’s also wise to ask someone to periodically check on the property.
When embarking on a plumbing project, whether it’s a minor repair or a major installation, having the right supplies is crucial. Irvine is home to various plumbing supply stores, each offering unique inventories and exceptional customer service. These stores cater specifically to providing plumbing hardware materials, making them the go-to destinations for any handyman or DIY enthusiast.
Let’s explore some of the best plumbing supply stores in Irvine and what makes them stand out.
Ferguson Plumbing Supply is a leading name in the plumbing supply industry, known for its extensive inventory and expert staff. Located conveniently in Irvine, Ferguson stores offer a wide range of plumbing products, including pipes, fittings, valves, and fixtures. Their comprehensive selection ensures that you can find everything you need for your project in one place.
One of the key advantages of shopping at Ferguson is the expertise of their staff. Whether you need advice on selecting the right materials or guidance on installation techniques, the knowledgeable team at Ferguson is always ready to assist. Additionally, Ferguson offers online ordering and delivery services, making it even more convenient to get the supplies you need.
Contractors’ Warehouse is another excellent option for plumbing supplies in Irvine. This store is known for its high-quality products and exceptional customer service. Pacific Plumbing Supply offers a broad range of plumbing materials, including pipes, faucets, water heaters, and more.
The staff at Contractors’ Warehouse is dedicated to helping customers find the right products for their specific needs. They are knowledgeable and can provide valuable insights into the best practices for plumbing installations and repairs. Additionally, Pacific Plumbing Supply offers competitive pricing, ensuring you get the best value for your money.
Hirsch Pipe & Supply has built a reputation as a trusted supplier of professional-grade plumbing materials. Located in Irvine, Hirsch offers a vast selection of plumbing products, from basic pipes and fittings to specialized tools and equipment. Their inventory is designed to meet the needs of both professionals and DIY enthusiasts.
Hirsch Pipe & Supply is committed to providing high-quality products that ensure durability and reliability in plumbing projects. Their knowledgeable staff can help you navigate their extensive inventory and find the right materials for your specific project requirements. Hirsch also offers convenient online shopping and delivery options.
Cal Steam is a go-to destination for plumbing supplies in Irvine, offering an extensive inventory and expert advice. This store provides a wide range of products, including pipes, valves, fittings, and fixtures, catering to both residential and commercial plumbing needs.
The staff at Cal Steam are experienced professionals who can offer valuable advice on selecting the right materials and ensuring proper installation. Their commitment to customer satisfaction makes them a reliable choice for plumbing supplies. Cal Steam also offers online ordering and in-store pickup, adding to the convenience for customers.
While The Home Depot is a well-known home improvement store, it also offers a comprehensive range of plumbing supplies. Located in Irvine, The Home Depot provides a convenient option for finding plumbing materials, tools, and components. Their extensive inventory includes pipes, fittings, valves, and a variety of plumbing fixtures.
The Home Depot is known for its accessibility and competitive pricing. The store layout makes it easy to find the necessary supplies, and the knowledgeable staff can assist with any questions or concerns. Additionally, The Home Depot offers online shopping with delivery or in-store pickup options, making it a versatile choice for plumbing supplies.
BJ Discount is a business in Irvine, known for its customer-focused approach and high-quality products. This store offers a diverse range of plumbing supplies, including pipes, fittings, fixtures, and tools, and has been serving Orange County for over 50 years.
The staff at BJ Discount is dedicated to helping customers find the right products for their projects. Their extensive knowledge and commitment to customer satisfaction make them a popular choice among local handymen and DIY enthusiasts. The store also offers competitive pricing and a welcoming atmosphere.
While primarily known for industrial supplies, McFadden-Dale Industrial Hardware also offers a wide range of plumbing components that can be challenging to find elsewhere. Located in Irvine, the McFadden Dale store provides an extensive selection of specialty plumbing items, including unique fittings, valves, and connectors.
The staff at McFadden-Dale Industrial Hardware can assist with locating hard-to-find plumbing components and offer expert advice on their applications. The store’s commitment to quality and customer service makes it a valuable resource for specialized plumbing projects.
Kaminskiy Handyman Plumbing Services is a trusted name in Irvine, offering a comprehensive range of plumbing services. While we do not sell plumbing supplies, our expertise and professional service make us an invaluable resource for your plumbing projects. Kaminskiy provides top-notch plumbing repair, installation, and maintenance services, ensuring that your projects are completed efficiently and effectively.
Finding the right plumbing supplier is crucial for the success of any handyman project. Irvine, California, offers a variety of excellent plumbing supply stores, each with its own strengths and specialties. Whether you prefer the comprehensive selection and expert staff at Ferguson Plumbing Supply, the quality products and exceptional service at Contractors’ Warehouse, or the professional-grade materials at Hirsch Pipe & Supply, you’ll find the perfect store to meet your needs. Additionally, Kaminskiy Plumbing Handyman Services provides a range of professional plumbing services to assist with any project. By exploring these top plumbing suppliers and service providers, you can ensure you have access to the best tools, materials, and expertise for all your plumbing projects in Irvine.
Selecting the right kitchen cabinets is crucial to the functionality and ambiance of your kitchen space. Your choice determines not only the practicality of your kitchen but also sets the aesthetic tone. The cabinets are the workhorse of the kitchen, influencing everything from storage to the layout of your cooking space. By considering key factors such as material quality, design preferences, and your kitchen’s configuration, you can find cabinets that are both beautiful and serviceable.
Navigating the myriad of options available for kitchen remodeling can be overwhelming, from deciding on the types of cabinets that suit your style to choosing materials that promise longevity and ease of maintenance. Having a clear understanding of your budget is also essential, as it affects the range and quality of cabinets you can consider. Thoughtful consideration of every aspect, from the features and accessories that enhance organization to the aesthetic details and finishes, will ensure that your kitchen cabinets are as functional as they are visually appealing.
Before choosing kitchen cabinets, it’s crucial to understand your kitchen’s layout. Knowing the exact dimensions of your space and the placement of appliances and features will help you maximize storage and functionality.
First, accurately measure the floor space of your kitchen. Record the length and width; then calculate the square footage. It’s essential to capture the ceiling height as well, since this can influence the height of your cabinets. Note any structural elements, like load-bearing walls, that could impact your design.
Your kitchen’s design must accommodate existing appliances and windows. Ensure that there is ample clearance for the swing of appliance doors and that windows are not obstructed. Consider the work triangle between the stove, refrigerator, and sink, which should be efficient and unblocked.
For storage optimization, look at your kitchen’s size realistically. If you have a small kitchen, think vertically, using taller cabinets to utilize all available space. Remember, the right layout will keep everything accessible, whether you’re reaching for a spice or stowing away a mixer.
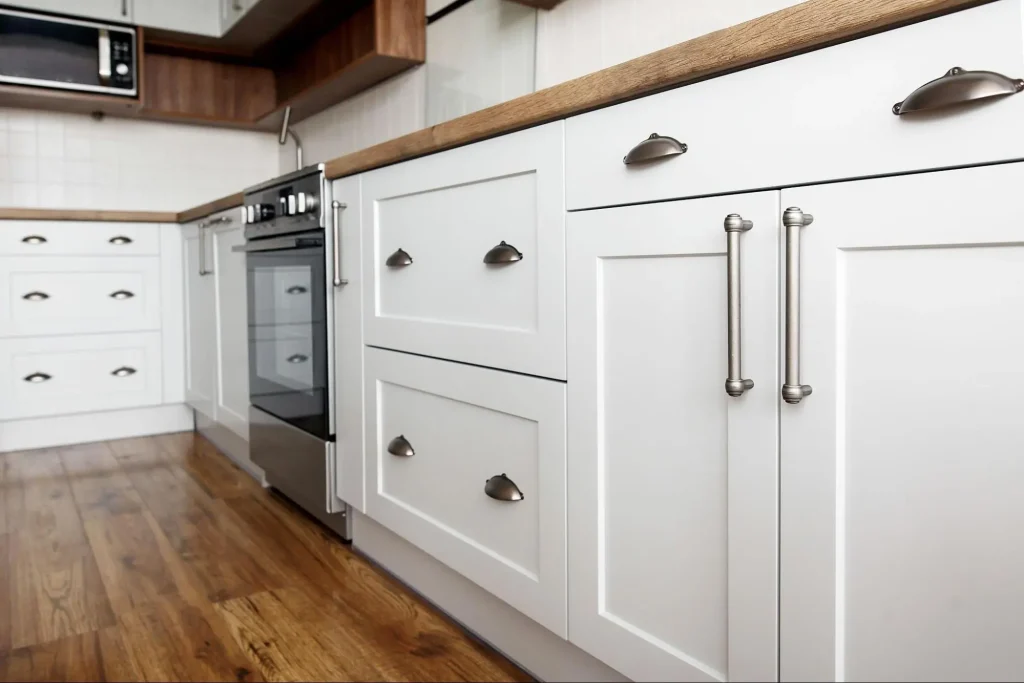
When selecting kitchen cabinets, your personal style and design preferences set the foundational tone. It’s vital to choose materials, colors, and styles that reflect your taste and integrate seamlessly with your home’s aesthetic.
The material of your kitchen cabinets not only dictates durability but also sets the stage for your kitchen’s overall feel. Hardwood is renowned for its longevity and classic appeal, while plywood offers a cost-effective yet sturdy alternative. If you prefer a modern look, consider laminate or thermofoil for a sleek finish that’s easy to maintain. Weigh each material’s traits against your lifestyle and kitchen design to ensure a harmonious balance.
Your kitchen cabinet’s color should complement both the counter and the overall kitchen palette. If you opt for a monochromatic scheme, use shades or tints of the same color for a refined and understated look. For a bolder impression, contrasting colors can create a dynamic and visually striking space. Always test samples under your kitchen’s lighting to gauge how the cabinets’ color will appear during different times of the day.
Cabinet door style is a defining element of your kitchen’s character. Flat-panel cabinets embody a minimalistic approach suitable for contemporary spaces, offering clean lines and an uncluttered aesthetic. On the flip side, raised-panel cabinets bring forth a traditional and detailed look, perfect for achieving a classic and timeless ambiance. When considering cabinet styles, aim for a cohesive look that aligns with both your lifestyle and the architectural details of your home. For example, modern kitchens may benefit from clean, simple, and contemporary pulls to enhance the cabinet design, whereas classic fixtures work well with more ornate cabinet styles.
Selecting the right type of kitchen cabinet is essential to both the function and style of your kitchen. You’ll encounter a variety of options, from cost-effective stock cabinets to fully customizable solutions, along with different constructions that can alter the cabinet’s appearance and use.
Stock Cabinets are your most accessible and budget-friendly choice. These are pre-manufactured in standard sizes, typically increasing in 3-inch increments. Because of their mass production, stock cabinets offer limited styles and finishes but are readily available and can be a functional choice for your kitchen if you’re looking for a straightforward, no-frills option.
On the other end of the spectrum, Custom Cabinets are designed to your specifications, offering a perfect fit and tailored to your exact wishes in material, style, and size. As expected, this level of customization means a higher cost and a longer lead time, but results in a unique and versatile kitchen space.
Semi-custom cabinets strike a balance between the two; they offer a wider variety of sizes and finishes than stock cabinets, giving you a more personalized look without the full cost or wait time of fully custom cabinetry.
Frame Cabinets are characterized by a face frame that outlines the cabinet box. Doors and drawers attach to this frame, which adds dimension and traditional style to your cabinets. It’s worth noting that frame cabinets are often more sturdy due to the additional framing.
In contrast, Frameless Cabinets provide a modern, clean look, with doors and drawers attaching directly to the cabinet box, giving a seamless appearance. They are also known as “full overlay” because the doors cover the entire cabinet box, maximizing interior storage space and offering a sleek, contemporary aesthetic.
For a kitchen tailored to your lifestyle, consider Specialty Units. These types of cabinets are designed for specific functions, elevating your kitchen beyond the basics. Examples include corner cabinets with a Lazy Susan for easy access, pull-out trash bins, or appliance garages to keep your counters clear and organized. Specialty units can enhance the functional and versatile nature of your kitchen, making it truly customized to your needs.
When selecting kitchen cabinets, it’s essential to consider how features and accessories can enhance organization. Ensure every item has its place with smart organizational solutions.
Drawers can transform your kitchen experience with functionality that caters to a variety of storage needs. Choose deep drawers for pots and pans to keep them easily accessible, while slim drawers are perfect for cutlery and utensils. Adjustable shelving empowers you to customize the space for plates and cookware, making the most of every inch. Consider inserts like utensil organizers to keep drawers tidy.
Enhance accessibility with pull-out drawers and racks. These features allow you to view and retrieve items without the hassle of digging through your cabinets, creating an efficient kitchen workflow. Pull-out organizers in cabinet bases make for convenient access for storing pans and lids. Slide-out spice racks and pull-out baskets offer organized spaces for smaller items, ensuring that everything has a designated spot.
Maximize corner storage with innovative solutions like the lazy Susan and corner cabinets designed with intricate pull-out mechanisms. These features offer unparalleled organization, dramatically increasing the usability of hard-to-reach areas. With rotating shelves or pull-out accessories, your corner cabinet becomes highly functional, offering easy access to all your cookware.
By incorporating these organizational features and accessories, your kitchen cabinets become more than just storage spaces—they evolve into an efficient, user-friendly part of your daily kitchen use.
When choosing the right kitchen cabinets, the quality and durability of materials are vital to ensure longevity and performance. This section will guide you through selecting the most suitable materials for your cabinets that stand the test of time.
Wood: Solid wood is renowned for its natural strength and timeless appeal, with options like oak offering remarkable durability. Each wood type has a unique color, grain, and texture, making your cabinets distinct.
Plywood: An engineered wood, plywood adds structural strength to cabinets. Look for high-grade plywood as it offers fewer defects and better resistance to warping, especially in humid environments.
Alternatives:
Drawer Fronts: Your drawer fronts can be made from solid wood, plywood, or MDF, each offering different levels of durability and aesthetics. Solid wood leads to durability but may cost more.
Door Materials: The doors of your cabinets get a lot of use, so the material choice here is critical. Whether you choose solid wood or a combination of wood and glass, make sure it complements the style and function of your kitchen.
Hardware: The quality of knobs and drawer pulls directly affects the longevity and use of your cabinets. Opt for hardware made from solid metals as they withstand frequent use better than plastic alternatives.
Joinery: The construction method used to assemble your kitchen cabinets plays a critical role in their durability. Dovetail joinery is known for strength, while dowel or mortise-and-tenon provides sturdy corners.
Remember, high-quality materials and solid construction will ensure that your kitchen cabinets will maintain their functionality and appearance over time. Choose wisely and balance your budget with the benefits of durability for the best outcomes.
The smallest details often make the biggest impact when personalizing your kitchen cabinets. Selecting the right hardware, finishes, and decorative elements is essential to achieving a cohesive look that reflects your style.
Your choice of hardware can drastically change the look of your kitchen cabinets. For a modern design, consider slim, sleek pulls or even a touch-latch system for a handle-free look. Shaker-style cabinets often benefit from classic knobs and cup pulls in a brushed or satin finish. Always select hardware that complements both the style of your cabinets and the overall design of your kitchen.
Deciding whether to go for painted or stained cabinet finishes depends on the aesthetic you’re aiming for. Painted finishes allow for more color options, giving you the freedom to match or contrast with your kitchen’s color scheme. Meanwhile, stained finishes showcase the wood’s natural grain and bring warmth to your space. Both finishes require different maintenance and offer varying levels of durability.
Molding and decorative elements can elevate the look of your kitchen. Crown molding installed at the top of your cabinets extends the line of your cabinetry to the ceiling, creating a more refined and finished look. Decorative elements like corbels, onlays, and inset cabinet doors can add a layer of sophistication. These details should be chosen carefully to maintain a cohesive design throughout your space.
When opting for new kitchen cabinets, you need to carefully assess your finances and the implications of your choices. It’s essential to determine a budget that reflects the value you expect from the investment, without compromising on quality.
To start, assess your overall renovation budget. Kitchen cabinets typically consume a significant portion of this budget, so setting a clear figure can guide your decisions. For a standard 10-ft. x 10-ft. kitchen, costs can range from a few thousand dollars for stock cabinets to much higher for custom work. Keep in mind the long-term value of your investment; choosing merely based on the cheapest option might lead to additional costs down the line due to lower quality or durability.
Finding a middle ground between cost and quality means understanding the materials and construction of the cabinets. Semi-custom cabinets offer a compromise, allowing for some level of customization and better quality without the expense of fully custom units. Retailers offer various grades, and it’s crucial to weigh the features versus the cost. Consider factors like the type of wood, the thickness of the shelving, and the hardware quality.
Your priority should be aligning your budget with anticipated quality and the long-term value that your new kitchen cabinets will add to your home.
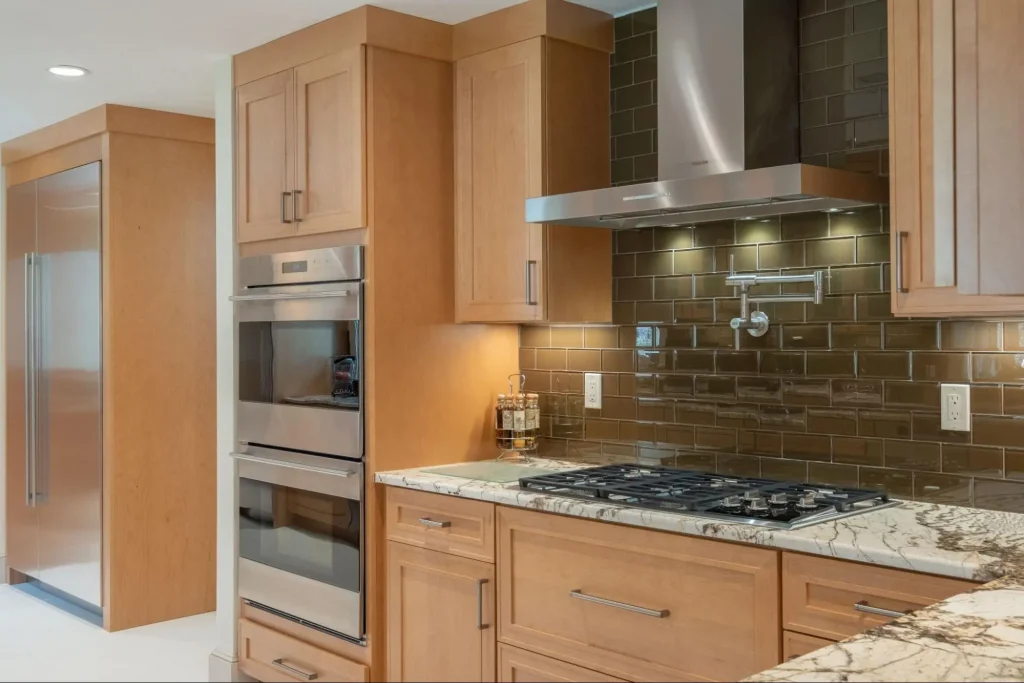
Selecting the perfect kitchen cabinets is only part of the journey; installing them correctly and maintaining their appearance and functionality are crucial for their longevity. Whether you opt for professional installation or tackle it DIY-style, understanding the necessary care, cleaning, and potential upgrades will help preserve your investment.
Should you hire a professional or install your cabinets yourself? This decision hinges on your skill level, budget, and the complexity of your project. Professional installers ensure precision and often provide warranties for their work. For intricate designs or layouts involving hardwood cabinets or adjustable shelves, their expertise can be invaluable. On the flip side, if you’re a confident DIYer, some resources can guide you through the process, potentially saving you money.
Maintaining the look and function of your cabinets involves routine care. Wiping spills immediately and avoiding harsh chemicals will prevent damage. For daily cleaning, use a soft cloth with warm water and mild detergent. Specific maintenance depends on the material, but generally, applying a wood cleaner periodically can maintain the luster of hardwood cabinets. Be mindful that adjustable shelves require occasional tightening to ensure stability.
As time goes on, you might want to refresh or upgrade your cabinets without a full remodel. Cabinet refacing is a cost-effective way to update your kitchen’s look. This involves replacing drawer fronts and cabinet doors while keeping the existing structure intact. For an upgrade, consider adding pull-out shelves or soft-close hinges. Such updates can enhance functionality and add a modern touch to your space.
When you’re investing in kitchen cabinets, the quality of the retailer or vendor can be just as crucial as the cabinets themselves. This section will guide you through a streamlined process to identify the best retailers and brands, review their product offerings, and compare the customer service and warranties they offer.
Begin by identifying brands with a reputation for quality and reliability. Look for those who provide detailed product specifications and transparent pricing. For example, kitchen cabinets made of cabinet-grade plywood are known for their durability compared to less sturdy materials like particleboard. Perform due diligence by reading online reviews and checking rankings to get a sense of which brands are respected in the industry.
Next, explore a mix of both physical showrooms and online stores. Showrooms allow you to get a tactile sense of the cabinets, and you can visually inspect the craftsmanship. When visiting a showroom, notice if they exhibit a wide range of options and styles that reflect current trends and classic designs. Online stores offer a breadth of options and can be quite informative.
Finally, prioritize retailers who offer excellent customer service and product warranties. Customer service should be accessible, knowledgeable, and ready to assist you with after-sales support. A substantial warranty indicates a brand’s confidence in its product quality—it’s advisable to seek warranties that cover the product for an extended period. Sources such as Consumer Reports emphasize the importance of looking for solid warranties and robust customer support networks.
Choosing the right kitchen cabinets is a critical decision that affects the functionality and aesthetic appeal of your home. By understanding the different types of cabinets, materials, and styles available, and considering your storage needs and budget, you can select the perfect cabinets for your kitchen. Kaminskiy Care and Repair stands as a leading provider, offering quality, reliability, and style when installing kitchen cabinets. With our expertise, you can achieve the kitchen of your dreams that is as functional as it is beautiful. Remember, the right kitchen cabinets not only improve your home’s value but also enhance your everyday living experience. Contact us today!
When choosing kitchen cabinetry, consider factors such as quality, material, size, layout, and design to ensure a perfect fit for your home.
Your kitchen’s functionality and aesthetic are directly tied to the cabinets you choose. It’s important to consider the cabinet’s construction, door styles, color, finish, and hardware, as well as the kitchen’s current layout and storage needs.
High-quality kitchen cabinets exhibit sturdy construction, smooth drawer operation, and robust door hinges. They are typically made of cabinet-grade plywood and have well-finished surfaces that withstand daily use.
Durable and stylish kitchen cabinets are often made from solid wood, but plywood and medium-density fiberboard (MDF) are also great options. They offer a balance of durability and design flexibility to match any kitchen style.
Measure your kitchen’s dimensions carefully and consider the placement of appliances and features. Utilize every inch of space efficiently with options such as lazy Susans or pull-out drawers for optimal organization and accessibility.
Wooden cabinets offer timeless appeal and strength but can be subject to warping in humid climates. Alternative materials like thermofoil or laminate are more budget-friendly and resist moisture better but may not have the same longevity or luxurious feel.
Consider your kitchen’s color scheme and overall style. For a cohesive look, match your cabinets with the style, whether it’s modern, traditional, or transitional. Cabinet finish and hardware also play a crucial role in complementing your kitchen’s design.
Replacing electrical outlets and switches is a task that many homeowners can undertake with the right tools and knowledge. Safety is paramount when dealing with electrical work. Before you start, ensure that you have all necessary equipment on hand and that you understand the basic principles of your home’s electrical system.
Turning off the power at the circuit breaker is the first step to preventing electric shock. Once the power is off, use a voltage tester to confirm there is no electricity flowing to the outlet or switch you’re working on. With the power safely shut off, you can proceed to remove the old outlet or switch.
Before attempting to replace any electrical outlets or switches, it’s crucial to prioritize your safety by ensuring the power is off and you have all the necessary tools at hand.
First, locate your circuit breaker and switch off the power to the area where you’ll be working. This is a non-negotiable step to prevent electric shock. After turning off the appropriate circuit breaker, you should use a voltage tester to confirm that power is indeed off. This straightforward testing reaffirms that it’s safe to proceed.
Having the right tools is essential for a safe and efficient replacement job. You’ll need the following:
Ensure all tools are in good condition and rated for electrical work. It’s better to have all your tools collected before you start the job to avoid any mid-task disruptions.

Before replacing an outlet or switch, ensure the power is off for safety. You’ll first remove the faceplate, then unscrew the device from the electrical box.
Begin by turning the power off at the breaker to eliminate electrical risk. Confirm power is indeed off using a voltage tester. Next, remove the wall plate by loosening the screws with a screwdriver. These are often flat-head screws, but check your specific wall plate to be sure.
With the wall plate off, you’ll see the outlet or switch held in place by mounting screws. Unscrew these to free the device from the electrical box. Gently pull the outlet or switch away from the wall, revealing attached wires that you’ll handle in the next steps.

Before you begin attaching wires and securing the new device, ensure the power supply is turned off. Pay attention to color-coded screws, as this will be essential for proper attachment of the wires.
Ensure that each wire is wrapped clockwise around the screw terminals and tightened securely, making a strong connection.
Once the wires are attached:
Remember to confirm all connections are secure before moving to the next stage.
Once you’ve secured the new outlet or switch in place, the final steps are crucial to ensure functionality and safety. These steps confirm that the electrical installation has been successful and that your new equipment is ready for use.
Align the faceplate over the device with the outlet or switch securely connected. Ensure it’s straight and gently tighten the screws with a screwdriver. Be careful not to over-tighten, as this could crack the faceplate.
To test the circuit, first, make sure your hands are dry and that you’re not standing in water. Turn the power back on from the circuit breaker or fuse box. Use a voltage detector to verify that electricity is present in the outlet or switch. For outlets, plug in a device, such as a lamp, and switch it on. For switches, after confirming the presence of electricity with your voltage detector, flip the switch to test the operation of the connected fixture. If everything functions as expected, your installation is a success. If not, turn off the electricity at the source and double-check your connections.
Before undertaking any electrical work, it’s vital to understand the basics of wiring and the different types of outlets you may encounter. This knowledge ensures safety and accuracy during installation.
Types of Wires in an Outlet:
Replacing outlets and switches can significantly contribute to your home’s safety and functionality. Following these steps ensures the job is done safely and correctly. Remember, while DIY projects can be fulfilling and cost-effective, electrical work can be hazardous.
If you’re unsure or uncomfortable at any point, consider hiring a professional from Kaminskiy Care and Repair. Our experts are here to help with all your home repair needs, ensuring safety, efficiency, and peace of mind
In this section, you’ll find answers to common questions regarding the replacement of electrical outlets and switches, helping you understand when and how you can do it yourself, and when to call a professional.
To replace a 2-prong outlet with a 3-prong ground outlet, turn off the power and check the box for a grounding means. If there’s a ground wire present, connect it to the new outlet. If not, consult an electrician about grounding options.
Yes, you can upgrade your outlets to GFCI. After turning off the power to the outlet circuit, disconnect the old outlet attach the line wires to the “line” terminals, and load wires to the “load” terminals on the GFCI outlet.
When replacing an outlet with multiple wires, ensure you turn off power to the area. Label each wire with tape before disconnecting. Attach black wires to brass terminals and white wires to silver terminals.
Always turn off power at the circuit breaker and use a voltage tester to confirm it’s safe to work. Wear rubber-soled shoes and use insulated tools. If uncertain, consult a professional.
The cost for professional services can vary; however, it typically ranges from $50 to $150 per outlet, depending on your location and the complexity of the job. GFCI and USB outlets may cost more due to the technology behind them.
In older homes, you may encounter outdated wiring like knob-and-tube or aluminum wiring, which may not be up to current codes. It’s crucial to ensure that the wiring can support modern electrical loads and safety standards.
When it comes to securing your home, nothing is more fundamental than choosing the right lock. From guarding your family’s safety to protecting your valuables, locks form the frontline of defense against intruders. However, with the myriad of lock types available on the market, selecting the most suitable one can be overwhelming. This guide will walk you through the top five lock types, outlining their features, benefits, and best-use scenarios. We aim to empower you with the knowledge to make an informed decision and fortify your home with confidence.
Deadbolt locks are renowned for their robust security. Unlike spring-bolt locks that can be easily retracted, deadbolts offer an extra layer of protection because they can only be unlocked by rotating the key. This feature makes them exceptionally resistant to forced entry.
Mortise locks are a classic option known for their versatility and durability. Installed within a mortised pocket in the door, they include a lock body, lever, and key cylinder. Their comprehensive design allows them to be tailored to specific security requirements.
With high humidity levels, bathrooms benefit from paint that can resist moisture to prevent mold and mildew. A semi-gloss finish is ideal for walls in this environment, ensuring surfaces are more water-resistant and durable in the long term.

As technology continues to evolve, smart locks are becoming increasingly popular. They offer remote control via mobile apps, voice assistants, or even biometric recognition, blending convenience and security seamlessly.
Keyless entry padlocks offer a modern solution to securing outdoor structures without traditional keys. These locks use combination dials or smart technology, making them a convenient option for external security.
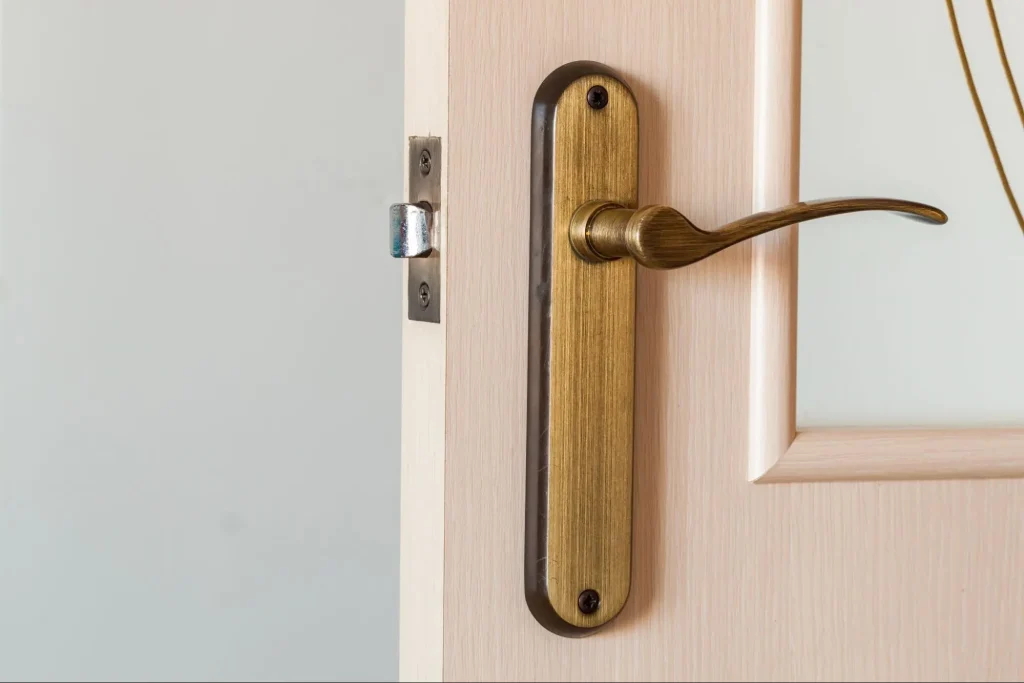
Lever handle locks combine functionality and aesthetic appeal, featuring a simple push-down handle mechanism. They are popular for home interior doors where ease of use is essential.
Selecting the right lock type is critical in safeguarding your home and family. Each lock type has its distinct advantages and ideal use cases. Understanding these differences allows you to match the right lock to your security needs. Kaminskiy Care and Repair is your trusted partner in achieving optimal security for your home. Our expert team provides comprehensive consultation, installation, and maintenance services for all lock types to ensure your peace of mind. Whether you are upgrading to smart locks or need guidance on traditional lock systems, we are here to help. Contact us today and start building a secure future.
A deadbolt is operated by a key or thumb turn and cannot be retracted unless manually unlocked, making it more secure. A spring-bolt lock uses a spring to hold the bolt in place and can be easily manipulated using tools.
While smart locks can be susceptible to hacking, choosing a high-quality lock with strong encryption and regular firmware updates significantly minimizes risks.
Yes, many homeowners use different lock types for various entry points depending on their security needs. For instance, deadbolts for main entrances, keyless entry padlocks for outdoor sheds, and lever handle locks for interior rooms.
It’s advisable to change locks every few years or after significant events like moving into a new home or losing a key. Periodic upgrades to newer lock technologies can also enhance security.
Selecting the right kind of paint for each room in your house is not just about the aesthetics; it also impacts the functionality and the overall feel of the space. The type of paint you choose should marry your personal style with the practical uses of the room. Satin, eggshell, matte—each finish has specific benefits that make it more suited for one room over another. It’s not just the finish, though; color plays a pivotal role in setting the mood of a room, reflecting your unique personality throughout your home.
Understanding the variety of paint finishes and how they correspond to the different levels of wear and tear a room might experience is critical in making an informed decision. A busy hallway requires a different kind of resilience compared to a seldom-used formal dining room. Being equipped with the right preparation and application techniques is equally crucial for achieving professional-looking results in your DIY painting project. A harmonious blend of color selection strategies and practical functionality will help you navigate the vast sea of options to achieve the ideal look for each space.
When selecting paint for various rooms in your home, consider both the room’s purpose and the characteristics unique to each space. This will ensure you choose a type of paint that not only matches your aesthetic but also stands up to the demands of the room’s function.
In the kitchen, opt for a paint that can withstand frequent cleaning and exposure to grease and steam. Semi-gloss or high-gloss finishes are best for walls and especially for cabinets and trim, as they repel moisture well and allow for easy wipe-downs.
The living room calls for a welcoming and comfortable atmosphere. Using satin or eggshell finishes enhances the ambiance and interacts with furniture and light in a way that creates a warm and inviting space. Choose colors that set the mood for relaxing or entertaining.
With high humidity levels, bathrooms benefit from paint that can resist moisture to prevent mold and mildew. A semi-gloss finish is ideal for walls in this environment, ensuring surfaces are more water-resistant and durable in the long term.
In your bedroom, the goal is to create a peaceful retreat where relaxation is key. Flatter sheens like matte or eggshell offer a serene backdrop. Keep colors soft and soothing to help relax the mind and promote a restful night’s sleep.
For a home office, look for colors that stimulate focus and energy. Brighter hues can help invigorate your workspace, while a matte or eggshell finish minimizes glare from your computer screen. The right paint can transform your work-from-home experience by energizing your environment without overwhelming it.

Choosing the right paint finish for your space can greatly influence the durability and atmosphere of a room. Each finish offers different levels of gloss, wear resistance, and ease of cleaning.
Matte and flat paints are valued for their minimal reflection and ability to cover imperfections on surfaces. They have a low sheen, which makes them excellent for ceilings and other low-traffic areas where light glare is undesired. While they can touch up easily, they are less resistant to stains and are harder to clean, so using them in a living room or adult bedroom would be more suitable than in a kitchen.
Eggshell and satin finishes strike a balance between matte and glossy paints, offering a slight sheen that stands up better to cleaning. They are highly versatile:
Semi-gloss and gloss finishes are your go-to options for high-traffic areas subject to wear and tear. Semi-gloss has a radiant sheen that resists stains and is easy to clean, making it ideal for kitchen walls, cabinets, and bathrooms. Gloss paint, boasting a high level of sheen, is typically used for trim, doors, and furniture because of its exceptional durability and resistance to scratches.
Choosing colors for your rooms involves more than just personal taste. You need to consider the room’s function, lighting, and the psychological impact colors have on mood. Here’s how to strategize your color selection effectively.
Colors significantly influence your emotional response, with each hue affecting your mood differently. Cool colors like blues and greens are often viewed as calming and can create a tranquil atmosphere. Conversely, warm colors such as reds and oranges are energizing, making them ideal for spaces where you wish to inspire activity. Neutrals can serve as a foundation, offering flexibility to decorate with various accent colors. When selecting a paint color, think about the emotion you want to evoke and choose shades that support that feeling.
Your room’s ceiling lighting will drastically change how paint colors look. Natural lightbrings out the truest hue of paint. For rooms with abundant sunlight, realize that colors might appear lighter. Artificial lighting varies: incandescent bulbs enhance warm tones, while fluorescent lighting casts a sharp, blue tone, affecting how colors are perceived. Before deciding, observe your paint choices in both natural and artificial light at different times of the day. It’s a critical step to ensure the color behaves as you desire.
To create a cohesive style throughout your home, selecting a color palette is key. Start with a base of whites and neutrals, then add layers of bold or bright colors to define your space’s character. For continuity, carry one or two colors throughout your home, adjusting the shades for variety. By systematically coordinating room colors, transitions between spaces become visually harmonious. Remember, whether you’re aiming for a vibrant, dynamic look or a subdued, elegant feel, your color palette is an essential tool in crafting your home’s atmosphere.

Prior to starting your DIY painting project, it’s crucial to select the right primer and understand the application techniques that will lead to a professional-looking finish. Remember, proper preparation prevents poor performance, and maintaining your paint job can help it withstand daily wear and tear.
Primer is essential in ensuring your paint adheres correctly and provides a uniform surface. For rooms with high moisture, such as bathrooms or kitchens, consider using a mold-resistant primer to prevent future damage. On surfaces with existing stains or where you’re making a drastic color change, an oil-based primer can provide better coverage and sealant properties.
Applying paint with the right technique is just as important as choosing the right color. For an even coat, start with a well-prepared surface and use a high-quality roller or angled brush for corners and edges. When painting, always maintain a wet edge to avoid overlap marks.
After the paint has dried, incorporating a few maintenance habits can extend the life of your paint job. Regularly clean walls gently with a soft sponge and mild detergent to remove dust and minor stains. For rooms that serve as a place for relaxation, such as bedrooms and living rooms, choose paint finishes that are calming and soothing with easier clean-up like eggshell or satin.
Implementing these steps will help you achieve a long-lasting, beautiful paint finish that stands up to the day-to-day challenges of a well-lived-in space.
Selecting the right paint is a crucial step in creating your ideal living space. Remember, the color you choose can influence the mood of the room. Soft neutrals can expand spaces, whereas bold colors can make large rooms feel cozier. When implementing your decisions, consider a company like Kaminskiy Care and Repair for professional advice and service. We ensure your room has the flawless finish it deserves. Contact us today!
Choosing the right paint for your home can transform a space. In this section, you’ll find information that will help you make informed decisions about paint types, colors, and applications for different rooms in your house.
For bedrooms, look for paint that creates a tranquil and relaxing environment. Latex-based paints are a popular choice due to their ease of cleaning and durable finish. They come in a variety of finishes, with eggshell or satin being ideal for the low-traffic nature of bedrooms.
Your living room paint should accommodate diverse activities and lighting conditions. A slightly higher gloss, like satin or semi-gloss, is recommended for living rooms due to their durability and ease of cleaning, which suits high-traffic areas.
Using the same paint color throughout your home can create a sense of continuity and harmony. However, selecting different colors for each room allows you to craft individual moods and themes that reflect the room’s purpose and your personal style.
When painting multiple rooms, start by identifying a color palette that appeals to you. Look for complementary colors and consider the transition between rooms. Utilize resources like virtual color consultations to visualize and select a harmonious range.
Selecting the right paint is a crucial step in creating your ideal living space. Remember, the color you choose can influence the mood of the room. Soft neutrals can expand spaces, whereas bold colors can make large rooms feel cozier. When implementing your decisions, consider a company like Kaminskiy Care and Repair for professional advice and service. We ensure your room has the flawless finish it deserves. Contact us today!
Embarking on home improvement projects can often feel empowering and cost-effective. However, when it comes to certain household repairs, attempting to handle them yourself without the proper expertise can lead to more harm than good. While painting a room or fixing a creaky door hinge might be within your wheelhouse, there are intricate projects that demand a professional touch, not just for the quality of the work, but also for your safety.
Some tasks, such as electrical work, not only require a specialized skill set but also come with significant risks. Inadequate handling of wiring can lead to serious injury or even create fire hazards. Similarly, plumbing and structural renovations are complex areas where proper knowledge and safety measures are crucial. These projects impact the core functionality of your home, and mistakes can result in extensive damage. You wouldn’t want to knock down a load-bearing wall or incorrectly install a plumbing fixture that leads to water damage. Additionally, there are legal and planning considerations to take into account, ensuring that your renovations are compliant with local building codes and regulations.
Electrical work is not for the faint of heart; it requires a deep understanding of electrical systems, and any mistakes can lead to serious safety hazards. Undertake electrical repairs only if you are a licensed electrician, as the risks include electrocution and creating potential fire dangers.
Electrical systems are complex and can be dangerous. If you’re not familiar with concepts like load calculations, wire sizing, and the National Electrical Code, attempting DIY electrical work can have dire consequences. For instance:
To emphasize, never undertake electrical projects that involve the main service panel or wiring upgrades alone. Engaging in tasks such as changing a light fitting or installing a new outlet may seem straightforward, but could disrupt your electrical system’s integrity if done incorrectly.
By hiring a professional, you are also assured of the quality of work that safeguards your home from electrical mishaps. Remember, cutting corners with electrical work is not cost-effective when your safety is at stake.
Tackling plumbing issues in your home can be a daunting endeavor. However, incorrect repairs could lead to leaks, water damage, or even problems with gas lines, costing you more in the long run.
Leaks and Water Damage: If you attempt pipe repair without proper knowledge, you may inadvertently cause a leak. A seemingly small drip can escalate into significant water damage that compromises the structural integrity of your home. Moreover, plumbing lines hidden within walls are particularly susceptible to being improperly handled, potentially leading to unseen water damage that can foster mold growth and rot.
Gas Line Hazards: Gas lines are another critical area where expertise is non-negotiable. Mishandling gas plumbing can result in leaks or worse, pose serious risks to your safety. It’s imperative to understand that gas line work often requires specific permits and inspections, which are there to ensure your household’s safety.
Unfamiliar Plumbing Systems: When you’re unsure about your home’s plumbing layout, it’s a clue to call a professional plumber. Specialists have the training to navigate complex plumbing systems and tackle any issues without guesswork.
Stubborn Blockages: If your efforts to clear a clog have failed, it indicates a need for professional intervention. Persistent blockages could imply deeper problems within your plumbing system, which a skilled plumber can diagnose and resolve.
In summary, save yourself the hassle and potential risks associated with DIY plumbing repairs. For a job done right, hiring a professional is your best bet.
When contemplating major renovations in your home, especially those that involve structural changes, it’s essential to recognize the complexity and risks involved. Making alterations that affect your home’s structural integrity should only be done by professionals, like structural engineers, due to safety concerns and building code requirements.
Identifying load-bearing walls is crucial before any structural alterations are made. These walls support the weight of your home and are integral to its structural integrity. You should only attempt to identify load-bearing walls with the aid of a professional. An experienced engineer can determine the difference between load-bearing and non-load-bearing walls by examining the home’s original plans or performing an in-depth assessment.
Characteristics of load-bearing walls include:
Removing walls without proper knowledge can lead to disastrous results, including collapse. Non-professionals may inadvertently compromise their home’s structural integrity by eliminating critical supports. Home renovations involving wall removal necessitate an understanding of how the load is transferred through the structure.
Potential risks include:
Structural changes, especially the removal of load-bearing walls, must be approached with caution. Remember, safety and compliance with local building codes are paramount; always consult a qualified professional to ensure your renovation plans are safe and feasible.

Certain home repair tasks go beyond the scope of typical DIY projects due to their level of complexity, the skills required, and the potential risks involved. These tasks necessitate hiring licensed professionals with specialized knowledge and a verifiable track record to ensure compliance with building codes and proper installation.
When dealing with hazardous materials like asbestos, it’s essential to prioritize your safety. Asbestos removal is not a job for an untrained individual due to the severe health risks it poses, including cancer. Only skilled professionals with specific training in hazardous material handling should deal with asbestos to prevent contamination and ensure safe disposal.
In conclusion, hiring professionals for these tasks safeguards your home and health while ensuring that work is carried out to a high standard.
Before diving into any home improvement project, it’s essential to focus on two vital aspects: securing the necessary permits and understanding local building codes to ensure compliance. Failure to adhere to regulations can lead to costly penalties and put your home at risk.
Permits serve as a formal go-ahead for your construction or remodeling project. They are not mere formalities; permits outline the scope of your work and ensure professionals check it for safety and adherence to building codes.
Building codes are systematic regulations concerning design, construction, materials, and safety standards appropriate to buildings.
Safety must never be an afterthought. Compliance with building codes inherently prioritizes safety for both the constructors and the occupants of the building.
By respecting these guidelines, you’ll ensure your home repair project is sound from both a planning and a legal standpoint.
When tackling home repairs, it’s crucial to recognize your limits. You may be inclined to take on various projects, but some repairs are best left to professionals. It’s important to note that complex electrical work poses safety hazards if not handled by professionals. Plumbing beyond minor fixes, if not handled with expertise, can lead to water damage, and tasks like structural changes, if not properly handled, can affect the integrity of your home.
Remember, certain projects can also invalidate home warranties or insurance policies if not completed by a certified contractor.
Before beginning a project, consider whether the time and potential cost savings are worth the risk of a DIY attempt.
Lastly, home maintenance providers like Kaminskiy Care and Repair can ensure jobs are done right the first time, giving you peace of mind and preserving the value of your home. Contact us today!
When dealing with home repairs, it’s important to recognize when a project is beyond your skills. Certain repairs can be hazardous or require specialized knowledge and permits.
Attempting to handle electrical repairs without proper training can result in serious injury from electric shock or may cause electrical fires. Professional electricians have the necessary tools and expertise to ensure safety.
Professional plumbers know how to mitigate the risks of water damage and ensure that repairs comply with local building codes. Incorrectly performed plumbing repairs can lead to leaks or severe water damage.
Many structural changes, including installing new sanitary or drainage systems, require building permits. Failing to obtain the necessary permits can result in fines, and the work may need to be redone by a professional.
Structural repairs can impact the integrity of your home if not done correctly. This includes work on load-bearing walls or foundations, where professionals are needed to ensure the safety and stability of the structure.
San Diego is home to a variety of hardware stores, each offering a unique selection of tools, materials, and services. From well-known chains to local gems, these stores provide everything a handyman could need.
When tackling home improvement projects, having the right tools and supplies is essential. For those in San Diego, finding a reliable hardware store that caters to handyman needs can make all the difference. Whether you’re a professional handyman or a DIY enthusiast, having access to a well-stocked hardware store ensures you have the necessary resources to complete your projects efficiently and effectively. Let’s dive into some of the best hardware stores in San Diego and what they offer.
Home Depot is a household name in the world of hardware stores and for a good reason. With multiple locations throughout San Diego, this store provides a vast selection of tools, building materials, and home improvement products. Home Depot’s extensive inventory includes everything from power tools and plumbing supplies to paint and electrical components.
One of the key advantages of shopping at Home Depot is their knowledgeable staff. Whether you need advice on which tool to use for a specific job or help finding a particular item, the employees are always ready to assist. Additionally, Home Depot offers various services such as tool rental, which can be incredibly beneficial for handymen who need specialized equipment for a short period.
Another major player in the hardware store market is Lowe’s. Similar to Home Depot, Lowe’s offers a wide range of products suitable for any handyman project. With locations spread across San Diego, Lowe’s is easily accessible and provides a convenient shopping experience.
Lowe’s is known for its high-quality products and exceptional customer service. The store’s layout is designed to make finding items straightforward, and the staff is always available to offer guidance and support. Lowe’s also provides online shopping options with in-store pickup or delivery, making getting the supplies you need easier than ever.
Marshall’s Industrial Hardware is a unique store in San Diego that focuses on providing industrial-grade tools and supplies. They cater to a wide range of industries, including construction, manufacturing, and maintenance. With an extensive inventory of fasteners, fittings, and industrial tools, Marshall’s is a valuable resource for handymen tackling complex projects that require durable and high-quality materials.
The Marshall’s Industrial Hardware staff are known for their expertise and willingness to help customers find exactly what they need. Whether you’re looking for specific hardware components or seeking advice on the best tools for a job, Marshall’s has you covered.
For those in need of specialized lumber and building supplies, Dixieline Lumber & Home Centers is a top choice in San Diego. With several locations throughout the city, Dixieline offers an impressive selection of lumber, plywood, and building materials, making it an ideal destination for more extensive handyman projects.
Dixieline Lumber & Home Centers also provide various services, including custom cutting and delivery, which can save you time and effort. Their knowledgeable staff can assist with project planning and offer expert advice on materials and construction techniques.
Toolshed Equipment Rental and Supply is a standout in San Diego for those in need of specialized equipment and tools. Unlike other hardware stores, Toolshed focuses on providing rental options for high-quality, professional-grade tools that are perfect for short-term projects. Their extensive inventory includes everything from heavy machinery to specialized hand tools.
Toolshed Equipment Rental and Supply offer flexible rental terms, ensuring you only pay for what you need when you need it. Their knowledgeable staff can help you choose the right tools for your project and provide detailed instructions on their use, making it a great resource for both professionals and DIY enthusiasts.
McFadden-Dale Hardware is another excellent option for handymen in San Diego, known for its vast selection of specialty tools and hardware. This store offers a unique shopping experience with a focus on hard-to-find items that aren’t typically available in larger chain stores. Whether you need specific fasteners, rare tools, or unique hardware pieces, McFadden-Dale is the place to go.
The staff at McFadden-Dale Hardware are passionate about DIY projects and are always willing to share their extensive knowledge and expertise. This personalized service and the store’s impressive inventory make it a favorite among local handymen and DIY enthusiasts.
Kaminskiy Care and Repair is a standout handyman service provider in San Diego, known for its comprehensive range of services and exceptional customer care. Whether you’re dealing with minor repairs or major renovations, Kaminskiy Care and Repair has you covered with our expert team of professionals.
Finding the right hardware store is crucial for any handyman looking to complete projects efficiently and effectively. San Diego offers a variety of excellent hardware stores, each with its strengths and specialties. Whether you prefer the extensive selection of Home Depot and Lowe’s, the personalized service of Marshall’s Industrial Hardware, or the specialty materials at Dixieline Lumber & Home Centers, you’ll find the perfect store to meet your needs. By exploring these top hardware stores and service providers, you can ensure you have access to the best tools, supplies, and expertise for all your handyman projects in San Diego.
Looking for professional handyman services in San Diego? Kaminskiy Care and Repair provides a range of professional handyman services to assist with any project.
No price games. You get a clear written quote before any work begins, backed by our workmanship warranty.