Are you ready to say goodbye to the outdated popcorn ceilings in your home? Often referred to as acoustic ceilings, these textured surfaces were once in vogue but are now often seen as a relic of the past, collecting dust and diminishing the modern appeal of interiors. If you’re set on refreshing your space and adding a touch of sleek sophistication, removing popcorn ceilings can be a rewarding DIY project. In this comprehensive guide, we will walk you through the process of safely removing popcorn ceilings, transforming your home’s aesthetic, and potentially increasing its value.
Before diving into the removal process, it’s crucial to understand what popcorn ceilings are and why they may need special attention. Popcorn ceilings are a type of textured finish that was popular from the 1950s to the 1980s, primarily for their ability to hide imperfections and provide some degree of soundproofing. However, they can harbor allergens and, more importantly, some may contain asbestos, especially if they were installed before the 1980s.
Before you begin, it’s imperative to test for asbestos. If your home was built before the 1980s, your popcorn ceilings contain this hazardous material. Asbestos exposure can lead to serious health issues, so if your test comes back positive, it’s best to hire a professional to handle the removal.
Once you’ve determined that your ceiling is free of asbestos, you’re ready to start the process. Begin by removing all furniture from the room or covering it with drop cloths or plastic sheeting. Don’t forget to protect your floors as well. Turn off the HVAC system to prevent dust from circulating, and cover any vents with plastic. Safety gear is a must—wear a dust mask, safety goggles, and gloves to protect yourself from the debris.
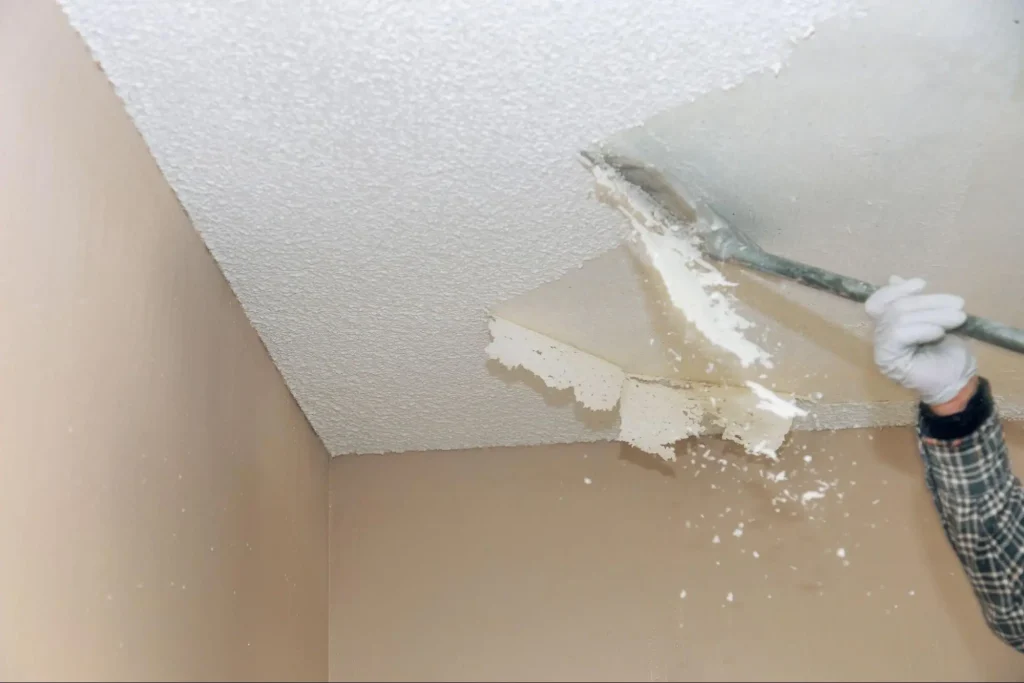
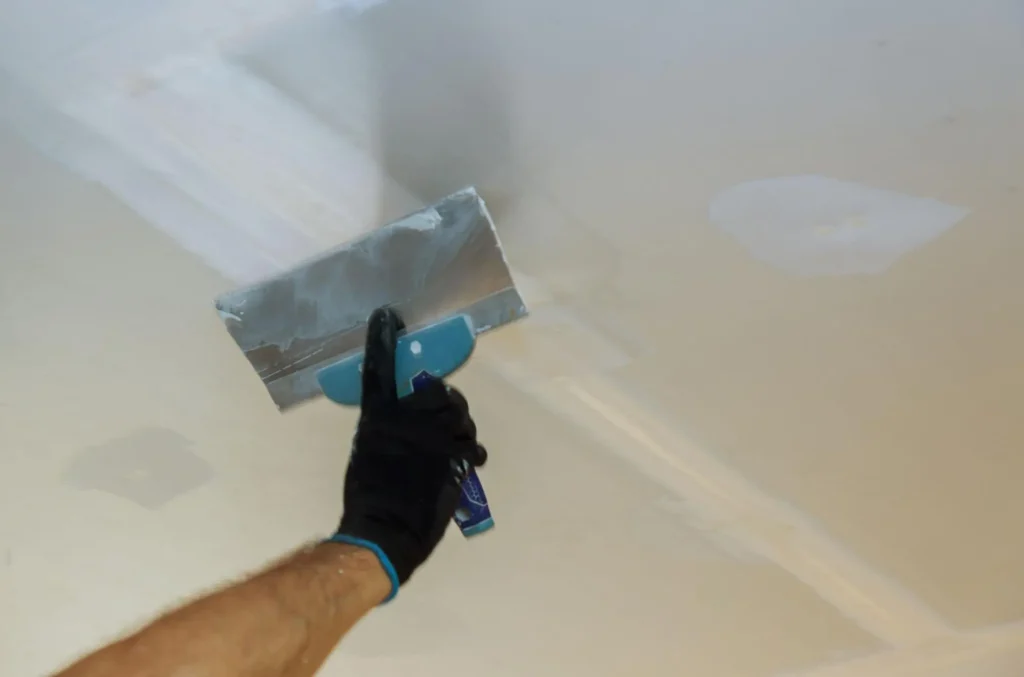
Once all the texture is removed, you’ll likely need to touch up the ceiling. Use joint compound to fill in any gouges or smooth out rough spots. Sand the ceiling lightly with fine-grit sandpaper for a smooth finish. Remember to wear a dust mask during this step to prevent inhalation of the fine particles.
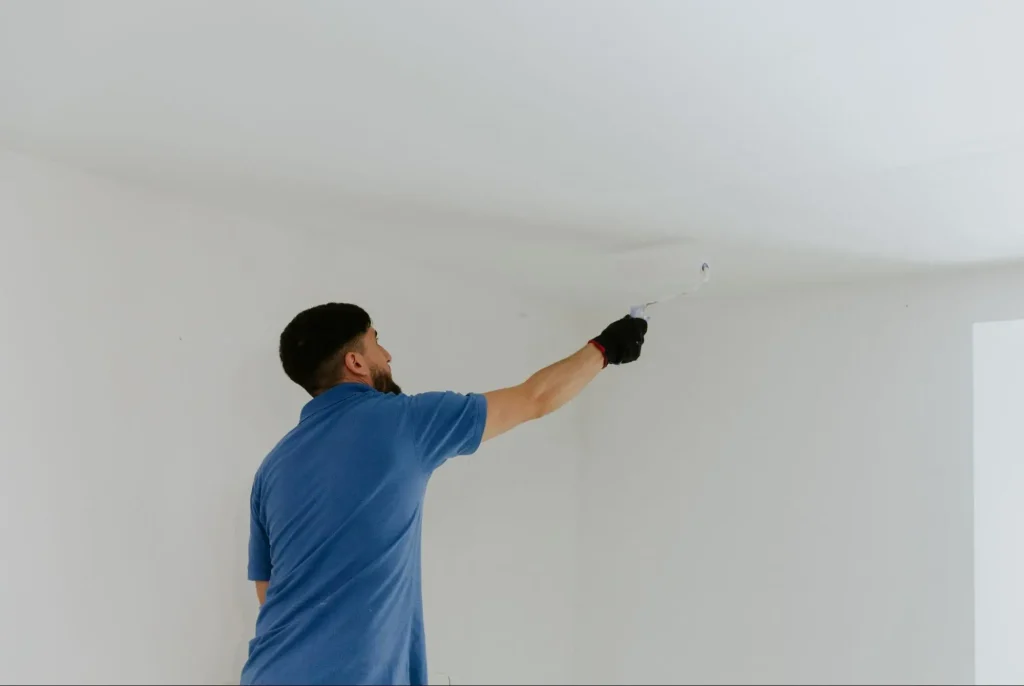
After the joint compound has dried and the ceiling is sanded smooth, it’s time to prime and paint. Apply a stain-blocking primer to ensure a uniform appearance and allow it to dry completely. Then, apply your chosen paint color with a roller designed for smooth surfaces. For a professional-looking finish, apply at least two coats of paint, allowing adequate drying time in between.
Removing popcorn ceilings can be labor-intensive, but the results are well worth the effort. With a smooth, modern ceiling, your home will feel brighter, more open, and up-to-date. Remember to prioritize safety, take your time, and follow each step carefully for the best outcome.
If you’re not comfortable tackling this project on your own, or if you encounter any issues along the way, don’t hesitate to call in the experts. Kaminskiy Care and Repair is here to help with all your home renovation needs. Our team of professionals can efficiently and safely transform your ceilings, ensuring a beautiful finish. Contact us today to schedule your consultation and take the first step toward revitalizing your home’s interior.
Ready to upgrade your home with confidence? Reach out to Kaminskiy Care and Repair for professional assistance and experience the joy of a renewed living space!
Keeping your deck in top shape doesn’t have to be a daunting task. With regular maintenance, you can ensure its longevity and preserve its value. The most important step you can take is to establish a routine for cleaning and inspecting your deck. Regularly sweeping away leaves, dirt, and debris can prevent damage and extend the life of your deck.
Look out for signs of damage like rot, decay, or loose boards. Address any issues promptly to avoid further deterioration. Protective measures, such as applying a sealant or using furniture pads, can also help safeguard your deck from wear and tear.
By implementing these simple maintenance steps, you’ll not only keep your deck looking great but also enhance its overall functionality. This attention to detail will make your outdoor space enjoyable for many years to come.
Keeping your deck in great shape involves regular cleaning and thorough inspections. This helps prevent damage and keeps the deck looking its best. This section covers sweeping and washing, inspecting for damage, and managing mildew and mold.
Sweeping is a simple yet essential part of deck maintenance. Leaves, dirt, and debris can accumulate quickly. Use a broom to sweep away anything that can trap moisture and lead to rotting or mildew.
For deeper cleaning, use a deck cleaner. You can opt for a garden hose or a pressure washer. A pressure washing session once a year can remove grime and algae. Be careful with the pressure setting to avoid damaging the wood.
Washing with water and a mild detergent can also work for regular upkeep. Scrub with a brush to remove stubborn stains. Ensuring thorough drying after washing helps protect against water damage.
Inspection is crucial for identifying any damage early. Check your deck at least once a year for signs of water damage, loose nails, and weakened boards. Look closely at the areas that are in contact with the ground as they are more prone to rot.
Pay special attention to the railing, steps, and areas that are frequently used. Loose or rotting parts should be repaired immediately to prevent accidents. Tighten any loose screws or replace rusted nails to keep the structure safe.
Regular inspections can help spot problems early, avoiding costly repairs in the future.
Mildew and mold can affect the appearance and safety of your deck. These often appear as dark spots on the surface. To remove them, use a mix of water and oxygen bleach, which is less harsh than chlorine bleach yet effective.
Apply the solution to the affected areas, scrub with a brush, and rinse thoroughly with water. Be sure the deck is completely dry before applying any sealant or finish.
To prevent mildew and mold from coming back, keep the deck clean and dry. Trim back plants and trees around your deck to improve sunlight and airflow, which can reduce the growth of mold and mildew.
Following these steps can help maintain a safe and attractive deck. Regular cleaning and careful inspections are key to long-lasting deck upkeep.

Damage to your deck can come from weather, pests, or simply wear and tear. To keep your deck safe and looking great, you need to fix structural issues, treat wood rot, handle pest infestations, and replace damaged nails or fasteners.
Check the framing, joists, beams, and footings for any signs of damage. Look for cracks, splintering, or warped wood.
If you notice damaged joists or beams, you will need to replace them. Use a pry bar to remove the damaged boards carefully. Replace them with boards of the same type and size. Secure the new boards using screws or nails.
If footings are unstable, you may need to dig around them and pour new concrete. Ensure the new footing is level and properly aligned with the existing structure. Regular inspections can help you spot issues early and prevent major repairs.
Wood rot and pests like termites can cause severe damage to wood decks. To check for rot, press a screwdriver into the wood. If it easily penetrates, the wood could rot.
Cut out the affected areas using a saw and replace them with pressure-treated lumber. Seal the new wood with a wood preservative to protect it from future rot.
For termite infestations, look for small holes or tunnels in the wood. Treat the area with a termite control product. In severe cases, you might need to replace the damaged boards entirely. Keeping your deck dry and well-sealed can prevent these issues.
Loose or rusted nails and screws can be hazardous. Check all nails, screws, and other fasteners regularly to ensure they are secure.
If nails are popping up, use a hammer to drive them back in. If they will not stay, replace them with screws, which provide a firmer hold. For rusted or corroded fasteners, remove them carefully and replace them with stainless steel or galvanized ones.
Make sure all fasteners are properly flush with the deck surface to prevent tripping hazards or further damage. Regular maintenance of nails and fasteners keeps your deck safe and looking neat.

Taking the right steps to protect your deck will significantly enhance its lifespan and maintain its integrity. Key areas to focus on include staining and sealing, using weatherproofing materials, and addressing wear and tear promptly.
Staining and sealing your deck protects it from moisture and UV rays, which can cause significant damage over time. To begin, choose a stain that matches your deck’s material—cedar, redwood, or composite. Staining enhances the wood’s natural beauty and provides a layer of protection against the elements.
After staining, apply a water-repellent sealant to lock in the stain and prevent water damage. Sealing is particularly important for wooden decks as it prevents water from seeping into the wood, causing rot and decay. A good practice is to reapply the stain and seal every two to three years or when water stops beading on the surface.
Using a power washer can help clean the deck thoroughly before applying stain and sealant. This ensures that dirt and debris do not interfere with the sealing process.
Weatherproofing materials are essential for protecting your deck from varying climate conditions. Consider using composite decking materials, which are designed to withstand harsh weather better than traditional wood. Composite decks are resistant to rotting, splitting, and warping, making them a great option for long-term durability.
For wood decks, apply a wood preservative to protect against insect damage and UV radiation. Products like water-repellent sealants also offer added protection against rain and snow, reducing the risk of water damage.
Use plastic sheeting or tarps to cover areas of the house close to the deck when applying any chemicals. This prevents accidental splashes or drips from damaging other parts of your home.
Regularly inspect your deck for signs of wear and tear to address issues before they worsen. Look for loose nails, cracked boards, and signs of rot. Tighten any loose parts and replace damaged boards promptly to maintain the structural integrity of your deck.
Handrails and stairs are high-traffic areas that often need extra attention. Reinforce these areas with additional support if needed. For composite decks, check for fading or scratches and use repair kits that match the material.
Cleaning your deck with a biodegradable wood deck cleaner helps maintain its appearance and prevent further damage. Make this part of your regular maintenance routine to keep your deck in top shape.
Elevate the look and usability of your deck by paying attention to maintenance and improvements. Focus on furniture upkeep and enhancing safety and accessibility to create a welcoming and secure outdoor space.
Your outdoor furniture can significantly enhance the aesthetic appeal of your deck. Regular maintenance of your furniture and accessories not only boosts their longevity but also keeps them looking their best. Clean your furniture pieces like tables and chairs regularly to prevent dirt and grime buildup. Use a mild deck cleaner suitable for wooden decks.
Check for rust on metal parts and repaint or seal them as needed. Wooden furniture requires sanding and restaining to protect against the sun’s harmful rays.Planters and other accessories should also be cleaned and inspected for damage. Replace any broken or worn items promptly to maintain a polished look.
Safety and accessibility are key when maintaining your deck. Ensure that handrails and railings are securely fastened and free from splinters or sharp edges. Regularly inspect and repair stairs to prevent accidents.
Install non-slip mats or strips on stair treads to provide extra traction, especially in wet conditions. Adequate lighting is crucial for evening use. Place solar-powered lights along the steps and railings for better visibility.
Consider adding ramps to improve accessibility for everyone, including those with mobility issues. Regularly check for any structural damage or weak spots to prevent potential hazards.
Consistent maintenance and thoughtful enhancements will help you create a more enjoyable and safe outdoor environment.
Regular maintenance is key to keeping your deck in great shape. First, you should clean your deck regularly. This helps remove mold, algae, and grime that can make the surface look unattractive. For a deeper clean, consider using a power washer once a year.
It’s also important to protect your deck from scrapes. Avoid using outdoor rugs made from natural fibers. Instead, opt for synthetic materials that won’t trap moisture. Scratches from furniture can be minimized by using furniture pads.
Use a clear sealer to protect your deck from moisture and UV damage. This simple step can extend the life of your deck significantly. Make sure to reapply the sealer as per the manufacturer’s recommendations, usually every couple of years.
Keep an eye out for damage. Regularly check for loose boards, nails, or screws, and fix them immediately. This prevents minor issues from becoming major repairs.
For more detailed maintenance, contact Kaminskiy Care and Repair for all your home maintenance needs.
Maintaining your deck doesn’t have to be complicated. With regular cleaning, protection, and timely repairs, your deck will remain a safe and beautiful part of your home for years to come.
Regular cleaning is crucial. Sweep leaves, dirt, and debris off your deck often. Deep clean annually using a power washer to remove grime. Apply the best wood treatment, like an oil-based stain, to protect against mold and cracking. Inspect for loose nails or boards and fix them promptly.
Using oil-based stains is highly recommended. They enhance natural wood color and prevent mold and mildew growth. Oil-based stains also help prevent cracking and warping. Avoid water-based stains because they may wear more quickly and not last as long.
Regular cleaning should be done weekly or bi-weekly. Deep cleaning and re-staining or sealing should be done annually to ensure maximum protection and longevity of your deck.
Keep it clean by sweeping and washing it regularly. Inspect the paint for chips or cracks and touch up any damaged areas promptly. Repaint every few years to maintain its look and protection.
Regular maintenance is key. Clean it frequently, use quality stains or treatments annually, and address repairs quickly. Protect your deck from the elements by using a cover when not in use and avoid dragging heavy furniture across it.
Water damage on ceilings can be a troubling sight for any homeowner, subtly emerging as a cosmetic issue before potentially turning into a more serious structural concern. When you notice blemishes or deterioration on your ceiling due to water, it becomes crucial to act promptly – not only to restore the appearance but also to ensure the safety and integrity of your living space. Understanding how to address this damage effectively can save you time and money, preventing minor problems from escalating into major, costly repairs.
Dealing with water damage on your ceiling involves a thorough approach, starting with the identification of the water source to prevent further damage. Once the cause is addressed, preparing the affected area for repair is essential for achieving a seamless finish. The actual repair process may range from simple patching to replacing substantial sections of the ceiling, depending on the extent of the damage. After repairs are made, implementing preventative measures and regularly maintaining your ceiling can help avert future water damage.
Before attempting any repair, determining the origin of the water damage is crucial. This involves a meticulous inspection for leaks and potential structural issues coupled with an assessment for any mold or mildew that might be present.
Begin by searching above the water-damaged ceiling for visible signs of leaking. Check the roof if the damage is located on the top floor. Missing or damaged shingles on the outside can indicate a leaky roof. Inside, the attic can be a hotspot for leaks, so look for wet insulation or water stains on the rafters. Next, you should scrutinize all plumbing fixtures, including pipes in the vicinity, as a plumbing leak could be your culprit. Utilize a moisture meter to detect less obvious sources of dampness.
After pinpointing the source of leakage, it’s essential to check for mold or mildew formation. They usually appear as black, white, or green specks or patches. Mold tends to thrive in damp conditions and can occur if the water damage has been prolonged. Not only does it signal a need for immediate action to stop the water source, but it also necessitates thorough cleaning to prevent health risks. If mold is extensive or located in hard-to-remove areas, consider seeking professional help.
Before you tackle repairs, it’s crucial to stop any ongoing damage. A swift response can prevent a compromised ceiling from collapsing and minimize the need for extensive reconstruction.
When you notice water damage on your ceiling, your immediate action should be to contain the leak. Place a bucket beneath any drips to catch falling water. If the ceiling is sagging, there is a risk of an accumulation of water, in which case puncture the bulge with a screwdriver to relieve pressure and allow the water to drain safely into the bucket below.
Once the leak is contained, drying out the area is imperative to prevent mold and structural damage. Use dehumidifiers and fans to circulate air and remove moisture from the room. Spread a tarp over the floor and any furniture to protect against water damage as you work. Continue drying until the area is completely dry to the touch, which could take several days depending on the extent of the water damage.
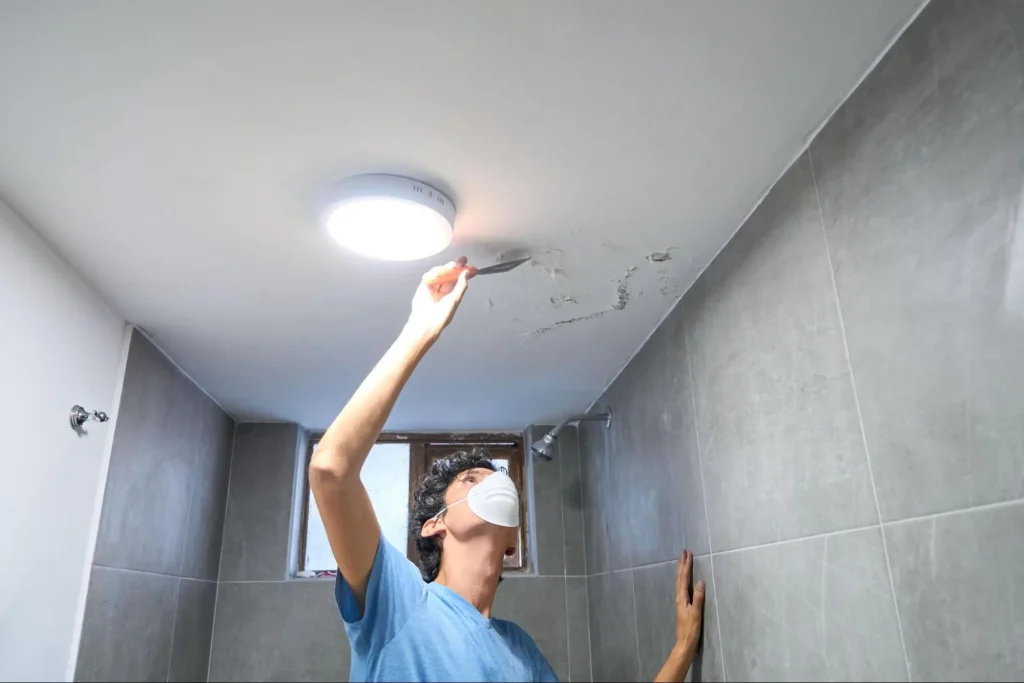
Before you start the repair process, equipping yourself with the right tools and materials is essential for a successful fix. Being prepared will help you smoothly transition through the steps of repairing your water-damaged ceiling.
To begin, ensure you have the following items:
Make sure you have a ladder that is tall enough to safely reach your ceiling. Collect all of these materials before starting your repair to save time and frustration.
Now it’s time to clear away the compromised ceiling:
Every piece of damaged material must be completely removed to ensure a sound foundation for your repair. Keep the space clear and clean to avoid working in a cluttered environment.
Before you begin, ensure you have all the right materials, like spackle, mesh tape, a putty knife, and the appropriate primer and paint. Let’s focus on restoring your ceiling confidently and effectively.
First, you’ll need to remove any flaking paint or damaged drywall using a utility knife or drywall saw. Once the area is clear:
After patching the water-damaged ceiling:
After repairing the structural aspects of water damage on your ceiling, it’s essential to address cosmetic concerns and take steps to prevent future issues.
Once your ceiling is structurally sound, it’s time to focus on aesthetics. Thoroughly sand the surface to ensure it’s smooth and ready for painting. Choose a paint matching your existing ceiling or a full repaint for a uniform look. Pay special attention to the caulk to prevent further water intrusion. If there is mold growth, ensure it has been appropriately treated and that there are no health risks before proceeding with the cosmetic fixes. Remember to be meticulous when working around light fixtures and appliances to maintain their functionality and appearance.
Maintaining the structural integrity of your ceiling involves regular inspections and preventative measures. Clean your clogged gutters routinely to avoid water overflow that can lead to ceiling damage. Inspect yourshingles for signs of wear or damage and replace them when necessary. Applying a water sealant can protect your ceiling from potential leaks. It is also crucial to check for proper attic ventilation to mitigate moisture accumulation. By taking these steps, you can help reduce the likelihood of future water damage and protect the investment in your home.
To repair a water-damaged ceiling plaster, first address the leak’s source. Remove damaged plaster, allow the area to dry, apply a new coat of plaster, sand it smooth, and repaint the ceiling.
For minor water damage, start by drying the affected area thoroughly. You can then seal any stains with a stain-blocking primer and repaint the ceiling to restore its appearance. Always ensure the root cause of water damage is fixed first.
The cost of repairing a ceiling with water damage varies, typically ranging from several hundred to a few thousand dollars, depending on the damage extent and whether the structure of your home is affected.
For professional help, contact a licensed water damage restoration specialist or a reputable contractor experienced in ceiling repairs. They can properly assess and fix the issue to prevent future damage.
Essential yearly maintenance tasks for homeowners include servicing the HVAC system, cleaning and inspecting the chimney and fireplace, testing and inspecting the home’s electrical system, and inspecting the home’s foundation for cracks or other damage. It’s also important to inspect the home’s exterior for damage caused by weather or pests and to clean gutters and downspouts.
Replacing a ceiling is necessary if the water damage has compromised structural integrity or if there is extensive mold growth. For cosmetic damage or minor issues, repairs may be sufficient.
Seasonal maintenance is an essential aspect of home ownership. Not only does it help keep your home in good shape, but it can also prevent costly repairs down the line. As a homeowner, it is important to keep a checklist of tasks that need to be completed each season.
A handyman can be a valuable resource for tackling these tasks. They have the skills and knowledge to handle a variety of home maintenance projects, from minor repairs to major renovations. By hiring a handyman, you can ensure that your home is well-maintained and ready for whatever the season brings.
In this article, we will discuss seasonal handyman tasks that you should add to your checklist. We will cover spring and summer maintenance, fall and winter readiness, and year-round handyman tasks. We will also answer some frequently asked questions about seasonal home maintenance.

As the weather warms up, it’s time to tackle some important tasks to ensure your home is in top shape for the spring and summer months. Here are some areas to focus on for your seasonal home maintenance checklist:
By following this spring and summer home maintenance checklist, you can ensure your home is in top shape for the warmer months. Regular maintenance will help prevent bigger issues down the road and keep your home looking and feeling comfortable.

As the weather gets colder, it’s important to prepare your home for the upcoming season. Here are some essential fall and winter handyman tasks to add to your checklist.
Before the temperature drops, make sure you take care of the following tasks to ensure your home is ready for the cold weather:
Heating and Insulation Checks
To ensure that your heating system is working properly and efficiently, take the following steps:
By completing these fall and winter handyman tasks, you can ensure that your home is ready for the colder weather and avoid costly repairs and damage.
As a homeowner, it is important to keep your home in good condition year-round. By performing regular home maintenance and repairs, you can ensure that your investment remains comfortable and secure for you and your pets. Here are some handyman tasks that you should add to your year-round home maintenance checklist:
Adding these year-round handyman tasks to your home maintenance checklist can help keep your home safe, secure, and comfortable all year long.
Keeping up with seasonal handyman tasks is crucial to maintaining the longevity and value of your home. By performing regular maintenance, you can prevent costly repairs and ensure the safety and comfort of your family.
Remember to consult with professionals like Kaminskiy Care and Repair for tasks that require specialized knowledge or equipment. Additionally, make sure to prioritize tasks that are time-sensitive or could cause further damage if left unattended.
By creating a seasonal handyman checklist and following it diligently, you can ensure that your home is always in top condition. Don’t forget to take advantage of online resources like printable checklists and DIY tutorials to make the process easier and more efficient.
Overall, taking care of your home is a responsibility that comes with many rewards. Not only will you save money in the long run, but you’ll also have a beautiful and functional space to enjoy for years to come.
A seasonal home maintenance checklist should include tasks that are specific to the time of year. For example, in the fall, you should clean your gutters and downspouts, inspect your roof for damage, and prepare your heating system for the winter. In the spring, you should inspect your home’s exterior for damage caused by winter weather, clean your windows, and prepare your air conditioning system for the summer. In the summer, you should inspect your home’s exterior for damage from summer storms, clean your outdoor grill, and prepare your pool for the season.
Monthly home maintenance tasks include changing air filters, checking and testing smoke detectors and carbon monoxide detectors, inspecting and cleaning range hoods and filters, and checking for leaks around sinks, toilets, and other plumbing fixtures. Additionally, it’s a good idea to test your garage door opener and lubricate the moving parts.
Essential yearly maintenance tasks for homeowners include servicing the HVAC system, cleaning and inspecting the chimney and fireplace, testing and inspecting the home’s electrical system, and inspecting the home’s foundation for cracks or other damage. It’s also important to inspect the home’s exterior for damage caused by weather or pests and to clean gutters and downspouts.
The critical maintenance checks to perform for each season vary depending on the time of year. In the fall, it’s important to prepare your home for the winter by cleaning gutters and downspouts, inspecting the roof, and preparing the heating system. In the winter, it’s important to prevent damage caused by freezing temperatures by insulating pipes and checking for leaks. In the spring, it’s important to inspect the home’s exterior for damage caused by winter weather and prepare the air conditioning system for the summer. In the summer, it’s important to protect the home from summer storms by inspecting the exterior for damage and preparing the pool for the season.
As the population ages, the concept of aging in place becomes increasingly important. Seniors often prefer to live in the comfort and familiarity of their own homes for as long as possible. However, staying at home can present challenges as one’s physical abilities change. Handymen play a crucial role in enabling seniors to live safely and independently. They can perform a range of modifications and repairs that reduce fall risks, enhance accessibility, and support seniors’ ability to perform daily tasks without undue strain.
Home modifications range from small-scale changes, like installing grab bars in bathrooms, to more comprehensive projects, such as widening doorways to accommodate mobility aids. Handymen can also assist with regular home maintenance tasks that may become difficult or dangerous for seniors to carry out themselves, such as gutter cleaning or fixing loose floorboards. Beyond providing services that ensure a safe living environment, handymen can also help seniors integrate technological aids that promote independence and facilitate communication with caregivers and loved ones.
When you envision your future, maintaining autonomy in your golden years is likely a priority. The concept of aging in place acknowledges this desire, providing a framework for you to live independently and safely in your own home as you grow older.
Aging in place refers to your ability to live in the residence of your choice, safely and independently, as you age. This idea isn’t just about comfort—it’s about empowering you to maintain control over your lifestyle and personal environment. Key elements include:
For many older adults, aging in place is synonymous with dignity and a higher quality of life.
The statistics speak volumes: the number of older adults preferring to live independently is significant. Independence as you age not only fosters a sense of achievement but also promotes better mental and physical health. To support this:
Your choice to age in place can ideally lead to a more fulfilling and comfortable lifestyle, solidifying its importance in an ever-aging society.

Your home can remain a haven as you age with the skilled support of handymen. They address common hazards and implement modifications that foster both safety and independence.
Handymen are trained to identify and fix potential risks in your home. They can install smoke detectors and carbon monoxide alarms to alert you to emergencies. Light fixtures are updated for better visibility, reducing the risk of accidents. Essential areas like bathrooms can be made safer with the addition of grab bars and non-slip flooring. For easier access, handymen can lower shelves and adjust cabinetry. Consider leveraging their skills to ensure seniors comfortably age in place.
Falls are a leading cause of injury among seniors, but many of these accidents are preventable with the help of a handyman. They can remove fall hazards such as loose carpeting and install double banisters for stairway support. Outdoor maintenance, including fixing uneven walkways and securing loose railings, is vital to prevent trips and falls. Consulting with a handyman can lead to tailored solutions that enhance your mobility and prevent potential injuries.

When planning for aging in place, certain modifications throughout the home can ensure safety and increase mobility for seniors.
The bathroom presents numerous safety challenges for seniors. Installing grab bars beside the toilet and in the shower area can help prevent falls. Consider a raised toilet seat to make sitting down and standing up easier. For showers and tubs, non-slip mats and a threshold ramp might be necessary for safe entrance and exit.
To accommodate wheelchairs or walkers, doorways may need to be widened for easier passage. Ramps should replace stairs at entrances, and handrails can assist in moving safely through the home. Every threshold should be considered, with ramps or flush entryways installed to eliminate trip hazards.
The kitchen should be a functional space that doesn’t hinder a senior’s ability to be independent. Lowering counters or ensuring sink and faucet controls are within reach can help, especially for wheelchair users. Remodeling may include pull-out shelves and drawers that offer easier access to utensils and groceries.
When aging in place, the goal is to maintain your independence and safety in your own home. Leveraging technology can be a game-changer in this respect. There are various assistivedevices designed to address daily challenges you might face, from operating doorknobs and door handles to managing light switches.
follow these steps to reset your tripped breaker:
Light Switches
By adopting these technologies, you can drastically reduce the barriers posed by traditional home fixtures, enhancing your ability to navigate and function in your personal space with confidence. Remember, a safe home environment is crucial to aging in place successfully and leveraging technology can be your ally in achieving this.
When you age, everyday tasks can become challenging due to physical limitations. This is where strategic home modifications and the expertise of handymen can be invaluable, ensuring you can navigate your living space safely and with ease.
Arthritis can make the simplest tasks, like turning a doorknob or using kitchen utensils, painful and difficult. Handymen can install lever-style door handles, which are easier to grip and require less force to turn. In the kitchen, D-shaped cabinet pulls and hands-free faucets can significantly reduce the strain on your joints.
For those with vision impairment, enhanced lighting is essential. Handymen can install brighter, more uniform lighting in hallways, staircases, and task areas to help reduce the risk of falls and make activities of daily living like eating and bathing safer. For example, motion-sensor lights that automatically illuminate the bathroom at night can be helpful.
Indulging in large-print labels and tactile markers on appliances can allow you to continue using them confidently. These modifications aid in distinguishing settings on microwaves, ovens, and thermostats, ensuring you maintain control over your environment.
As for your bathroom, a critical space for safety, handymen can secure grab bars next to the toilet and in the shower to support balance and prevent falls. Non-slip mats both inside the tub and on the bathroom floor can offer additional protection.
Remember, these adaptations not only make your home more accessible but also more comfortable, allowing you to live independently with confidence.

Proper home maintenance and modification play a crucial role in creating a safe environment for seniors choosing to age in place. By addressing these areas, you ensure both the longevity of the home and the safety of its occupants.
Home Maintenance: Regular check-ups and repairs are fundamental to keeping your home in top condition. This includes routine tasks such as gutter cleaning, checking for leaks, and maintaining heating and cooling systems. These actions prevent minor issues from becoming major problems that could compromise your home’s safety and comfort.
When considering home modifications for aging in place, enlisting professional help can provide a tailored approach to ensure your living space is safe and comfortable. Handymen, occupational therapists, and sometimes nurses collaborate to conduct thorough assessments and recommend impactful home fixups.
Occupational therapists (OTs) specialize in facilitating a safe and functional living environment for you. During an assessment, they will evaluate your daily activities in the context of your home’s layout and features. They bring a deep understanding of how health conditions can affect your ability to perform tasks and will recommend modifications that cater to your specific needs.
For instance, they might suggest installing grab bars in the bathroom, which can prevent falls, or adjusting the height of countertops to improve accessibility. OTs might also advise on lighting improvements, as bright environments help reduce the risks associated with diminished vision.
Handymen can then implement these recommendations, performing home fix-ups such as:
In some cases, a nurse’s input can be valuable, especially when home health care is needed. Nurses can assess medical equipment requirements and ensure that the home environment supports health care protocols.
Together, these professionals help tailor your home to your evolving needs, allowing you to live independently and with dignity. It’s about making your house work for you, ensuring every day is met with safety and ease.
Handyman services play a pivotal role in enabling you to maintain your independence and comfort in your own home as you age. By addressing safety concerns, skilled technicians from Kaminskiy Care and Repair ensure that your living space is adapted to meet your changing needs.
By engaging with Kaminskiy Care and Repair handyman services, you gain peace of mind, knowing that your home won’t just be a place to stay—it will be a secure and suitable environment for you to thrive in as you experience the golden years of life. Contact us today
This section addresses common inquiries about how handymen can contribute to safer living environments for seniors wishing to age in place.
Handymen can help with various modifications such as installing grab bars, widening doorways for wheelchair access, and adding ramps. Making bathrooms safer with walk-in tubs or shower seats is also crucial for preventing falls.
Common tasks include fixing loose tiles, securing wobbly railings, improving lighting, and maintaining heating and cooling systems to ensure comfort and safety throughout the year.
To find affordable and trustworthy services, check with local senior organizations for recommendations, read reviews, and verify that the handyman service is licensed and insured.
A circuit breaker that repeatedly trips is more than just an annoying inconvenience; it’s a sign of an issue within your electrical system that requires attention. The circuit breaker’s primary role is to safeguard your home from electrical hazards, so when it trips, it’s doing its job to prevent potential electrical fires or other dangers. Several factors can cause your breaker to trip, including circuit overload, short circuits, ground faults, or a malfunctioning breaker itself. Understanding why your circuit breaker trips and how to address the problem not only can save you from persistent trouble but also help ensure the safety of your home.
Troubleshooting the reasons behind a tripping circuit breaker is a critical skill for homeowners. It involves interpreting the signs your electrical system presents and knowing how to reset the breaker correctly. While some issues, like resetting a tripped breaker or reducing an overloaded circuit, are within the realm of DIY fixes, others, such as dealing with short circuits or faulty wiring, require the expertise of a licensed electrician. It’s essential to know when to tackle the problem yourself and when to call professionals for help, ensuring that you maintain a safe and functional electrical system.
In this section, you’ll learn precisely what a circuit breaker is and how it functions as a safety mechanism to prevent electrical fires.
A circuit breaker is an automatic electrical switch designed to protect an electrical circuit from damage caused by excess current resulting from an overload or short circuit. It works by interrupting the flow of electricity upon detecting a fault condition. Unlike a fuse, which operates once and then must be replaced, a circuit breaker can be reset to resume normal operation.
Circuit breakers play a crucial role in maintaining your safety by mitigating fire hazards. If an electrical overload or short occurs, a breaker will “trip”, effectively cutting off power to the affected circuit. This interruption in electrical flow stops excessive current that can cause overheating, which if left unchecked, could result in electrical fires. By acting as a safeguard, circuit breakers help to preserve both your electrical system and your physical safety
When your circuit breaker trips, it’s often due to preventable electrical issues within your home. Understanding why this happens is the first step in addressing the problem.
Overload occurs when you demand more electrical power from a circuit than it can handle. Common signs of an overloaded circuit include appliances that seem underpowered or lights that dim when you use other appliances. To rectify this, try:
A short circuit is a more serious issue marked by two wires touching that should not—an occurrence potentially hazardous and a common reason for tripping. This can result from a variety of issues including damaged wires or faulty appliances. If you notice a burning smell or scorched outlets, the next steps include:
Ground faults are similar to short circuits but involve a hot wire touching a ground wire or metal box. They often occur in areas at risk for moisture intrusion, such as kitchens or bathrooms. Manage ground faults by:
External power surges due to lightning or changes in the power grid and internal surges, when high-power appliances turn on and off, can trip breakers.
High-power appliances like microwaves, hair dryers, and air conditioners can trip breakers, particularly if other devices are used on the same circuit simultaneously.

If you’re faced with a tripped breaker, it’s crucial to approach the reset process with a focus on electrical safety to avoid hazards. Ensuring you follow the proper steps can safeguard both your well-being and your home’s electrical system.
Firstly, verify that there is no apparent danger in your surroundings. If you notice any unusual signs, such as scorch marks on outlets or a burning smell, do not attempt to reset the breaker; instead, consult a professional electrician. Additionally, ensure that the area around your electrical panel is dry to prevent the risk of electric shock.
follow these steps to reset your tripped breaker:
By taking these measures, you can reset your breaker safely and effectively. Remember to always prioritize safety when dealing with electrical issues. If the breaker trips again after you have reset it, or if you are unsure at any stage, it is essential to contact a qualified electrician.
To ensure the safety and reliability of your home’s electrical system, adopt a proactive approach. Regular maintenance can prevent circuit breaker issues while recognizing when professional intervention is necessary can save you from more extensive problems.
Conducting regular maintenance on your electrical system is pivotal to preventing unexpected circuit disruptions. At least once a year, inspect your electrical wiring, looking for signs of wear and tear. Test safety devices like GFCI outlets periodically to confirm they’re functioning properly.
If your home is older, it may be time to consider upgrading your electrical system. This could include replacing old wiring that can’t handle modern electrical loads or adding additional circuits. Upgrades provide not only enhanced safety but also improved functionality for your everyday power needs.
In certain scenarios, it’s crucial to entrust the job to a professional electrician like Kaminskiy Care and Repair. Tasks like diagnosing frequent breaker trips, repairing faulty wiring, or upgrading your electrical panel should be handled by a qualified electrician to ensure the work adheres to code and maintains your safety.
Understanding why your circuit breaker keeps tripping is essential for maintaining a safe and functional electrical system in your home. From overloaded circuits to faulty appliances, each cause has a specific solution. Regular checks and maintenance can help you avoid these issues and the inconveniences they bring.
For expert advice and professional service, contact Kaminskiy Care and Repair. Our skilled electricians can help you diagnose and fix any electrical issues, ensuring your home remains safe and your power is uninterrupted. Trust us to provide reliable solutions tailored to your needs. Remember, dealing with electrical systems can be hazardous. Always consider professional help for complex issues to ensure safety and efficacy.
When addressing issues with your circuit breaker, understanding the potential causes of tripping can be crucial in finding the right solution.
Even with no appliances connected, your circuit breaker may trip due to wiring issues such as a ground fault or damage to the insulation of the wires within the affected circuit.
A circuit breaker that frequently trips could signify a serious electrical problem, such as a potential fire hazard due to overloaded circuits or faulty wiring.
If your breaker trips immediately after resetting, this could indicate a direct short circuit or a ground fault in one of the connected appliances or within the circuit wiring itself.
Check for overload by unplugging all devices and then reconnecting them one at a time. Also, inspect outlets and switches for signs of damage, scorch marks, or loose connections.
Yes, a circuit breaker can trip after a period due to a slow-building overload or a thermal trip caused by a heating issue within the breaker itself.
Begin by documenting when the trips occur to identify any patterns. Then, systematically test the devices and outlets on the circuit, looking for worn cords or plugs, and inspect the breaker itself for signs of damage or wear.
As the population ages, the concept of aging in place has gained traction, emphasizing the importance of making adaptations that allow seniors to live independently and safely in their own homes. Home safety upgrades are a crucial part of this process, ensuring that as mobility and health needs change with age, the home environment continues to be a place of comfort and security. These upgrades not only enhance safety but also foster a sense of autonomy, allowing seniors to navigate their living spaces with confidence.
There are a myriad of DIY home safety modifications that you can install without the need for professional help. From simple additions like grab bars in the bathroom to more advanced technological aids, these enhancements make a significant impact on minimizing the risk of falls and accidents. Moreover, many of these modifications are cost-effective, and there are resources available that can help with the financial aspect of home safety improvements for seniors. By taking proactive steps to create a safer living space, you can protect your independence and well-being well into your senior years.
As people age, their homes also need to evolve to accommodate their needs for comfort, safety, and accessibility. These adaptations can help reduce the risk of accidents, enhance mobility, and promote independence by addressing potential hazards. With thoughtful modifications, seniors can minimize their risk of falls and other injuries, making their everyday lives safer and more enjoyable.
In the bathroom, where slips and accidents are prevalent, installing grab bars and handrails is paramount. Securing these fixtures next to the toilet and in the shower area gives you something to hold onto, reducing fall risk significantly. It is advisable to look for a contractor skilled in home safety modification for proper installation.
Adequate lighting is essential for seniors to see clearly and avoid obstacles. Increase the wattage of bulbs where allowed, and add more light fixtures or lamps, especially in stairways, hallways, and bathrooms. Consider motion-sensor lights for ease of use and energy efficiency.
Secure all rugs with double-sided tape or non-slip backing to prevent them from moving. Check carpets for any tears or raised areas and repair them promptly. This simple step can greatly reduce the risk of falls caused by slipping on loose rugs or tripping over uneven surfaces.
Apply non-slip mats or strips to the bathtub and shower floor. Consider a shower chair and a handheld showerhead to make bathing safer and more comfortable. These adjustments help reduce the risk of slips and falls in wet conditions.
Rearrange furniture to create wide, clear pathways that are easy to navigate. This ensures there is ample room to move around with aids such as walkers or wheelchairs, reducing the likelihood of bumps and falls.
Replace round doorknobs with lever-style handles, which are easier for seniors to operate, especially for those with limited hand strength or arthritis. This upgrade enhances accessibility throughout the home. A smart door lock can offer both security and ease of use, allowing you to lock and unlock your door with a simple code or even remotely. This ensures that you don’t have to manage keys, which can be particularly helpful if you have mobility concerns or suffer from memory issues.
Lower the height of shelves in closets and cabinets to make everyday items more accessible. Avoiding the need to reach up or bend down can help prevent falls and strain-related injuries.
A raised toilet seat with arms can make it much easier and safer for seniors to sit down and stand up. This is particularly helpful for those with reduced mobility and balance. Thanks to a taller design, a comfort-height toilet design will be easier to use.
Smart home devices like voice-activated systems can control lights, thermostats, and locks. Seniors can manage their environment effortlessly, reducing the need to perform physically challenging tasks. Your home can be equipped with a variety of smart devices that improve security and functionality. A smart door lock can offer both security and ease of use, allowing you to lock and unlock your door with a simple code or even remotely. This ensures that you don’t have to manage keys, which can be particularly helpful if you have mobility concerns or suffer from memory issues.
Discover methods to safeguard your residence with devices such as motion-activated lights, which illuminate areas automatically as you approach, reducing the risk of falls during the night. To further integrate home automation for safety, you can install a security system that alerts you to open doors or windows, ensuring that your home remains secure
Install smoke detectors and carbon monoxide detectors on every floor, especially near bedrooms. Check their functionality regularly and keep fire extinguishers accessible, ensuring they are suitable for all types of home fires.
Making your home safer for senior living doesn’t have to be daunting. With these top 10 DIY home safety upgrades, seniors can significantly enhance their living environment, making it more secure and accommodating to their needs. These improvements not only promote independence but also provide peace of mind to both the seniors and their families. For those who prefer professional assistance with more complex modifications, Kaminskiy Care and Repair offers expert services tailored to elder safety and home maintenance. Contact us today! By taking proactive steps today, you can ensure a safer tomorrow for yourself or your loved ones, allowing seniors to enjoy their homes with confidence and comfort.
Installing grab bars in critical areas like the bathroom and along hallways provides extra stability for seniors. Replacing doorknobs with lever handles can also significantly reduce the effort required to open and close doors.
You can create a safer home by removing loose rugs or securing them with non-slip underlays and ensuring that all pathways are clear of clutter. Arrange furniture to create unobstructed paths.
Installing handrails on both sides of staircases and ensuring that doorways are wide enough for walker or wheelchair access are key upgrades. You can also consider lowering sinks and countertops to a more accessible height.
Increasing the number of light fixtures and replacing existing bulbs with LED ones that emit bright, clear light can help seniors see better, reducing the risk of accidents. Nightlights in hallways and bathrooms are also essential for nighttime safety.
Simple measures like adhesive-backed stair treads for better traction on steps, and rearranging commonly used items to lower, more accessible shelves can make a big difference. Additionally, consider the installation of simple handrails to aid movement throughout the house.
Choosing the right ceiling fan for your home can significantly enhance both comfort and style. When selecting a ceiling fan, it’s crucial to consider the size of the room and the height of the ceiling to ensure optimal airflow. For smaller rooms, fans with a diameter of 29 to 36 inches are suitable, while large rooms may require fans ranging from 50 to 71 inches. You can find more detailed sizing recommendations in this ceiling fan buying guide.
Ceiling fan styles vary widely, allowing you to match a fan with your home decor. You can choose from modern, traditional, and transitional designs to complement your space. Additionally, ceiling fans come with various features such as lighting options and remote controls. For rooms with higher ceilings, using a downrod can position the fan at the correct height for better air circulation.
Ensuring energy efficiency is another important factor when shopping for a ceiling fan. Look for fans with the ENERGY STAR® label, which indicates they meet strict energy efficiency guidelines. Fans with an ENERGY STAR® rating can help reduce your energy bills and environmental impact. Moreover, some fans come equipped with reversible motors, allowing you to change the blade direction for seasonal airflow settings.
Choosing the right ceiling fan means considering several important factors like the type and style of the fan, its size and scale, and the motor and performance capabilities.
Ceiling fans come in various types and styles that can suit any home decor. Common types include standard, modern, traditional, contemporary, industrial, and coastal styles. A standard ceiling fan generally fits most home interiors and serves the basic function of air circulation.
Modern and contemporary fans often feature sleek designs and unique materials like metal or glass. Traditional fans tend to have detailed finishes and more conservative designs. If you prefer rugged and practical over aesthetics, you might look into industrial fans, which are often used in larger spaces. Coastal fans typically have features that withstand humid or salty air environments.
When choosing a fan, make sure it complements the decor of your room while meeting your functional needs.
The size of your ceiling fan is crucial to its effectiveness in a room. Fan sizes are determined by blade span, which ranges from 24 inches to over 80 inches. To choose the right fan size, consider the room size:
Positioning is also important. Ensure the distance from the floor to the fan blades is at least 8 feet. For rooms with high ceilings, use a downrod to position the fan correctly for optimal airflow. Low-profile or “hugger” fans are ideal for ceilings under 8 feet.
The performance of a ceiling fan heavily depends on its motor type. The two primary types are AC motors and DC motors. AC motors are traditional and usually less expensive, but DC motors are more energy-efficient and quieter. Consider the fan’s airflow, measured in CFM (cubic feet per minute). Higher CFM means better air circulation, which is crucial for larger rooms. Energy efficiency is another factor; fans with the ENERGY STAR label use less energy which can save you money in the long run. Make sure the fan you choose offers the best balance between performance and energy efficiency.

Proper installation of a ceiling fan ensures efficient performance and safety. Key factors include ceiling height, proper mounting options, and meeting electrical requirements.
Ceiling height is crucial when installing a ceiling fan. For high ceilings, a longer downrod may be necessary to ensure the fan sits at the optimal height. Downrod lengths vary but typically range from 12 to 72 inches.
For ceilings between 8 to 9 feet, a standard mount is often sufficient. For vaulted or sloped ceilings, you will need an angled mount to keep the fan blades parallel to the floor. For low ceilings, consider a flush-mount option, which attaches the fan directly to the ceiling, maintaining enough clearance from the floor. Always ensure there is at least 7 feet of clearance from the floor to the fan blades.
Choosing the right location for your ceiling fan is essential. For optimal airflow, install the fan in the center of the room. In larger rooms, consider installing two fans for better air distribution.
If you have a sloped ceiling, make sure your fan has an angled mounting option. Avoid placing fans directly over beds or other furniture for safety reasons. In rooms with high ceilings, ensure the downrod is long enough to position the fan adequately. Also, keep the fan blades at least 20 inches away from the nearest wall for safety and better performance.
Before installation, check the electrical requirements and ensure your ceiling can support the fan’s weight. Use an electrical box rated for ceiling fan support, not a standard light fixture box.
Turn off the power at the circuit breaker before starting any wiring work. Connect the wires according to the fan’s instructions, typically by matching the black fan wire to the black ceiling wire, the white fan wire to the white ceiling wire, and the green or bare wire for grounding. Secure all connections with wire nuts and ensure they are tight to prevent any electrical hazards.
Selecting the right ceiling fan involves considering various features and accessories. The choices you make can influence energy efficiency, lighting options, and the level of control you have.
Many ceiling fans come with built-in light kits. You can find fans that use standard bulbs or LED bulbs, which are more energy-efficient. If your goal is to save energy and reduce utility bills, look for fans that are Energy Star certified. These fans are designed to meet strict energy efficiency guidelines.
If you prefer adjustable lighting, some fans offer dimmable options. This allows you to set the right mood in your room. LED bulbs often come with dimming features, adding to their appeal. Light kits can be added to most ceiling fans, making it easy to customize your fan to your lighting needs.
Control options for ceiling fans vary widely. The most basic fans use a pull chain for adjusting speed and turning the light on or off. Wall switches offer another level of convenience, allowing you to control your fan without reaching for a chain.
Remote controls bring added comfort, enabling you to adjust settings from anywhere in the room. Modern fans may come with smart features. These include compatibility with smart home systems like Alexa and mobile apps that allow for remote operation. You can schedule your fan to turn on or off at specific times or control it through voice commands.
Features like smart connectivity can make your home more comfortable and efficient. They are particularly useful when your fan is installed in a hard-to-reach area or if you want advanced settings like scheduling and automation.

Choosing the right ceiling fan for your home means considering the room size, your budget, and the style that matches your decor. Each factor plays a crucial role in ensuring your new fan not only looks good but also functions efficiently.
First, think about where you will install the ceiling fan. A fan that is too small won’t provide enough airflow, while a fan that is too large might overpower the room. Rooms up to 75 square feet need fans with blades up to 36 inches in length. For rooms around 144 square feet, choose fans with 42 to 48-inch blades.
For spaces over 225 square feet, opt for 50 to 54-inch blades. Also, consider the ceiling height. Fans should be placed 8 to 9 feet above the floor for the best air circulation. If your ceiling is higher, you may need a longer down rod to position the fan correctly.
Your budget will greatly affect your options. Fans vary widely in price depending on their features, materials, and brand. Establish a budget before you start shopping. Higher-end fans often offer better performance, longer warranties, and more durable materials.
Even if you’re on a tight budget, look for fans with good reviews on performance and reliability. Check for energy-efficient models which can save you money on your power bill in the long run. Remember, sometimes spending a bit more upfront can result in long-term savings.
Ceiling fans come in a wide array of styles, from modern to traditional, and in various finishes. The design of your fan should complement your room’s decor. For example, a sleek, metallic fan might suit a modern living space, while a wooden finish could match a more rustic setting.
Consider the color scheme and existing fixtures in the room. Some fans come with integrated light kits, which can add both functionality and style. Make sure the finish of the fan matches or complements other hardware and decorative elements in the room.
Choosing the right ceiling fan involves considering various factors to ensure it meets your needs.
Firstly, consider the size of the room. For small rooms up to 75 sq. ft., a fan with 36-inch blades or smaller is ideal. Larger rooms need bigger blades.
Pay attention to the ceiling height. Fans should be placed 8 to 9 feet above the floor for optimal airflow. Use a downrod for higher ceilings.
Think about the design and style of the fan. Modern, traditional, or industrial styles can impact the look of your room. Color options also matter.
Mounting options are crucial. Flush mount fans work best in rooms with low ceilings. For high or sloped ceilings, choose a fan with an angled mounting option.
Check the energy efficiency of the fan. Look for Energy Star ratings to help reduce electricity costs.
For small rooms up to 100 square feet, choose a fan that is 29 to 36 inches in diameter. For large rooms up to 400 square feet, pick a fan that is 36 to 50 inches. Great rooms over 400 square feet need a fan that is 50 to 71 inches in size.
When selecting a ceiling fan with lights, consider the room’s natural lighting, the purpose of the lighting, and the style of the light fixtures. Make sure the light output fits the room’s needs and complements the fan design. Energy efficiency is also important for long-term savings.
Choose a ceiling fan color that complements your overall room decor. If your room has neutral tones, opt for a fan in a similar shade. For bolder decor, a contrasting color can make a statement. Consider the room’s lighting and furniture when selecting the fan color to ensure a cohesive look.
Yes, the number of blades affects both efficiency and airflow. Fans with fewer blades (typically three) can move air more effectively and with less drag, making them more energy efficient. More blades can distribute air more smoothly and quietly but might have slightly reduced efficiency.
Patching drywall is a fundamental skill for homeowners and DIY enthusiasts alike. Whether it’s from moving furniture, doorknob collisions, or general wear and tear, walls can sustain damage that requires attention. Understanding how to properly patch drywall not only saves you time and money but also restores your walls to a smooth finish, making them ready for paint or wallpaper. Even if you’re new to DIY repairs, with the right tools and a steady hand, you can make nearly invisible repairs.
Before tackling drywall repairs, assessing the damage and gathering the appropriate materials is important. Small holes, typically caused by screws or nails, can be fixed easily with a simple spackling technique. Larger holes or dents may require a patch and additional steps to blend the repair with the surrounding surface. The key to a successful repair lies in careful preparation, the right mixture of joint compound, and patient sanding to ensure a flat and seamless finish. Once the patch is smooth and dry, it’s ready to be painted, blending the repair with the rest of your wall.
Before you tackle any patching job, it’s essential to get acquainted with the material you’re working with. Drywall is a ubiquitous component in modern construction, owing to its ease of installation and smooth finish. Here’s what you need to know to handle it competently.
There are several types of drywall, each suited for different applications:
It’s critical to select the right type of drywall for your repair to ensure durability and compliance with building codes.
To work with drywall, you need some basic tools that help you measure, cut, and secure the material:
Investing in the right tools can mean the difference between a patch job that’s smooth and one that’s noticeable. Always prioritize quality when choosing your toolkit.
Creating a timeline helps manage the project’s scope and deadlines. Start by listing all tasks, from demolition to final touches.
Estimate the time each task will take, adding buffer time for unexpected delays. Coordinate with contractors to align schedules and confirm availability. A typical bathroom remodel can range from 2 to 6 weeks, depending on the project’s size and complexity. Prioritize critical tasks like plumbing and electrical work before moving on to tiling and fixtures. Document the timeline and regularly review it to ensure everything stays on schedule. Having a clear timeline helps avoid costly delays and keeps the project on track.
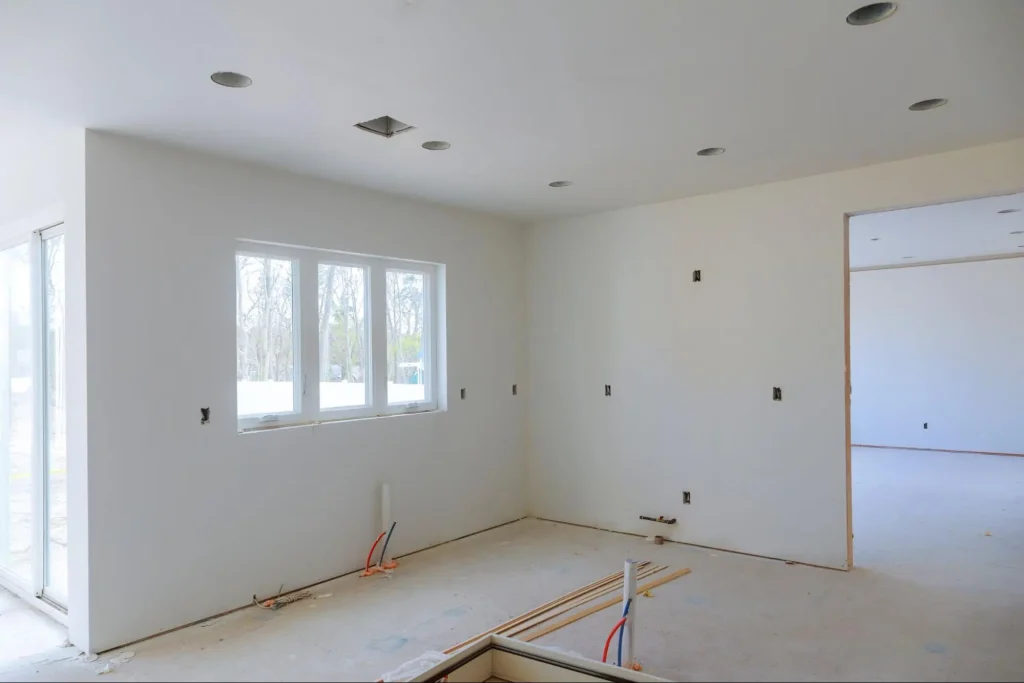
Before you begin the process of patching drywall, it’s important to gather the right tools and materials and to heed certain safety precautions to ensure a smooth and safe operation.
To successfully patch drywall, you’ll need the following:
Additionally, here is a simple list to keep on hand before starting your project:
When handling drywall and associated materials, impose these safety measures:
Ensure your work area is well-ventilated and keep tools on a flat, stable surface when not in use. Always follow the manufacturer’s guidelines for any products and tools used.
Before attempting to patch small holes in drywall, ensure you have the right materials, such as spackle, paint, and sandpaper. It’s a straightforward process that can restore your walls to a like-new condition.
Patching Nail Holes
When dealing with nail holes, they are often minor enough to do a quick fix. Here is a simple way to address these:
Remember to start with a clean area and finish with sanding for a professional look.
For small cracks, the process requires a careful approach to ensure they do not widen over time:
Use paint that matches your wall to blend the patched area with the rest of the surface.
Repairing a large hole in drywall may seem daunting, but with the right tools and techniques, it’s a manageable task. The process can typically be broken into two main parts: removing the damaged area and fitting in a new piece of drywall.
When you encounter a large hole in drywall, it’s key to first cut out the damaged area to create a clean starting point for the patch. To do this effectively:
For a clean cut, your tool must penetrate through the drywall layer without causing additional damage to the surrounding areas.
After you’ve prepared the site, the next step is to install a new drywall patch:
Finally, to seamlessly integrate the patch with the rest of your wall, cover the seams with joint tape, apply joint compound, and sand the area smooth once dry. This process will make the repair virtually invisible and restore the look of your wall.
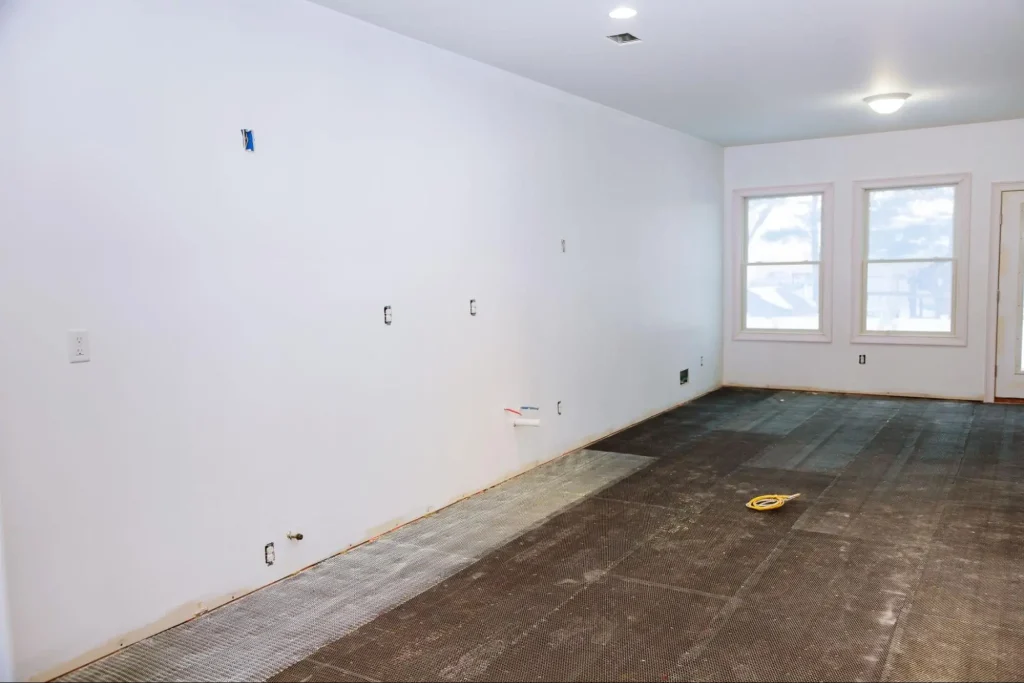
To ensure a smooth and flawless finish on your drywall, it’s crucial to master the final steps of applying joint compound and sanding and painting. These processes will disguise seams and imperfections, making the wall ready for a final coat of paint.
Begin with a thin coat of joint compound, using a drywall knife to fill in the seams where you have placed your drywall tape or mesh tape. Ensure you spread the compound evenly, feathering out the edges to create an undetectable transition between the tape and the wall.
Remember that each layer should be thinly applied – aim for layers no thicker than 1/8 inch.
Once your final coat of joint compound has thoroughly dried, you’re ready to sand. Equip yourself with fine-grit sandpaper and gently buff the area. Your goal is to achieve a surface so smooth that it seamlessly blends with the rest of the wall.
Next, apply paint to your sanded and cleaned drywall. Select a high-quality paint and roll it on in smooth, even strokes.
Always work in well-ventilated areas to ensure safety and the best drying conditions.
Mastering drywall repair is essential for maintaining the integrity and appearance of your walls. Precision and care in your approach are key to achieving smooth surfaces and preventing future damage.
Patching drywall might seem daunting at first, but with the right tools and techniques, it can be a straightforward DIY project. It’s an essential skill that can save you both time and money while keeping your home looking its best.
However, if you’re not confident in your DIY skills or you have a large area that needs repair, Kaminskiy Care and Repair is here to help! Our experienced technicians can handle everything from simple patches to comprehensive drywall repairs and painting, ensuring a professional finish that enhances your home’s beauty and value.
To effectively repair small holes in drywall, first clean the area around the hole. Apply a spackling compound to fill the hole, then smooth it out with a putty knife. Once dry, sand the area until it’s flush with the wall.
For patching a large hole in drywall, you’ll begin by trimming and cleaning around the hole’s edges. Install a backing support and cut a piece of drywall to fit the space. Secure it in place, then cover it with a joint compound, feathering the edges. After it dries, sand for smoothness.
Yes, you can patch screw holes in drywall by filling them with joint compound or spackling. Allow the filler to dry, then sand the area lightly until it blends with the surrounding wall.
A Drywall Repair Kit typically includes a joint compound, a putty knife, a sanding pad, and sometimes a patch or mesh. It’s used for convenient, all-in-one solutions for small repairs, such as nail holes or minor dents.
Yes, priming is necessary after patching drywall to seal the repaired surface and ensure a uniform surface for painting—this helps prevent the patch from showing through the final painted finish.
To replicate drywall texture after a patch job, first observe the type of texture around the repair. Use texturing tools or a sponge to mimic the pattern, then apply a joint compound or texture product to match the surrounding area’s texture.
Before diving into your bathroom remodel, it’s crucial to have a solid plan in place. Creating an essential checklist will save you time, money, and unnecessary stress. Start by identifying your big-picture goal; decide whether you’re looking for a complete overhaul or just a few updates to modernize your space.
Your priorities should guide your planning process. Think about the elements that matter most, such as storage, lighting, or plumbing improvements. Once you have a clear vision, setting a realistic budget and finding reputable contractors will keep your project on track and within your financial means.
Preparing for the physical work can be daunting but manageable with proper preparation. Make sure you have detailed designs and all necessary permits ready. This stage sets the foundation for a smooth installation and finishing process, ensuring your dream bathroom becomes a reality.
Proper planning and design are crucial for a successful bathroom remodel. Focus on defining your vision, selecting the right materials and fixtures, and creating a realistic timeline.
Start by setting a clear vision for your bathroom remodel. Think about the design style you prefer, such as modern, traditional, or rustic.
Create a Pinterest board or collect pictures that inspire you. Decide on the bathroom layout and consider elements like fixtures, the position of the shower or tub, and storage solutions. Detail every aspect, such as the color palette, lighting, and even the type of tiles you want. Knowing your vision will guide other decisions and keep the project on track.
Choosing the right materials and fixtures is essential.
Tiles are a popular choice for walls and floors, offering durability and ease of cleaning. Consider options like ceramic, porcelain, or natural stone. For the walls, you might prefer paint or wallpaper that complements your tiles. Fixtures such as faucets, mirrors, and lighting play a significant role in both functionality and aesthetics. Ensure your faucet and showerhead match your design style. Opt for energy-efficient lighting and consider underfloor heating for added comfort. Don’t forget to select storage solutions that maximize space, like cabinets or shelves.
Creating a timeline helps manage the project’s scope and deadlines. Start by listing all tasks, from demolition to final touches.
Estimate the time each task will take, adding buffer time for unexpected delays. Coordinate with contractors to align schedules and confirm availability. A typical bathroom remodel can range from 2 to 6 weeks, depending on the project’s size and complexity. Prioritize critical tasks like plumbing and electrical work before moving on to tiling and fixtures. Document the timeline and regularly review it to ensure everything stays on schedule. Having a clear timeline helps avoid costly delays and keeps the project on track.
Planning your bathroom remodel starts with careful budgeting and selecting the right professionals. This ensures that your project stays on track and meets your expectations.
Decide on a clear budget before beginning your bathroom remodel. To do this, list all potential costs including materials, labor, permits, and emergency funds for unexpected expenses.
Getting multiple quotes from different contractors can help you find the average cost. This will give you a realistic budget figure.
Allocate funds for high-quality materials where necessary. Cheaper materials might look appealing, but they can cost more in the long run if they need frequent replacement.
Key items to budget for:
Remember, a well-planned budget can prevent overspending and ensure your remodel meets your needs.
Hire licensed and insured professionals to avoid potential risks. Check their certifications and previous work to gauge the quality of work they deliver.
Essential steps when hiring:
Choosing the right professionals will help you avoid delays and costly mistakes. An experienced contractor can provide valuable insights and make your remodel smoother and more efficient.

Before you start any bathroom remodel, it’s crucial to prepare thoroughly. This involves tearing down the old bathroom and addressing essential plumbing and electrical systems to avoid future issues.
Begin by removing all fixtures such as sinks, toilets, and bathtubs. Ensure the water supply is turned off to avoid leaks during this process. This prevents costly accidents and damage.
Next, carefully remove old tiles, drywall, and any subflooring. Wear protective gear to avoid injuries from debris and dust. Dust can settle everywhere, so consider using plastic sheeting to cover surfaces and prevent dust spread.
Pay attention to the framing and structural supports. Inspect for any signs of rot or damage, and replace them if necessary. Proper framing is essential for the stability of your new bathroom.
Turn off the main water supply before working on the plumbing. Inspect and update pipes if they are outdated or damaged. This is a good time to install new plumbing for additional fixtures or features.
When it comes to electrical work, ensure the power is off at the breaker box. Upgrade old wiring to meet current safety standards. Install new switches, light switch covers, and outlets in appropriate locations.
Plan your layout to include adequate lighting and if necessary, install new circuits to handle increased electrical loads. Properly addressing both plumbing and electrical needs upfront will save time and money in the long run. Neglecting these steps can lead to serious issues later.
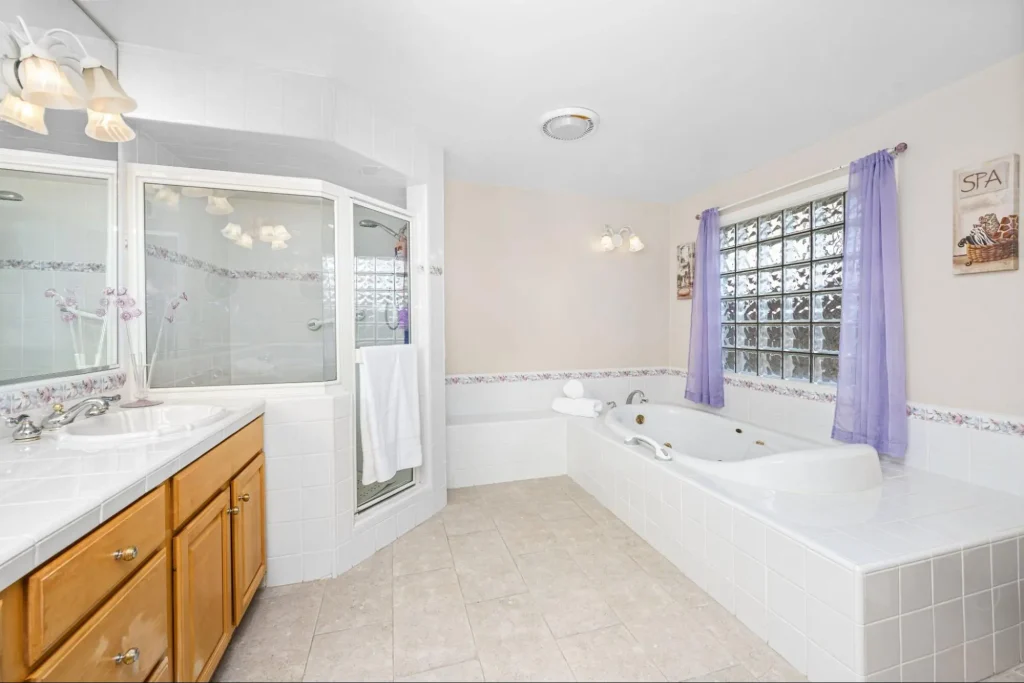
The final stages of your bathroom remodel involve installing essential fixtures and adding the last details that will complete the space. These steps ensure both functionality and aesthetic appeal.
Begin by installing the vanity, sink, and faucets. Ensure the cabinets and storage units are securely mounted. Attach the shower head and shower door, and place the toilet and bathtub in their designated spots. It’s essential to properly connect all plumbing to prevent leaks.Next, focus on the lighting. Install overhead lights, dimmer switches, and smart mirror lighting. Add ventilation by installing an exhaust fan to keep moisture levels in check. Lay down flooring like tile or vinyl, ensuring that tile and grout work is sealed correctly to avoid water damage. Include accessories like a heated towel rack and shiplap walls for added luxury.
After all fixtures are in place, conduct a thorough inspection. Check for any plumbing leaks around the sink, faucets, and toilet. Test all electrical installations, including lights, dimmer switches, and any integrated television setup.
Ensure the shower head has the correct water pressure and that the shower door seals properly. Pay attention to finishes like caulking around the bathtub and sink areas. Confirm that all mirrors are securely hung and that the countertops are free of scratches. Finish by adding final touches like knobs on cabinets and fresh grout if needed. Inspect and clean each part for a spotless, polished look.
Starting a bathroom remodel can be a big task, but careful planning can make it easier.
First, assess your needs. Determine if you want a full overhaul or just an update. Identify key areas you want to focus on, such as showers, sinks, or flooring.
Budgeting is crucial. Plan how much you can spend. This will guide your choices and help you avoid overspending. Think about your design preferences. Do you like a modern look or something more traditional? Sites like Pinterest are great for gathering ideas.
Materials are important. Choose durable and water-resistant options for the bathroom. Tile, granite, and quartz are popular choices.
Hiring the right professionals can make or break your project. Look for local contractors with good reviews. Kaminskiy Care and Repair offers remarkable bathroom remodeling ideas and services that will guarantee you peace of mind.
Finally, timing matters. Set a timeline for each stage of your remodel. This helps keep you on track and ensures the project finishes on time. By focusing on these key areas, you can achieve a successful bathroom remodel.
First, create a detailed plan and budget. This should include design ideas, a list of required materials, and an estimated timeline. Get quotes from contractors and decide if you need permits.
Consider durable and water-resistant materials. Ceramic or porcelain tiles are popular for floors and walls. Quartz and granite are good choices for countertops. Choose moisture-resistant paint and high-quality fixtures to ensure longevity.
Focus on durability, style, and functionality. Ensure fixtures match your overall design theme. Consider water-saving features for faucets, showerheads, and toilets. Look for quality brands that offer good warranties.
Set a realistic budget based on your financial situation and the scope of work. Include costs for materials, labor, permits, and unexpected expenses. Track your spending closely and adjust your plan as needed.
No price games. You get a clear written quote before any work begins, backed by our workmanship warranty.