When it comes to home improvement projects, having the right tools and supplies is essential. For residents of Walnut Creek, CA, finding reliable hardware stores that cater to handyman needs can significantly impact the success of their projects.
Walnut Creek boasts a variety of hardware stores, each offering unique selections of tools, materials, and services. From well-known chains to local gems, these stores provide everything a handyman could need. Let’s dive into some of the best hardware stores in Walnut Creek and what they offer.
Home Depot is a household name in home improvement, and its Walnut Creek location is no exception. Known for its extensive inventory, Home Depot offers everything from essential hand tools to advanced power tools, building materials, plumbing supplies, and more. That makes it a one-stop shop for all your handyman needs.
Home Depot also offers a range of services that can be incredibly beneficial for handymen. These include tool rental, key cutting, and even workshops that provide training on various DIY projects. The knowledgeable staff at Home Depot is always available to help, whether you need advice on the best products for your project or assistance finding specific items.
Another major player in the hardware store market is Outdoor Supply Hardware. Outdoor Supply Hardware offers a wide range of products suitable for any handyman project. Its stores are easily accessible and provide a convenient shopping experience.
Known for its high-quality products and exceptional customer service. The store’s layout is designed to make finding items straightforward, and the staff is always available to offer guidance and support. Outdoor Supply Hardware also provides online shopping options with in-store pickup or delivery, making getting the supplies you need easier than ever.
Harbor Freight Tools is a popular destination for those looking for quality tools at discounted prices. Located conveniently near Walnut Creek, this store offers a wide range of tools and equipment perfect for any handyman project. From power and hand tools to generators and air compressors, Harbor Freight Tools has a comprehensive selection of products.
What sets Harbor Freight Tools apart is their commitment to affordability without compromising on quality. The store frequently offers sales and promotions, making it an excellent choice for budget-conscious handymen. Additionally, their customer loyalty program provides even more savings and exclusive deals.
Belmont Hardware is a local favorite in Walnut Creek, known for its extensive selection of building materials, plumbing, and hardware supplies. Belmont Hardware has been serving the community for decades, offering personalized service and expert advice. Whether working on a construction project or a simple repair, Belmont Hardware has the materials and tools you need.
True Value Hardware is another excellent option for handyman supplies in Walnut Creek. This community-oriented store offers diverse products, including tools, paint, electrical supplies, and gardening equipment. True Value is known for its reliable customer service and commitment to the local community.
The staff at True Value Hardware are always ready to provide assistance and offer expert advice on your projects. Whether you’re looking for a specific tool or need recommendations on the best materials for a job, True Value is a trusted resource for handymen in Walnut Creek.
Kaminskiy Care and Repair is a trusted name for handyman service in Walnut Creek, offering a comprehensive range of services. While we do not sell hardware supplies, our expertise and professional service make us an invaluable resource for your home improvement projects. Kaminskiy Care and Repair provides top-notch repair, installation, and maintenance services, ensuring your projects are completed efficiently and effectively.
Finding the right hardware store is crucial for any handyman looking to complete projects efficiently and effectively. Walnut Creek offers a variety of excellent hardware stores, each with its strengths and specialties.
Whether you prefer Home Depot’s extensive selection and professional services, Outdoor Supply Hardware’s high-quality products and exceptional customer service, or Belmont Hardware’s personalized service and local expertise, you’ll find the perfect store to meet your needs.
Kaminskiy Care and Repair also provides a wide range of professional handyman services to assist with any project. By exploring these top hardware stores and service providers, you can ensure you have access to the best tools, supplies, and expertise for all your handyman projects in Walnut Creek.
Are you looking to upgrade your home with new fixtures and fittings? Whether you’re renovating your bathroom or kitchen or simply replacing old fixtures that have seen better days, choosing the right ones is essential.
With so many options available, it can be overwhelming to know where to start. That’s where handyman advice comes in. By following some simple tips and guidelines, you can choose the right fixtures and fittings that will look great and function well for years to come.
Assessing Your Space and Needs Before you start shopping for fixtures and fittings, it is important to assess your space and needs. Consider factors such as the size of the room, the style of your home, and your personal preferences. For example, if you have a small bathroom, you may want to choose space-saving and compact fixtures.
If you have a large kitchen, you may want to choose a faucet with a high arc to accommodate larger pots and pans. By assessing your space and needs, you can narrow down your options and choose fixtures that are both practical and stylish.
Selecting Quality Fixtures and Fittings When it comes to fixtures and fittings, quality is key. You want to choose products that are durable, reliable, and built to last. Look for fixtures and fittings made from high-quality materials such as brass, stainless steel, or ceramic.
Check for features such as water-saving technology, easy installation, and warranties. Choosing quality fixtures and fittings ensures that your investment will pay off in the long run.

Assessing your space and needs is essential before choosing fixtures and fittings. That involves understanding each room’s dimensions and identifying each fixture’s functional requirements.
The first step in assessing your space is to understand the dimensions of each room. That will help you determine the size and type of fixtures and fittings that will fit comfortably in each space. For example, if you have a small bathroom, you may need to choose a compact toilet and sink to maximize space.
To measure the dimensions of your room, use a tape measure to measure each space’s length, width, and height. Record these measurements on paper or in a spreadsheet to refer back to when choosing fixtures and fittings.
The next step in assessing your space is to identify each fixture’s functional requirements. That involves determining how each fixture will be used and the necessary features to meet your needs.
For example, when choosing a showerhead, consider whether you want a fixed or handheld option and whether you need multiple spray settings. When selecting a toilet, consider whether you need a standard or elongated bowl and whether you want a dual-flush option to save water.
Make a list of each fixture’s functional requirements and use this list as a guide when choosing fixtures and fittings. That will ensure you select options that meet your needs and make your space functional and comfortable.
By assessing your space and needs, you can choose fixtures and fittings that are the right size and have the necessary features to meet your requirements. This will ensure that your space is functional and comfortable and that you are satisfied with your choices for years to come.
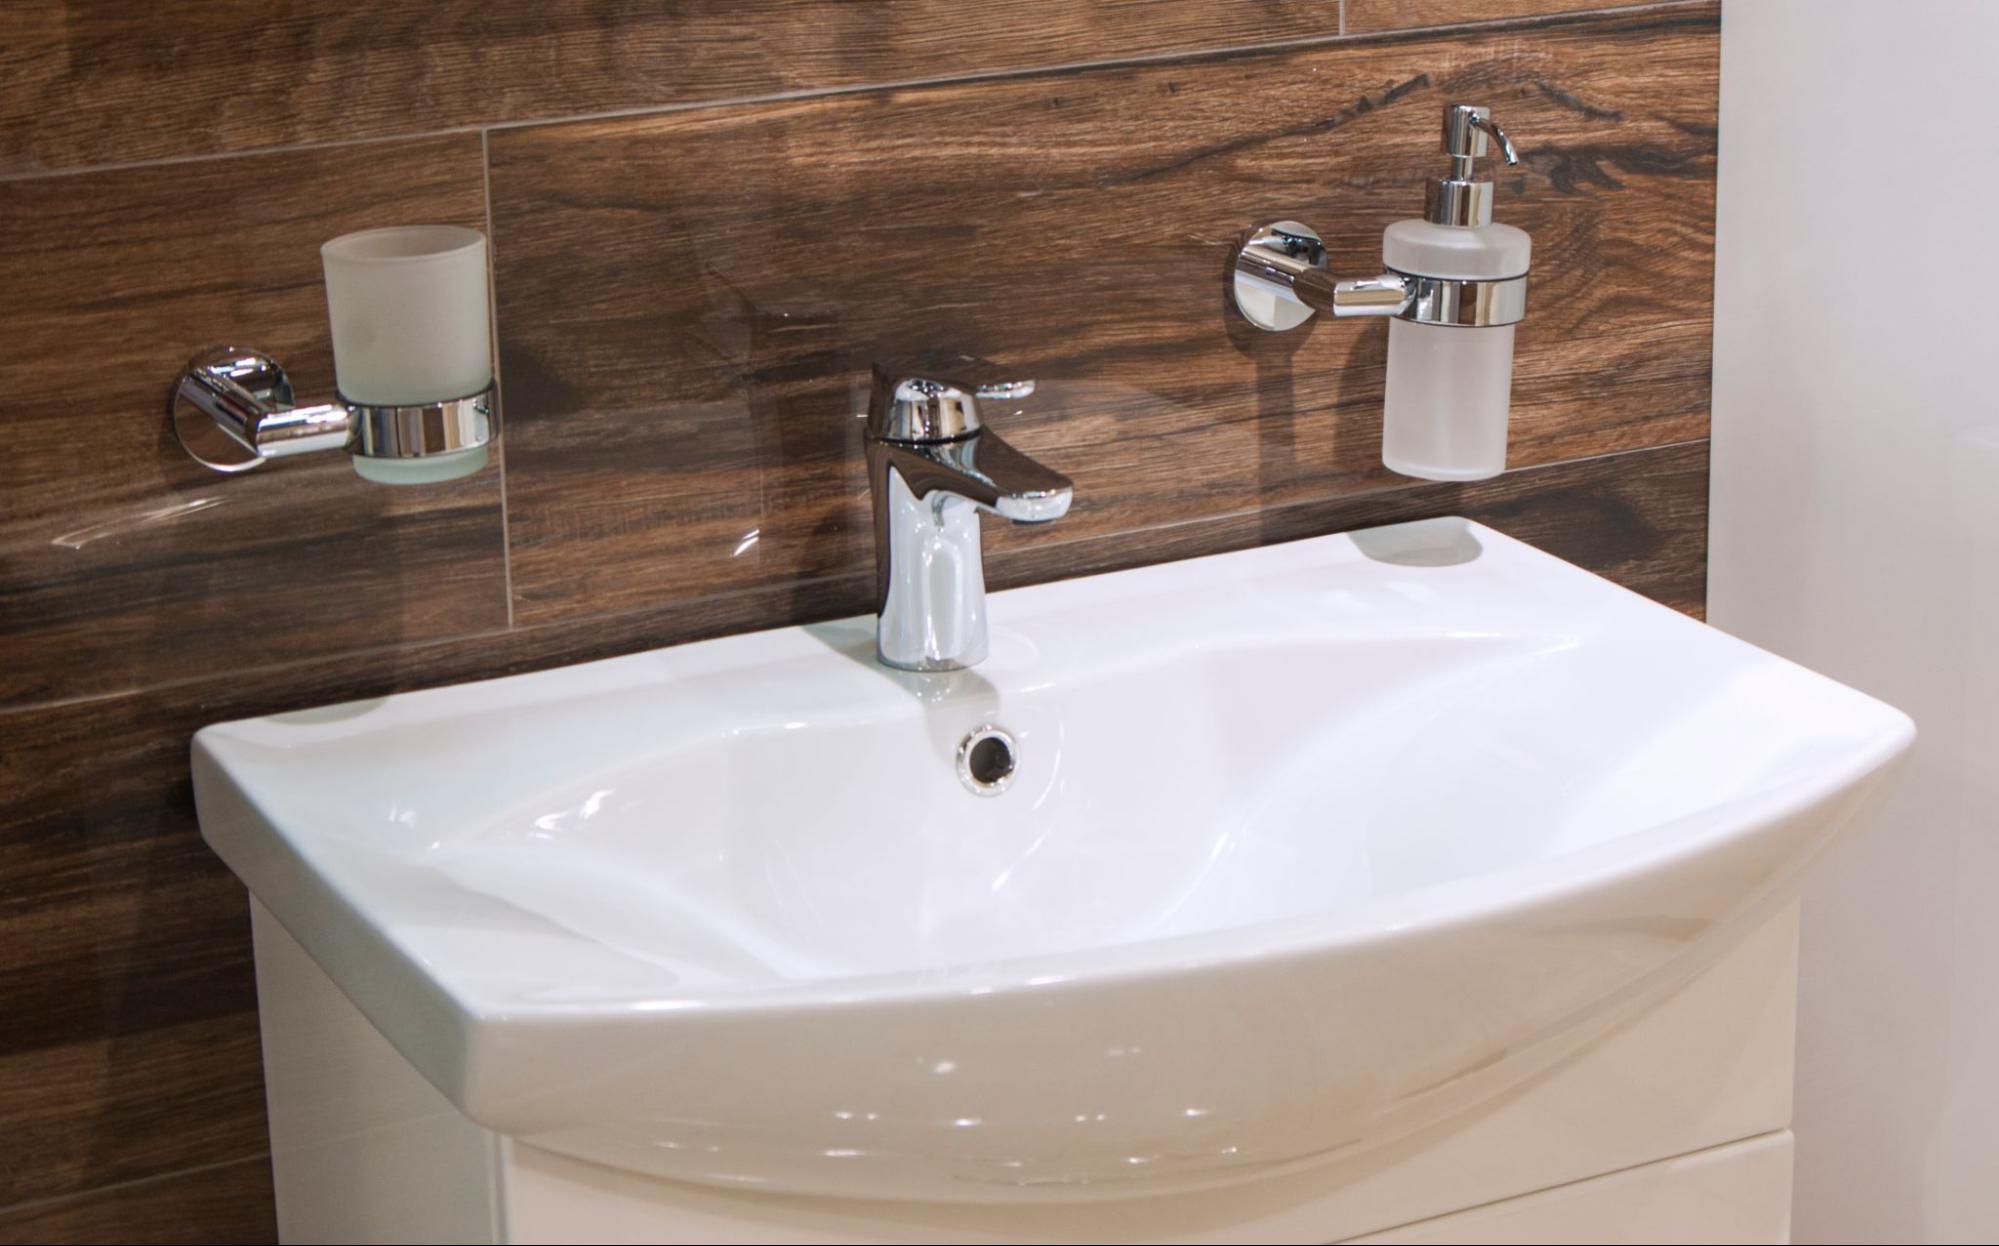
When selecting fixtures and fittings for your home, choosing high-quality, durable, and aesthetically pleasing materials is essential. Here are some key factors to consider.
One of the most important factors to consider when selecting fixtures and fittings is the material they are made from. High-quality materials such as brass, stainless steel, and porcelain are durable and long-lasting, making them an excellent investment for your home. These materials are also aesthetically pleasing and can add a touch of elegance to your decor.
Another critical factor to consider when selecting fixtures and fittings is their compatibility with your existing decor. Choose fixtures and fittings that complement your existing decor and enhance your home’s overall look and feel. For example, choose fixtures and fittings with clean lines and simple designs if you have a modern minimalist decor.
Finally, it’s essential to consider the ease of installation and maintenance when selecting fixtures and fittings. Choose fixtures and fittings that are easy to install and maintain, saving you time and money in the long run. For example, choose fixtures and fittings that can be easily cleaned with a damp cloth and mild soap.
By considering these key factors when selecting fixtures and fittings, you can ensure that you choose high-quality materials that are durable and aesthetically pleasing, compatible with your existing decor, and easy to install and maintain.
Choosing the right fixtures and fittings can be daunting, but it can be much easier with the right advice. This article covers several vital factors you should consider when selecting fixtures and fittings for your home.
Firstly, it is crucial to consider the style of your home and choose fixtures and fittings that complement it. You should also consider the size of your room and choose fixtures and fittings that fit well and do not make the room look cluttered.
When selecting fixtures and fittings, it is crucial to consider the quality of the products. Cheap fixtures and fittings may save you money in the short term, but they will likely wear out quickly and require frequent repairs or replacements. It is better to invest in high-quality fixtures and fittings that will last longer and require less maintenance.
Another essential factor to consider is the cost of the fixtures and fittings. You should set a budget and stick to it. That will help you avoid overspending and ensure you can afford all the necessary fixtures and fittings.
Finally, hiring a reputable handyman to install your fixtures and fittings is vital. A professional handyman will ensure that your fixtures and fittings are installed correctly and safely. Kaminskiy Care and Repair is a reputable handyman service that can help you with all your installation needs.
By considering these factors and following the advice of a professional handyman, you can choose the right fixtures and fittings for your home and ensure that they are installed correctly and safely.
When selecting lighting fixtures for an open floor plan, consider the overall style of your home and choose fixtures that complement it. You should also create a cohesive look by selecting fixtures with a similar finish or color. Additionally, consider the size and scale of each fixture to ensure that they are proportional to the space and don’t overwhelm the room.
When choosing light fixtures for your kitchen and dining area, consider each space’s function. In the kitchen, you’ll want to select fixtures that provide ample task lighting for cooking and food preparation.
In the dining area, you’ll want to choose fixtures that create a warm and inviting atmosphere for entertaining. You should also consider the size and scale of each fixture to ensure that they are proportional to the space.
When selecting plumbing fixtures for a renovation, you should consider the overall style of your home and choose fixtures that complement it. You should also consider each space’s function and select appropriate fixtures for the room. Additionally, you should consider the quality and durability of each fixture to ensure that they will last for many years to come.
A sagging or sticking fence gate can be more than just an eyesore; it can make using your yard frustrating. Knowing how to fix a fence gate can save you time and money. By addressing the problem yourself, you avoid the costs of hiring a professional and learn valuable DIY skills. Whether it’s tightening loose hinges or replacing the entire gate, you’ll have it working smoothly again in no time.
Begin by evaluating the gate and its components, such as the hinges and latches, to determine what needs fixing. Sometimes, simply adjusting a few screws can make a difference. If the damage is more extensive, removing the gate and starting fresh might be necessary. Armed with the right tools and materials, you’ll be well-prepared to tackle any fence gate problems you encounter.
Before you can fix your fence gate, it’s important to carefully inspect it. This will help you know what’s wrong and what tools you need.
First, look at the gate’s alignment. Does it hang unevenly or scrape the ground? These are signs that might be sagging or misaligned. Examine the hinges and latches closely. Check for rust, wear, or missing screws.
Next, inspect the gate frame and panels for cracks, splinters, or breaks. These can weaken the gate structure. Also, take a look at the posts supporting the gate. If they are wobbly or leaning, this might be the root of your problem.
Check the gate’s hardware as well. Loose bolts or screws can cause the gate to malfunction. Inspect where the gate attaches to the fence post. Make sure all connections are secure and intact.
After identifying issues, you will need to gather the right materials. For a sagging gate, you might need a turnbuckle kit or a gate repair kit. These can help pull the gate back into place. You’ll also need basic tools like a level, screwdriver, and wrench.
If the hinges are damaged, purchase new ones. Opt for heavy-duty hinges if your gate is large or heavy. For loose or missing hardware, get the appropriate screws or bolts.
For frame and panel repairs, you’ll need wood fillers, replacement boards, and a hammer. If the posts are unstable, concrete mix and post levelers can help reinforce them.
To repair a fence gate, you need essential tools and quality materials. These items ensure safety and efficiency in the repair process.
Selecting the right tools is crucial. You’ll need a screwdriver, level, and drill. A screwdriver will help you tighten and remove screws. Use a level to make sure your gate is even. A drill can make the job quicker, especially for creating pilot holes.
Other useful tools include pliers, wrenches, and measuring tape. Pliers can grip screws tightly. A wrench is handy for dealing with bolts. Measuring tape ensures you get precise dimensions when aligning the gate.
Don’t forget safety equipment like gloves and safety glasses. They protect your hands and eyes from sharp objects and debris.
High-quality replacement parts are essential. Choose rust-resistant screws and hinges. They last longer and handle weather conditions better.
For hinges, pick ones with strong load-bearing capacity. This prevents your gate from sagging over time. Look for galvanized or stainless steel materials to avoid rust.
Latches and bolts should also be sturdy. They secure your gate effectively. Ensure the dimensions match your existing gate and fence post.
Check for wood pieces if your gate frame needs repair. Select treated or hardwood to increase durability. Quality materials make your repair job longer-lasting and more reliable.

Before installing a new gate, you need to safely dismantle the old one and properly dispose of the materials. This process involves removing the gate from its hinges and dealing with any old or damaged parts.
First, support the gate in its current position to prevent it from falling. Place a 2×4 or similar board underneath to hold it at the needed height. Ensure the gate is stable before proceeding.
Next, use a screwdriver or drill to remove the screws from the hinges. Work from the bottom hinge to the top to keep the gate steady. You might need to have another person help hold the gate for safety, especially if it’s heavy or large.
After removing the screws, carefully lift the gate off the hinges. If the gate is sagging or difficult to remove, it could be due to warped wood or rusted hinges. In this case, you may need a crowbar or extra leverage to pry it free.
Finally, inspect the fence post and hinges. If the post is wobbly or damaged, you’ll need to address that before installing the new gate.
Once the gate is removed, decide how to dispose of the materials. If the wood is in good condition, consider repurposing it for another project. For example, you might use it for small garden fences or plant trellises.
Metal hinges and screws should be recycled. Remove rust and other debris before taking them to a recycling center. Check whether your local facility accepts small metal parts or if you need to drop them off at a specialty center.
Proper disposal of old materials ensures a clean workspace and complies with local regulations. It also allows you to start fresh with high-quality components for your new gate.
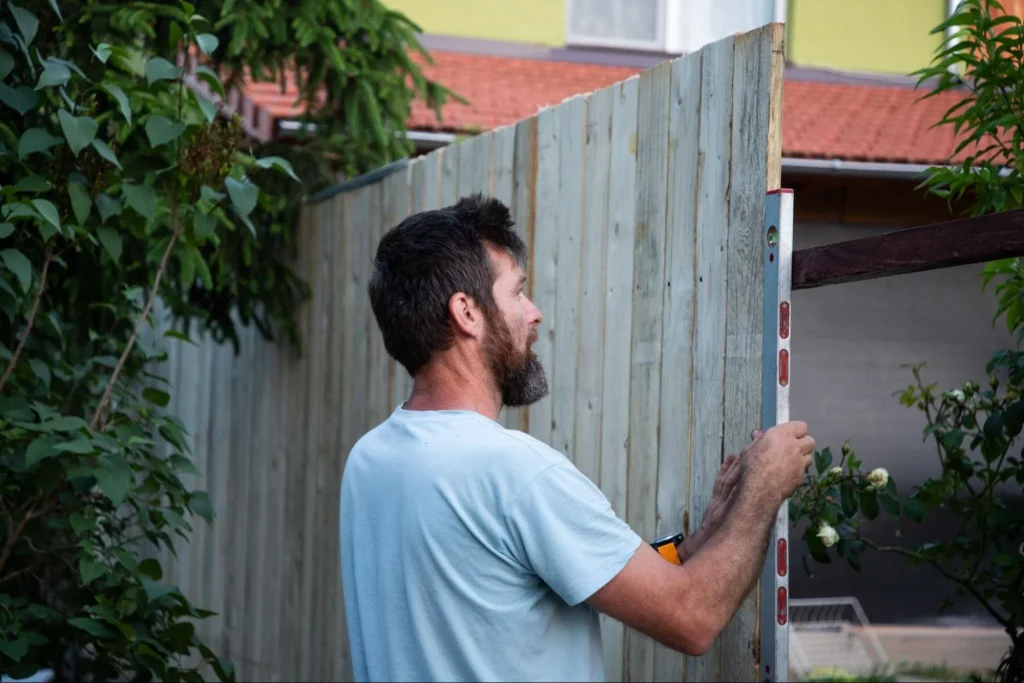
Making sure your new gate functions well involves setting up sturdy posts and hinges and then properly aligning and attaching the gate to ensure smooth operation and durability.
The first step is to secure the posts. Place the posts in holes about 2 feet deep to provide a solid base. Ensure the posts are vertical using a level. Fill around the posts with concrete or packed dirt, then let it set.
Next, install the hinges on the gate. Position the hinges about 8-12 inches from the top and bottom. This placement helps distribute the weight evenly.
Bolt or screw the hinges firmly to the posts. This will secure the gate in place. Use heavy-duty hardware to ensure longevity.
Start by holding the gate up to the posts. Check that it lines up with the fence and is at the right height. Adjust the mounting blocks if necessary.
Once aligned, mark where the hinges will be attached to the gate. Drill pilot holes for the hinge screws, then screw them in tightly.
Finally, test the gate to ensure it swings freely and closes securely. Make any adjustments needed for smooth operation. If the gate isn’t level, tweak the hinges until it is correct.
By following these steps, you’ll have a sturdy, well-aligned gate that enhances the security and look of your fence.
To repair a sagging wooden gate, first assess the condition of the gate and the fence post. Tighten any loose hinges using a screwdriver. If the hinges are stripped, replace them with new ones. For significant sagging, install a turnbuckle kit to realign the gate.
Loosen the screws on the hinges just enough to adjust the gate. Close the gate to see if it aligns correctly. Tighten the screws once the gate is in the correct position. If the hinges are damaged, replace them with new, appropriately sized hinges.
First, check for any obstructions in the gate’s path. Sand down any rough edges or swollen wood that may cause the gate to stick. Lubricate the hinges to ensure smooth movement. If the latch is misaligned, adjust it to ensure the gate closes properly.
Consider the cost of materials such as wood, metal, or vinyl. Factor in the cost of new hinges, latches, and any additional hardware. Labor costs should also be included if you’re hiring a professional. Always account for any potential repairs to the fence post or surrounding area.
Timely repairs in your home are crucial for maintaining its value and safety. Addressing issues promptly can save you from costly damages later on. Whether it’s a small crack in the wall or a more significant problem like a leaky roof, ignoring these repairs can lead to more extensive issues that are harder to fix.
As a homeowner, you face several common repair tasks that, if left unattended, can escalate into significant challenges. Understanding what needs attention and how to handle these repairs will not only keep your home in good shape but also enhance your living experience. A reliable handyman can be an invaluable resource, helping you identify and prioritize these tasks efficiently.
Being proactive about repairs can also prevent accidents and health hazards. Regular inspections and maintenance create a safer environment and contribute to a positive home atmosphere. Establishing a good relationship with a handyman can provide you with peace of mind, knowing that you have a trusted expert to rely on for your home’s needs.
Timely repairs play a crucial role in maintaining your home’s value and safety. Addressing issues as they arise can save you money and prevent larger problems from developing. Let’s look at the specific benefits of regular maintenance and early intervention.
Regular maintenance offers significant cost savings. Simple tasks, like fixing leaks or patching cracks, often take less time and money compared to larger repairs later on. For example, a small plumbing issue can lead to water damage if ignored, resulting in much higher repair costs.
Consider tracking your maintenance expenses. Create a list of tasks completed each year. This will help you see patterns in spending and identify potential savings. When you invest in timely repairs, you protect your home from deteriorating conditions that can escalate quickly.
When you intervene early, you greatly reduce the risk of extensive damage. Ignoring problems can lead to issues like mold, structural failure, or electrical hazards. These conditions can pose health risks and may require costly fixes.
For instance, a small crack in your foundation can expand over time. Repairing it early could cost a few hundred dollars, whereas delaying it might result in thousands in repairs.
To make the most of early intervention, regularly inspect your home and address concerns immediately. Set a schedule for evaluations, especially before harsh weather changes. This proactive approach will safeguard your home, your finances, and your peace of mind.

Regular maintenance is key to keeping your home or workspace in good condition. Being aware of common repairs can help you address issues before they escalate. Here are three main areas to focus on: plumbing, electrical systems, and structural stability.
Plumbing problems can disrupt your daily routine. Common issues include leaky faucets, running toilets, and clogged drains.
Addressing these plumbing issues promptly can prevent more serious water damage.
Electrical maintenance is crucial for safety and efficiency. Common electrical problems include faulty outlets, flickering lights, and tripped breakers.
Taking care of these electrical issues boosts safety and can reduce energy costs.
Maintaining structural integrity is vital for any building. Common structural repairs involve drywall, foundation, and roofing problems.
Paying attention to these structural aspects can enhance the durability of your home or workspace.
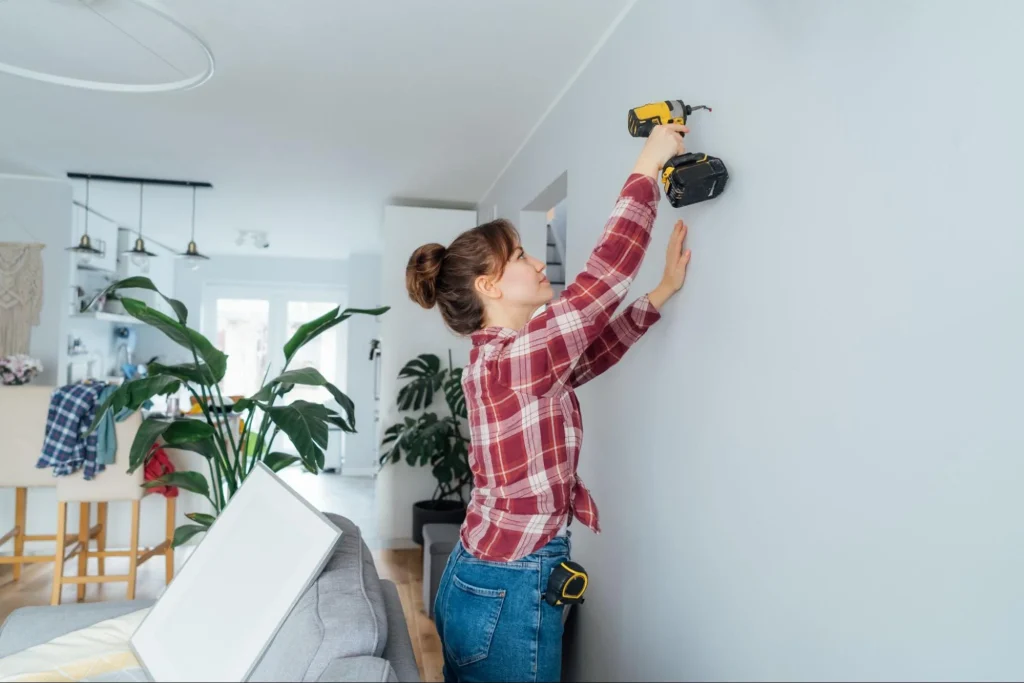
When taking on repair tasks, safety should always be your priority. Proper preparation and the use of protective measures can help you avoid injuries and ensure a successful outcome.
Using personal protective equipment (PPE) is essential for any repair job. Start with gloves to protect your hands from sharp edges, chemicals, and other hazards. Safety glasses are important for eye protection when cutting, drilling, or working with harmful materials.
Wear work boots with sturdy soles to prevent injuries from heavy objects. Depending on the task, consider using a hard hat if you are working in an area where objects could fall.
Also, include a dust mask when dealing with wood or other materials that produce dust. Be sure to always inspect your PPE for damage before use to guarantee it is effective in keeping you safe.
Electrical tasks require special attention. Always turn off the power at the circuit breaker before starting any repair work. Use a voltage tester to check that the power is off in the area where you are working.
Wear insulated gloves and use tools with rubber handles to minimize your risk of electric shock. Keep tools and cords dry to avoid accidents.
Be cautious of overloaded circuits, which can cause fires. Use the correct wattage for bulbs and avoid using damaged extension cords. If you’re not confident in your skills, it’s best to hire a professional to ensure safety during electrical repairs.
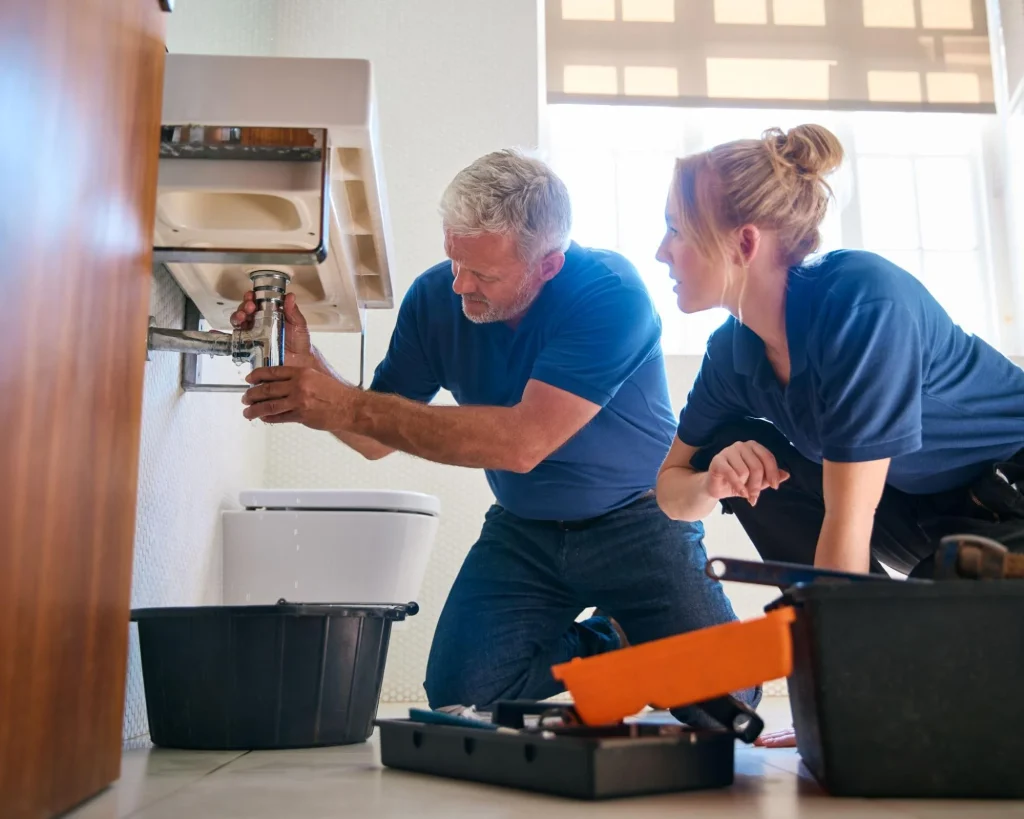
Knowing when to tackle repairs yourself and when to call in a professional can save you time and money. It’s important to assess the complexity of the job and understand the specific situations that warrant expert assistance.
When you face a repair issue, start by evaluating how complex it is. Ask yourself the following questions:
A good rule of thumb is to opt for professional help when the repair could result in injury, or significant damage or requires specialized knowledge.
Certain repairs should always be left to the professionals. These include:
When in doubt, it’s better to consult a professional. This not only ensures safety but also guarantees that the repair meets local codes and standards.

Creating a strong bond with a handyman can lead to better service and trust. When you understand the qualities to look for and emphasize clear communication, your relationship will flourish.
When searching for a handyman, certain traits are essential. First, ensure they have experience and skills relevant to the work you need. Review their portfolio or ask for references to see past projects.
Next, look for reliability. A good handyman shows up on time and completes tasks as promised. This reliability builds your confidence in their ability to handle your repairs.
Trustworthiness is another key quality. You want someone who respects your home and belongings. Ask for background checks or read reviews to gauge their character.
Finally, effective problem-solving skills are crucial. A handyman should be able to assess issues and propose viable solutions. This will save you time and money in the long run.
Clear communication is vital in any handyman-client relationship. Start by discussing your expectations upfront. Describe the tasks you need help with and what you’re hoping to achieve.
Use specific language when explaining your needs. Avoid vague descriptions, as they can lead to misunderstandings. For instance, instead of saying, “I need this fixed,” specify what “this” is and the desired outcome.
Establish a timeline as well. If you have a deadline, share it. This ensures your handyman understands the urgency and can plan accordingly.
Timely repairs are essential for maintaining your home’s safety and value. When issues are addressed quickly, you can prevent them from becoming bigger and costlier.
Pay attention to small problems, like leaks or cracks. These might seem minor, but they can lead to significant damage over time.
Make a checklist of repairs needed around your home. Prioritize these tasks to stay organized and ensure everything is noticed. By addressing repairs promptly, you protect your investment and enhance the comfort of your living space. Your home deserves care, and you are capable of providing it.
Addressing repairs quickly helps prevent further damage. For instance, a small leak can lead to mold growth if not fixed promptly. Quick action can save you from more extensive repairs down the line.
Regular property maintenance keeps your home in good shape and helps retain its value. It also reduces the likelihood of unexpected repair costs. This way, you can manage your budget better and plan for improvements.
When prioritizing repairs, consider factors like safety, impact on daily living, and cost. Addressing safety issues first is crucial, as they can pose immediate risks. Additionally, evaluate how repairs might affect your daily routine.
A skilled handyman can provide regular check-ups and maintenance for your installations. This includes adjusting fittings, sealing gaps, and ensuring everything functions properly. Regular attention can significantly extend the life of appliances and systems.
Delaying minor repairs can lead to larger, more costly issues. For example, ignoring a small crack in the wall may result in structural damage. This can also disrupt your daily activities or business operations if left unaddressed.
Pressure washing is an effective way to clean your home’s exterior, driveways, and decks. To ensure your project is both safe and successful, it’s essential to follow proper techniques and best practices. Knowing how to prepare for the task and execute it properly can save you time and effort while protecting your surfaces from damage.
As a homeowner, you want your outdoor spaces to look their best. Understanding how to use a pressure washer safely will help you achieve a thorough cleaning without risking injury or harm to your property. Equipped with the right tips, you can transform your space while enjoying a sense of accomplishment.
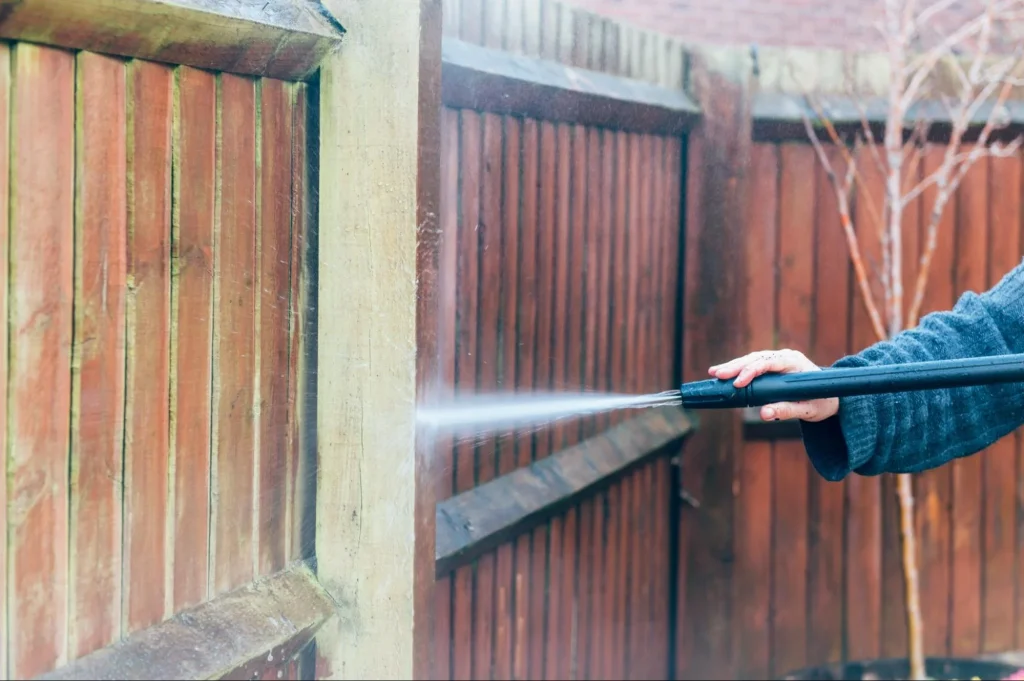
Preparation is key to a successful pressure washing job. You need to ensure you have the right equipment and take necessary safety measures before you start cleaning. Additionally, understanding the area that needs attention will help you achieve better results.
Knowing how to use your pressure washer is crucial. Whether you choose an electric pressure washer or a gas pressure washer, read the manual before getting started. Check the PSI (pounds per square inch) rating, as higher numbers mean more power for tougher stains.
Ensure you have the right nozzles for various surfaces. Different colors represent different spray patterns, like 0°, 15°, 25°, and 40°. For example, a 15° nozzle works well on concrete, while a 40° nozzle is better for delicate surfaces like wood.
Before you begin, put on protective gear. Wear safety goggles to shield your eyes from debris, along with gloves to protect your hands from harsh chemicals. Closed-toe shoes are also essential to prevent injuries.
Make sure the power source is safe. If you’re using an electric pressure washer, double-check outlets for damage. For gas models, ensure adequate ventilation. Always keep a safe distance from moving parts and avoid pointing the nozzle at people or pets.
Take time to examine the area you plan to clean. Look for fragile items that might get damaged, such as plants, furniture, or decorations. Move them out of the way before you start.
Check for any electrical outlets, light fixtures, or other hazards around the cleaning zone. Identify any surfaces that may need special detergents, particularly for stains or mildew. Being aware of these factors will help you work efficiently and avoid potential issues during your pressure washing task.
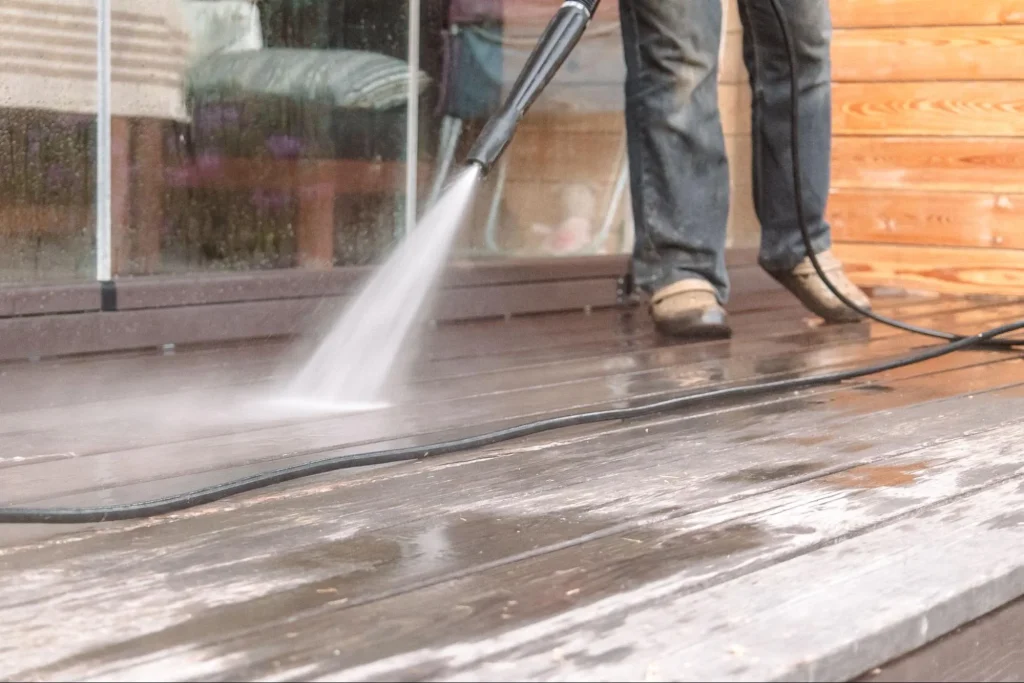
To achieve clean surfaces without causing damage, you need to follow effective washing techniques and ensure proper post-washing maintenance. Both steps are essential for successful pressure washing.
Start by selecting the right nozzle tips for your pressure washer. Each tip creates different spray patterns and pressure settings, which can impact your efficiency. For example, a wide spray is best for large areas, while a narrow tip is great for tough stains.
Always maintain a distance of 6 to 12 inches from the surface. This distance helps prevent damage while effectively loosening dirt and grime. Use a consistent washing technique, moving the wand in a sweeping motion, and overlapping each pass slightly.
Incorporate a surface cleaner attachment for large flat areas like driveways and patios. This helps cover more ground quickly while maintaining uniformity. Remember to rinse thoroughly after washing to remove any residue, especially when using chemicals or detergents.
After pressure washing, it’s crucial to perform maintenance on your equipment. Check the pressure washer for clogs or wear. Clean or replace the nozzle tips if necessary to ensure optimal performance for future jobs.
Inspect the surfaces you washed for any damages that may have been revealed during cleaning. Look for cracks or worn spots on your siding and other surfaces. Repair any issues promptly to prevent further damage.
Lastly, store your pressure washer properly. Drain the water to avoid freezing or internal damage. Keeping your equipment in good shape means less chance of breakdown and costly repairs. Regular maintenance will ensure your pressure washer remains effective for years to come.
When pressure washing, safety, and technique are key to effective results. Here are some essential tips:
Best Practices include:
By following these guidelines, you can achieve a clean and polished look while keeping safety at the forefront.
For safety precautions, always wear protective gear such as safety goggles, gloves, and closed-toe shoes. This will protect you from debris and chemicals.
Make sure to check the condition of your equipment before use. Avoid pointing the nozzle at people or pets and stay clear of electrical lines.
Use detergents specifically designed for pressure washing. These are often labeled as pressure washer detergents and come in various formulas for different surfaces.
For tougher stains, a mild bleach solution can be effective on mold and mildew. Always follow the manufacturer’s instructions for mixing and dilution.
Start from the top and work your way down. This prevents dirty water from running over clean areas.
Use a consistent sweeping motion, overlapping each pass slightly. This helps to evenly cover the surface and ensures no spots are missed.
Read the manufacturer’s manual carefully before beginning. Familiarize yourself with the parts and controls of the machine.
Start with a test on a small, inconspicuous area to gauge the pressure and effectiveness. Adjust settings as needed based on the surface.
Fire and water damage can be devastating for any homeowner. Understanding the restoration process can help you recover quickly and protect your property from further issues. Whether you are facing the aftermath of a fire or dealing with water damage, knowing the right steps to take is essential.
In this guide, you will learn about effective preventative measures to minimize risks, as well as what to do immediately after an incident. You will also find tips on selecting a professional restoration service to ensure your home is restored properly and safely.
By being informed and prepared, you can take charge of the restoration process and safeguard your home against future damage.

Understanding the types of damage caused by fire and water is crucial for homeowners. Each type of damage has unique characteristics and risks that require specific restoration methods. Recognizing these aspects can help you respond effectively.
Fire damage comes in several forms, each impacting your home differently. The most common types include:
Water damage fits into three main categories that reflect the source and severity of the issue:
Both fire and water damage lead to significant harm to building materials. Understanding these impacts helps you prioritize repairs:
Recognizing the specific types and impacts of fire and water damage is vital for effective restoration. Knowing what to expect can guide your cleanup efforts and inform your discussions with restoration professionals.
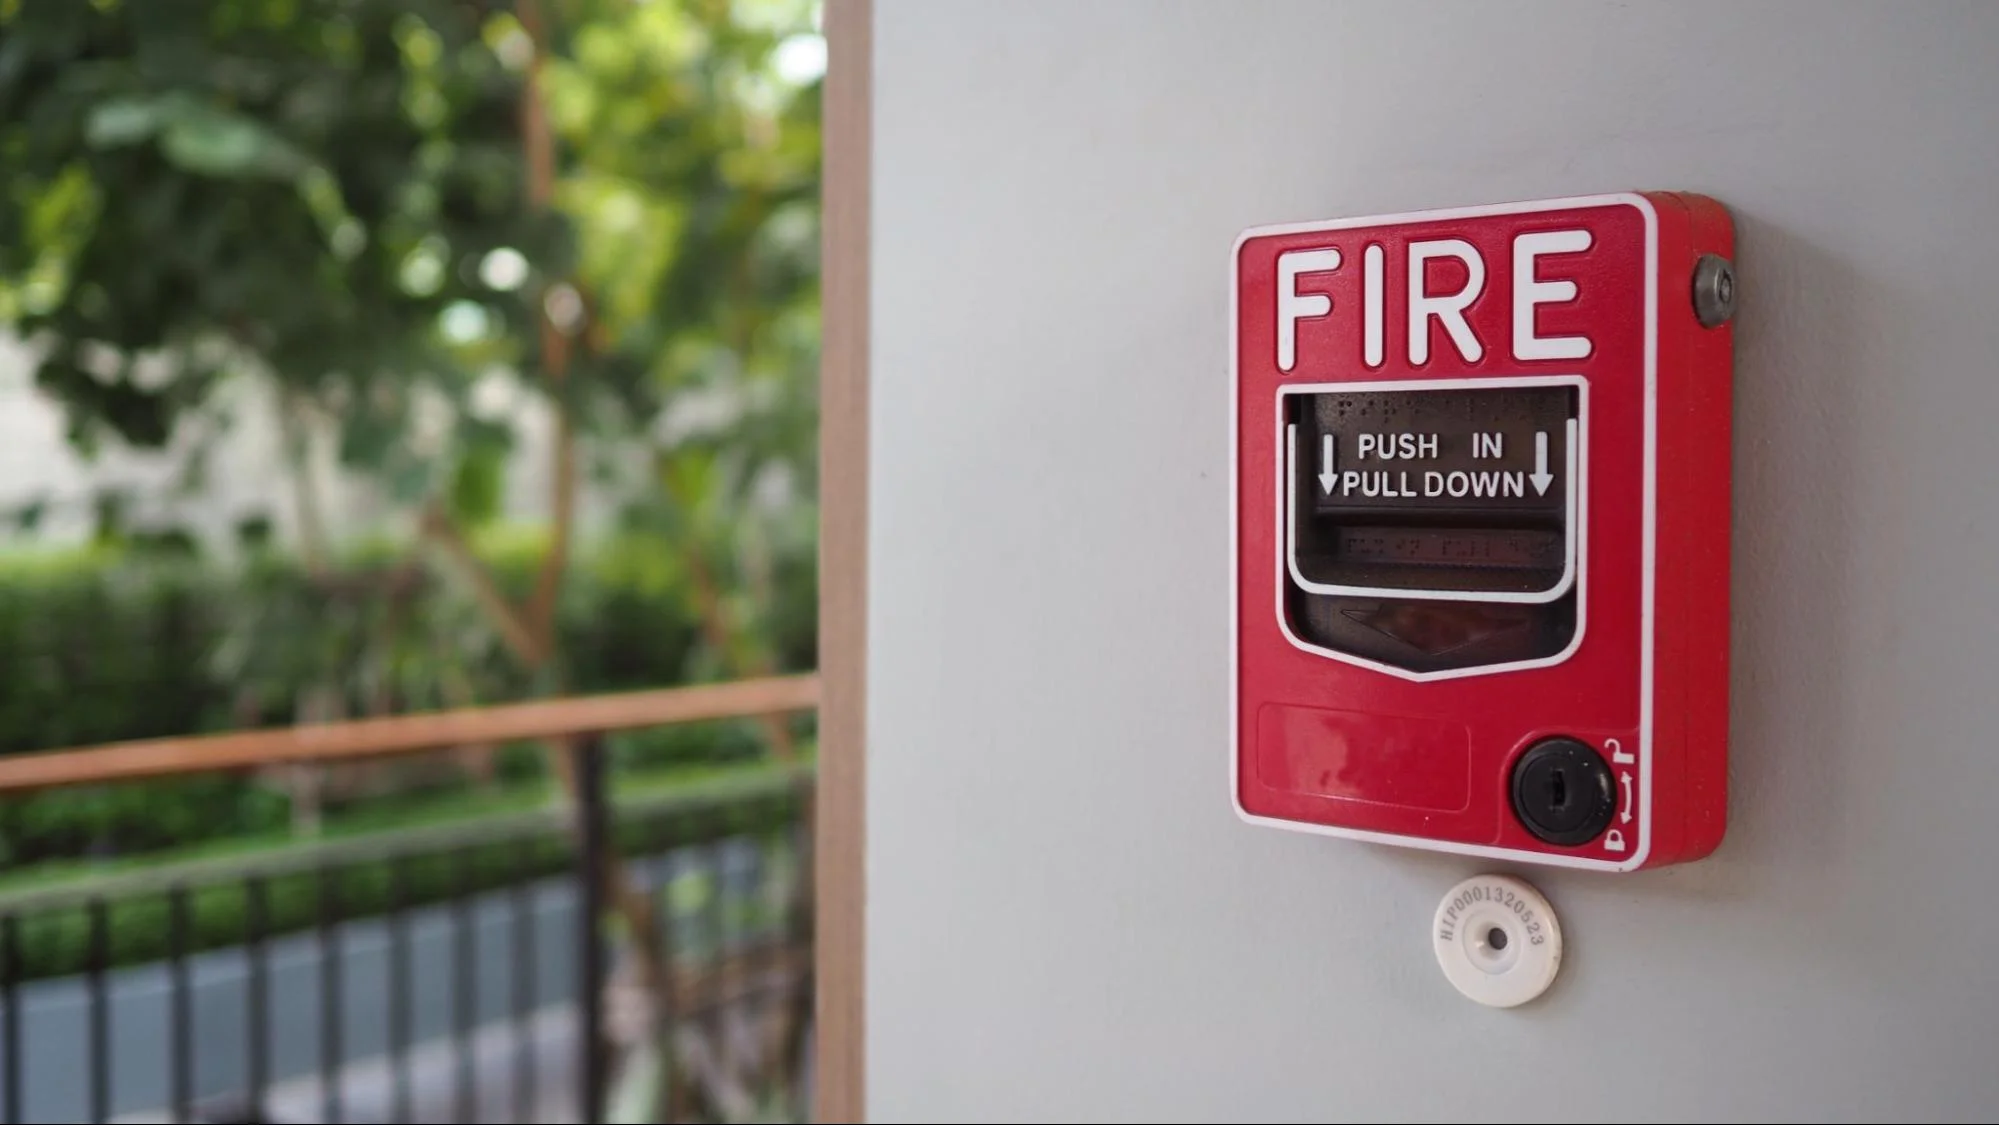
Taking proactive steps can significantly reduce the risk of fire and water damage in your home. By implementing effective prevention strategies and using home safety equipment, you can protect your property and ensure your family’s safety.
To minimize the risk of fire, focus on key safety measures. First, install smoke alarms on every level of your home, especially inside bedrooms. Test them monthly and change batteries at least once a year.
Keep flammable materials away from heat sources. Store items like paper, cloth, and chemicals in safe places. Use fire-resistant materials when renovating or building your home.
Create a fire escape plan. Discuss it with your family and practice regularly. Ensure all family members understand how to escape safely. Consider attending a fire safety workshop for additional skills.
Preventing water damage requires attention to your home’s structure and systems. Start by checking your roof for leaks, especially after heavy rain. Clean gutters regularly to ensure proper drainage.
Inspect your plumbing for leaks and fix any issues promptly. Use water leak detectors in areas prone to flooding, such as basements or laundry rooms.
Be cautious with appliances like dishwashers and washing machines. Regularly check hoses for wear and replace them every few years.
Finally, consider installing a sump pump in your basement. This can help manage any unexpected water buildup quickly.
Having the right safety equipment is essential for protecting your home. Start with fire extinguishers. Keep one in the kitchen and another on each level of your home. Check them periodically to ensure they are charged.
Install carbon monoxide detectors near sleeping areas. Similar to smoke alarms, they should be tested monthly.
In case of a flood or water emergency, have a basic emergency kit. It should include items like flashlights, batteries, and bottled water. Knowing how to shut off utilities like gas and water can also help prevent further damage.
Keep your emergency contacts handy for immediate assistance if needed.
Restoring your home after a fire or water damage involves several important steps. Each phase is crucial for ensuring your property is safe and livable again. Here’s what you can expect during the restoration process.
The first step is to assess the extent of the damage. A professional restoration team will conduct a thorough inspection. They will look for signs of fire and water damage, noting affected areas.
This inspection includes checking for structural damage, smoke stains, and water saturation. The team will use specialized tools to get accurate readings. This helps determine an effective restoration plan.
After this, they will create a detailed report. This document outlines what needs to be repaired and the methods to use. Understanding the damage allows you to make informed decisions moving forward.
Once the assessment is complete, containment begins. This step is vital to prevent further damage to your home. The restoration team will seal off the affected areas.
They may use plastic sheeting to isolate spaces. This keeps soot, debris, and contaminants from spreading. It also ensures that any water used in the restoration does not affect dry areas.
Containment helps protect your belongings as well. By limiting exposure to damaged areas, the team can save more of your property. It’s a key step in maintaining control of the restoration process.
If water is present, quick removal is essential. The team will use powerful pumps and vacuums to extract standing water. Fast action helps prevent mold growth and further damage.
After removing the water, the area will need thorough drying. Industrial fans and dehumidifiers will be deployed. These tools help evaporate moisture trapped in walls and floors.
Monitoring moisture levels is crucial during this phase. The team will take readings to ensure areas are completely dry. This prevents future issues like mold and structural weakness.
After addressing water issues, it’s time to tackle soot and smoke. Smoke damage can be widespread, affecting walls, ceilings, and floors. The restoration team will employ specialized equipment for cleaning.
They often use air scrubbers to filter out smoke particles. Surfaces will be cleaned with appropriate cleaning solutions. This ensures that odors and stains don’t linger.
In some cases, deep cleaning or even replacement of materials may be necessary. Your restoration team will know the best approach to take. This step is critical for improving indoor air quality and restoring your home.
After cleaning, the next phase is sanitization. The team will use disinfectants to eliminate bacteria and germs. This is important for your health and safety after a disaster.
Odor removal is also addressed during this step. Special techniques, such as ozone treatment or thermal fogging, may be used. These methods target unpleasant smells left by fire or water damage.
It’s important to ensure your home smells fresh and is safe to inhabit. A thorough approach to sanitization and odor removal prevents lingering issues later on.
The final step is repairs and reconstruction. This phase involves fixing or replacing damaged structures and materials. Your restoration team will follow the plan created during the initial inspection.
Repairs may include drywall replacement, flooring installation, or even major structural work. Each repair is completed with care to ensure safety and quality.
It’s essential to choose materials that match your home’s original style whenever possible. This keeps the aesthetic appeal intact. Your team will provide guidance on material options and timelines for completion.

Choosing the right restoration professional is crucial after a fire or water damage. It’s important to focus on qualifications, coverage, and reputation to ensure quality work and peace of mind.
When hiring a restoration professional, check for relevant certifications. Look for credentials from organizations like the Institute of Inspection, Cleaning and Restoration Certification (IICRC). These certifications show that the company has undergone extensive training in restoration practices.
Professionals may also have training in specific areas such as fire damage restoration or water damage restoration. This specialized knowledge helps them handle complex situations effectively.
Ask potential companies about their training programs. A well-trained restoration team will follow industry standards, ensuring efficient and reliable service.
Always verify that the restoration company is insured and licensed. Having the proper insurance protects you from liability in case of accidents during the restoration process.
Most states require restoration businesses to have a license. Check local regulations to ensure compliance. A licensed contractor usually adheres to industry standards and local laws, providing added security.
Additionally, ask if they carry general liability and workers’ compensation insurance. This coverage protects both you and the workers from any damages or injuries that may occur on your property.
Customer reviews and testimonials offer insights into the quality of services provided by a restoration company. Look for feedback on platforms like Google, Yelp, or the company’s website.
Pay attention to both positive and negative reviews. A single bad review may not tell the whole story, but consistent issues or complaints can be a red flag.
Also, consider asking the company for references. Speaking with former clients allows you to gauge their reliability and professionalism. Positive feedback from previous customers can strengthen your confidence in your choice.
When dealing with fire and water damage, quick action is vital. You must assess the damage immediately. This helps you understand what needs attention.
Taking these steps can minimize loss and ensure a smoother restoration process. With the right approach, your home can quickly return to a safe and comfortable condition. Don’t hesitate to reach out for help when needed.
After a fire or water incident, ensure your safety first. Check for any dangers like structural damage or gas leaks. Next, contact your insurance company to report the incident and begin the claims process. Document all damage with photos for your records.
Look for a restoration service with good reviews and proper certifications. Make sure they have experience handling fire and water damage. Ask for estimates from multiple companies and verify their insurance coverage. This will help you make an informed choice.
Start by securing the property to prevent unauthorized access. Remove any burnt debris and thoroughly ventilate the area to reduce the smoke smell. It’s important to check electrical systems and plumbing for damage. Always consult professionals for more serious issues to ensure safety.
Address water issues quickly to prevent mold growth. Dry out affected areas within 24-48 hours. Use dehumidifiers and fans to aid in drying. If you find mold, clean small areas with the proper solutions. For larger infestations, contact professional mold remediation services.
Keeping your carport in good shape is important for protecting your vehicle and enhancing the overall look of your property. DIY carport repairs and improvements can be both manageable and rewarding for homeowners ready to take on the challenge. Whether you are fixing a leaky roof, adding storage options, or upgrading the structure, you can boost functionality and aesthetics with some effort and planning.
Before starting any project, it’s essential to understand the basics of carport designs, maintenance needs, and potential improvements. Knowing what repairs are necessary and how to approach enhancements can give you confidence in your ability to tackle the work. The right preparation will help you make thoughtful decisions, ensuring your carport meets your needs for years to come.
As you read on, you’ll find practical steps for successful repairs and improvements that can make a real difference. Get ready to transform your carport into a more functional and attractive space with useful tips and strategies tailored specifically for you.

When considering a DIY carport, understanding different designs is essential. From the type of structure you choose to its size and materials, each element plays a significant role in functionality and aesthetics.
Carports come in various types that cater to different needs. The two main categories are attached and detached carports.
The attached Carports connect directly to your home. They offer seamless access and help save space. This type is ideal if you want easy entry during bad weather.
Detached Carports stand independently. They can be placed anywhere on your property, allowing for flexible setups. Many people prefer them for added space and potential multi-car parking.
Other options include open-sided and enclosed designs. Open-sided carports provide ventilation but limited security. Enclosed carports offer protection but may require more materials and cost.
Choosing the right size for your carport is crucial. Measure the space available on your property and consider your parking needs.
A standard carport is typically 12 to 24 feet wide and can be 20 to 40 feet long. If you have larger vehicles like trucks or SUVs, opt for a width closer to 18 feet or more.
Think about future needs too. If you plan to buy a larger vehicle or have guests who visit often, factor in extra space. Also, consider the height. Most vehicles require at least a 7-foot clearance.
The choice of materials affects the durability and maintenance of your carport.
Wood Carports offers a classic look. They are versatile and can be painted or stained. However, they require regular maintenance to prevent rot, especially in wet climates.
Metal Carports are known for their strength and longevity. They can withstand harsh weather conditions better than wood. Metal surfaces often need less upkeep but can be prone to rust if not finished correctly.
Consider local weather conditions when choosing materials. For instance, if you live in an area with heavy snowfall, a sturdy metal design might be best.
Roof design affects both appearance and functionality. There are several types you can choose from.
Flat roofs are simple and can integrate well with modern designs. They are easier to build but may require good drainage solutions to handle rain.
Hip roofs have slopes on all sides, which can effectively shed water and snow. They often add a decorative touch and can make your carport look more appealing.
Gabled roofs feature two sloping sides and offer maximum height. They provide excellent ventilation and are suitable for larger structures.
When planning your carport, think about the roofing material as well. Options include metal, shingles, and membrane systems, each impacting durability and maintenance.
Planning before you start building your carport is essential. It ensures that your project complies with local laws and meets your needs. Effective preparation will save you time, money, and frustration.
Before you begin, check your local building codes. These codes set rules for construction and safety standards. Many areas require permits for carport construction.
To find out what’s needed, visit your local planning office or their website. They often provide guidelines and application forms. Failing to obtain necessary permits can lead to fines or require you to dismantle your carport.
Make a list of codes and permits needed for your project. Keep this information handy as you proceed.
Choosing the right location for your carport is critical. Look for a flat, stable area that is free of obstructions like trees or fences to enhance its stability.
Take note of the following factors:
Measuring your site is also crucial. Make sure the space is large enough for the carport size you have in mind.
A precise carport plan is vital for a successful build. Start with a sketch detailing the dimensions and design of your carport.
Include essential features such as:
On your plan, label each component clearly to avoid confusion later. Having a visual reference helps you stay organized and focused.
Budgeting for your carport is a key step in the planning process. Start by estimating the costs for materials, labor, and permits.
Create a detailed budget sheet. List each item and its estimated cost, then total them for an overall budget. This helps you stay on track financially and make necessary adjustments before starting the project. A well-prepared budget ensures you won’t run into surprises during construction.

Building a carport can protect your vehicle from the elements and increase your property’s value. This guide will help you set the posts, construct the frame, add finishing touches, and customize your carport for your needs.
Start by marking the area where your carport will stand. Measure and dig holes for the posts, typically 2 to 3 feet deep, to ensure stability.
Use a level to keep the posts straight. Concrete is used to secure the posts in place. Pour it into the holes and let it cure for at least 24 hours.
Consider a DIY Carport Kit if you prefer detailed instructions and materials. Metal carports often require specific installation measures. Make sure the posts are anchored properly to withstand strong winds and heavy snow loads.
Once the posts are secure, start constructing the carport frame. If you are building a wooden carport, use treated lumber for durability. Use 2×6 beams to connect the posts and create a solid frame.
Attach the carport roof. Depending on your preference, you can choose a flat or sloped design. Use plywood for a wooden roof or metal sheets for a metal carport.
Make sure the roof is properly aligned to avoid leaks. Secure the roofing material with nails or screws. Reinforce the frame to enhance stability, especially if your area experiences strong weather.
After the frame and roof are complete, focus on the finishing touches. Apply wood stain or sealant to wooden structures to protect them from moisture and insects.
For metal structures, consider painting to prevent rust. Adding gutters can help channel rainwater away from your carport and your home, preventing potential water damage. Additionally, consider installing LED lights for visibility at night. Use weather-resistant materials to ensure longevity. You can also add side walls for added protection against wind and rain.
Customization turns your basic carport into a tailored storage solution. Think about adding shelves or hooks inside for tools and outdoor equipment.
You might also want to install privacy panels or decorative elements to enhance aesthetics.
If you have a wooden carport, consider adding a pergola feature for extra shade and a more appealing design. For a metal carport, adding side panels can improve wind resistance.
Finally, assess your needs regularly. Make updates or improvements based on how you use the space. Your carport can evolve to meet changing requirements.

Proper care and attention to your carport can significantly extend its life and enhance its functionality. Focusing on routine maintenance, effective repairs, and thoughtful upgrades elevates your carport’s protection while increasing your property value. Here’s what you need to know.
Regular maintenance is essential for keeping your carport in top shape. Start with a visual inspection every few months. Look for signs of rust, leaks, or damaged panels.
Cleaning is also important. Use a mild detergent and water to wash the surfaces. This prevents dirt and debris buildup, which can cause long-term damage.
Don’t forget the roof. Clear leaves and debris regularly to avoid water pooling. Additionally, check for any loose screws or bolts and tighten them as needed. Regular upkeep saves you time and money on future repairs.
DIY repairs can save you money and time. For minor dents or scratches on metal carports, consider using a rubber mallet or a heat gun to gently reshape the surface.
If you notice leaks, investigate the seams and joints first. Sealing these areas with a waterproof sealant can prevent further damage.
For wood carports, check for rot by pressing a screwdriver into the wood. If it sinks in easily, you may need to replace that section. Simply cut out the damaged area and splice in a new piece. This hands-on approach keeps your carport safe and sturdy.
Security features can protect your investment. Installing motion sensor lights around the carport deters potential intruders.
Consider investing in a security camera system for additional peace of mind. These features provide safety while adding to your property value.
You might also think about enclosing your carport with sturdy gates. This protects your vehicle from theft and can show buyers that you’ve prioritized security.
With the right maintenance, repairs, and enhancements, your carport can remain a valuable asset for years to come.
You can repair a DIY carport using materials like tarps or metal sheeting to cover damaged areas. Use sealants to fix leaks and reinforce weak spots with additional supports. These methods often require minimal investment while still providing solid results.
Start by removing the damaged post with a saw. Then, excavate the old concrete if present. Install a new post in the hole, ensuring it is level. Secure it with concrete or brackets for added stability. Finally, allow the concrete to cure before applying any weight.
You can strengthen your carport by adding diagonal bracing between the posts. Consider using stronger materials for any repairs or replacements. Additionally, check that all connections are secure and tight to prevent movement during high winds or heavy rain.
Yes, you can raise the height of your carport by extending the posts. This often involves removing the existing posts and installing taller ones. Ensure that the roof structure is capable of supporting the new height. Consult local building codes for any necessary permits.
Basic repairs may require tools like a saw, drill, and level. For materials, keep wood, metal sheets, brackets, and sealants on hand. Depending on the extent of your repairs, you might also need concrete mix, paint, and protective coatings to ensure durability.
Installing kitchen cabinets can seem like a daunting task, but it’s an essential part of any kitchen renovation. With the right planning and preparation, you can achieve a professional-looking installation on your own. Knowing what types of cabinets are available and how to fit them into your space can make all the difference in your project’s outcome.
The installation process involves several key steps, from understanding the layout to making necessary adjustments for a perfect fit. You will learn to customize your cabinets to suit your style and needs, ensuring your kitchen not only looks good but functions well too. By following a straightforward approach, you can simplify the process and avoid common mistakes.
With the right tips and techniques, you can transform your kitchen efficiently. Embracing this DIY project will give you a sense of accomplishment and enhance the value of your home.
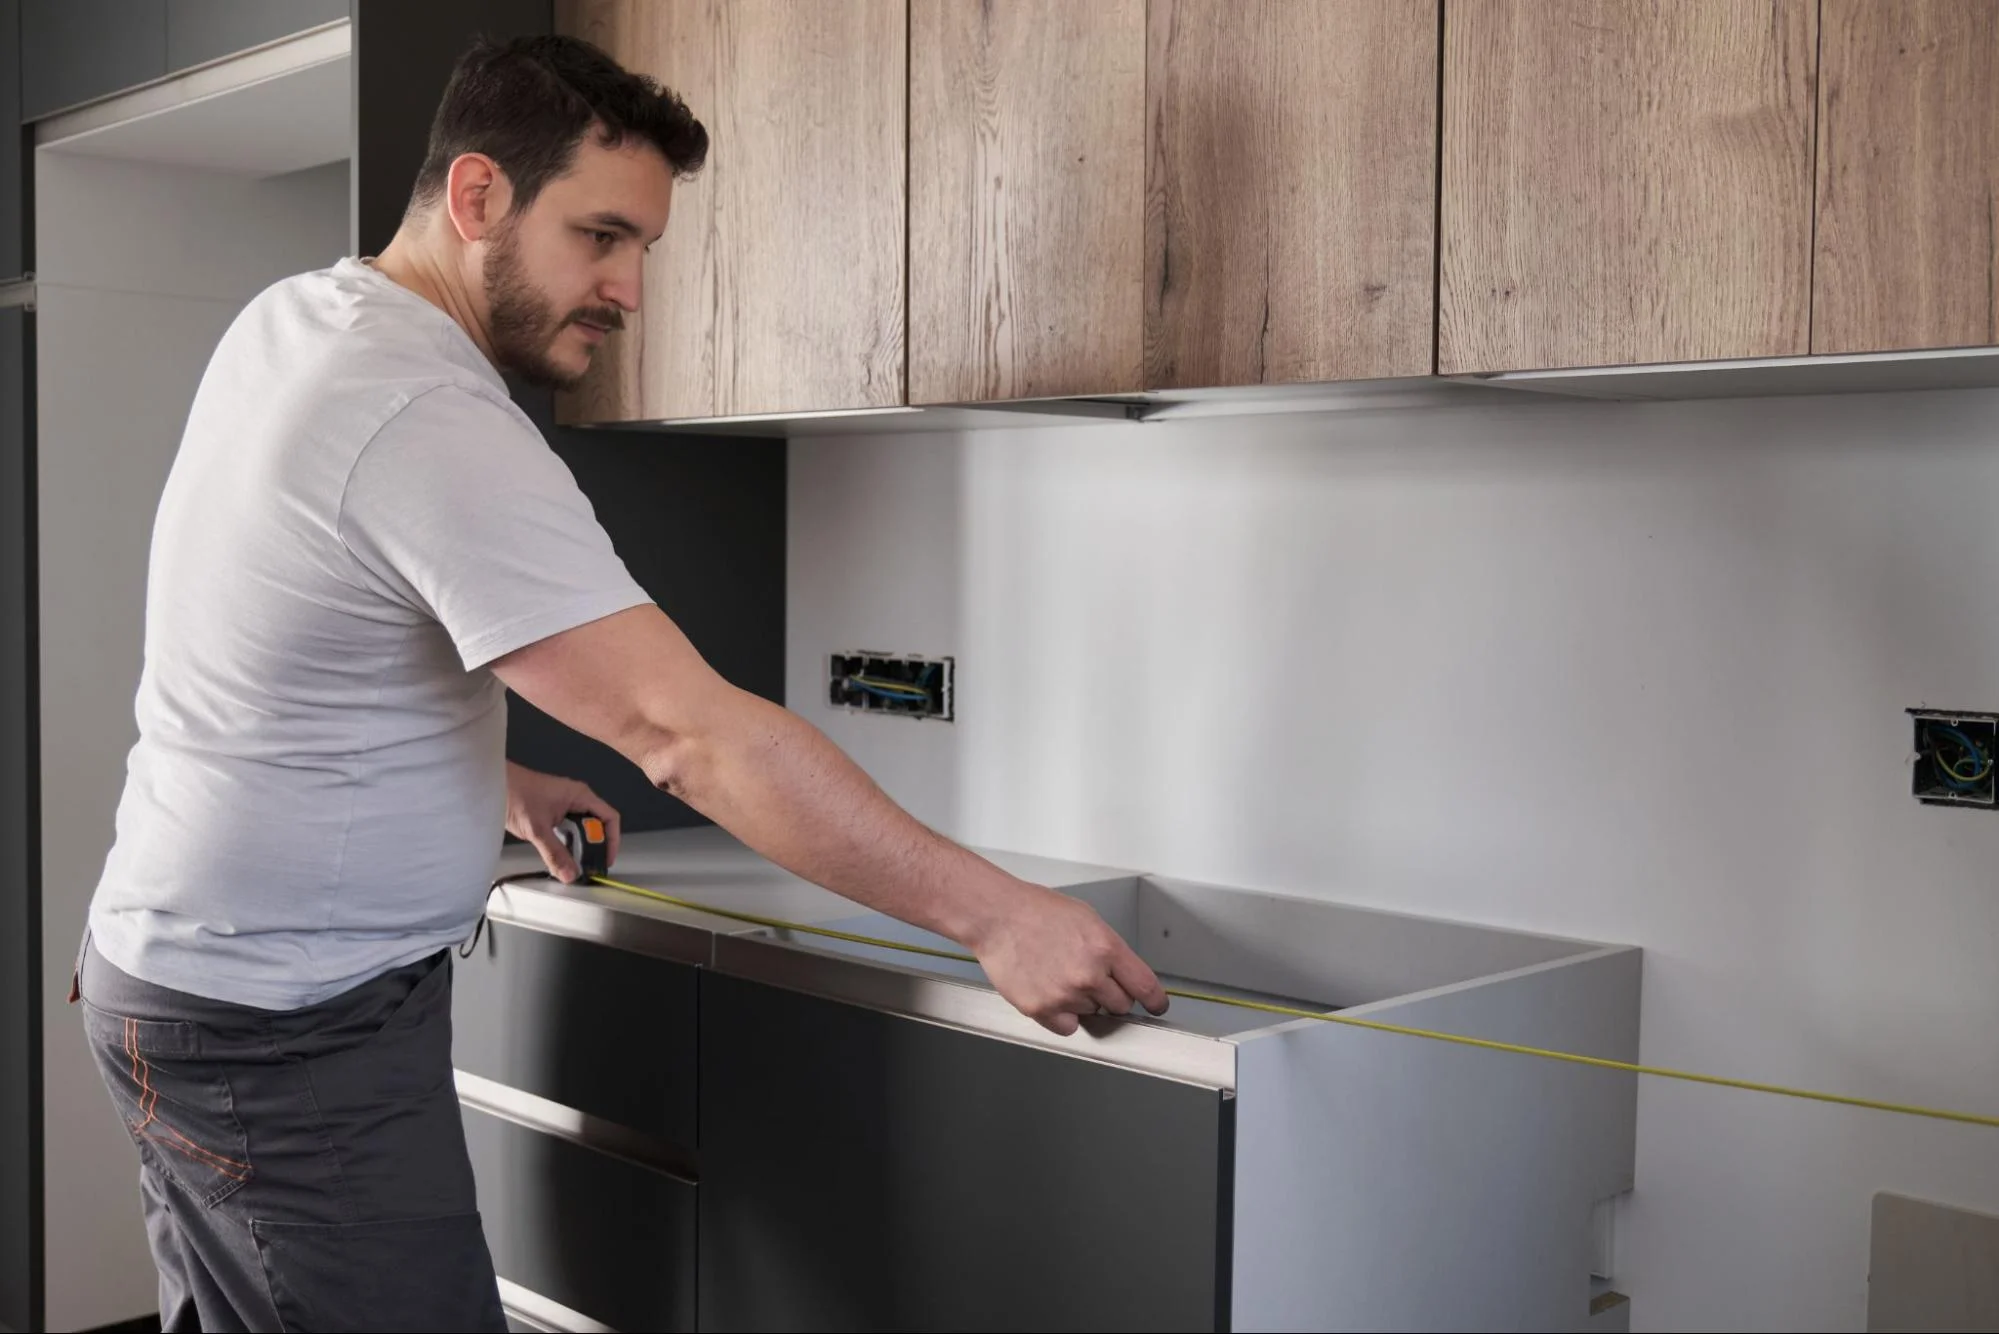
Preparation is key to a successful kitchen cabinet installation. Start with accurate measurements and select the right cabinets that fit your style and space. Gathering the necessary tools will make the actual installation process smoother.
Measuring your kitchen accurately is crucial. Begin by using a tape measure to check the width, height, and depth of each wall where you will install cabinets.
Create a detailed sketch of your kitchen layout. Include locations of doors, windows, and appliances.
Make note of any obstacles like pipes or electrical outlets. It’s best to measure twice to ensure accuracy. Erroneous measurements can lead to costly mistakes.
Also, keep in mind that walls can be uneven. Make sure you measure at several points to account for any discrepancies.
Choosing the right cabinets involves factoring in material, style, and color. Start by deciding on the cabinet type—stock, semi-custom, or custom.
Stock cabinets are ready-made and can be picked up quickly. Semi-custom cabinets offer more options in terms of sizes and finishes, while custom cabinets are fully tailored to your space but may require more time.
Also, think about the design. Consider traditional, modern, or rustic styles based on your kitchen theme.
Color and finish should also align with your overall kitchen style. A cohesive look enhances the room’s appeal.
The choice of materials affects the durability and maintenance of your carport.
Wood Carports offers a classic look. They are versatile and can be painted or stained. However, they require regular maintenance to prevent rot, especially in wet climates.
Metal Carports are known for their strength and longevity. They can withstand harsh weather conditions better than wood. Metal surfaces often need less upkeep but can be prone to rust if not finished correctly.
Consider local weather conditions when choosing materials. For instance, if you live in an area with heavy snowfall, a sturdy metal design might be best.
Having the right tools will make installation easier. Assemble a list of essential items such as:
Don’t forget safety gear like goggles and gloves.
Before starting, ensure all tools are in working order. If you lack any tools, consider borrowing or renting instead of buying. This preparation sets you up for a smooth installation process.
Choosing the right type of kitchen cabinet is essential for both function and style. Each cabinet type serves a specific purpose and has unique features that can enhance your kitchen.
Base cabinets sit directly on the floor and provide the foundation for your kitchen design. They are typically 34.5 inches tall, allowing for countertop installation. These cabinets offer ample storage space for pots, pans, and kitchen tools.
When selecting base cabinets, consider the material. Common options include solid wood, plywood, and MDF. Solid wood offers durability and a classic look, while MDF is often more affordable and resistant to moisture.
You can also choose between various styles, such as shaker, flat-panel, or traditional. Additionally, base cabinets can include built-in features like drawers, shelves, or pull-out trays to improve accessibility.
Wall cabinets are mounted above the counter, maximizing vertical space. They typically range in height from 30 to 42 inches. These cabinets are perfect for storing dishes, spices, and other kitchen essentials.
When selecting wall cabinets, consider the door style and finish, as they can dramatically affect your kitchen’s appearance. Popular choices include glass-front doors for a modern look or raised-panel doors for a more traditional style.
You should also think about the depth of the cabinets. Standard wall cabinets are usually 12 inches deep, but you can find deeper options for increased storage. Hanging wall cabinets at the right height ensures easy access while maintaining a clean look.
Tall cabinets are often used for pantry storage or to house appliances like ovens and microwaves. They range in height from 84 inches and can add significant storage space to your kitchen.
When designing with tall cabinets, you can choose between full-height or appliance garages. Full-height cabinets provide abundant space for food items or kitchen supplies. Appliance garages can help conceal appliances, creating a more organized appearance.
Consider the width of tall cabinets as well. Common widths are 18, 24, or 30 inches. The choice of material and style should match your overall kitchen design. Integrating these cabinets with other storage options will enhance both functionality and aesthetics.

Getting your kitchen cabinets installed correctly is crucial for both function and appearance. This section covers essential steps to ensure a smooth installation process. You will learn about setting up your layout, securing cabinets to the walls, and how to align and join the units properly.
Begin by measuring your kitchen space accurately. Use a tape measure to obtain the dimensions of each wall and note any obstructions like windows or outlets.
Once you have your measurements, create a detailed sketch. Include locations for base and wall cabinets. Consider the workflow in your kitchen. Ensure that elements like the sink, stove, and fridge are easy to access.
After you finalize your layout, mark the wall with a level pencil line where the top of the cabinets will be. This line will act as a guide for proper installation and alignment.
Ensure the cabinets are firmly attached to the wall for safety and stability. Start by locating the wall studs. Use a stud finder for best results, as they provide the strongest hold for cabinets.
Position the cabinet against the wall along the marked line. Use screws to attach the cabinet to the wall studs. It’s advisable to use two or more screws per cabinet, depending on its size.
For added security, consider shimming behind the cabinet if it’s not level. This will prevent any movement and keep your cabinets aligned.
Once all your cabinets are secured, focus on alignment. Check each unit with a level to ensure they are all even. If one is slightly off, adjust with shims as needed.
Next, it’s time to join the cabinets together. Use cabinet screws to connect adjacent cabinets. Drill through the side panels, taking care to avoid any visible damage.
Finally, ensure that all joints are flush, and the face frames align smoothly. This attention to detail will make a significant difference in the final look of your kitchen.
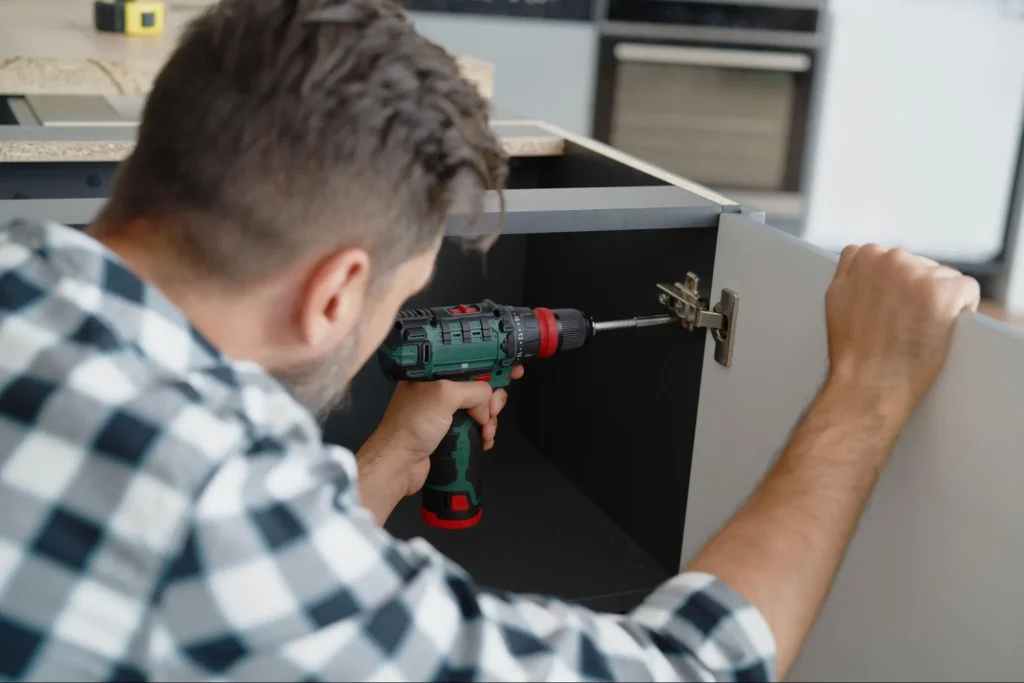
Customizing your kitchen cabinets can enhance both the functionality and aesthetics of your space. Making the right adjustments to trims and hardware can help you achieve a polished look while ensuring everything operates smoothly.
Adding trim and moldings to your cabinets can transform their appearance. Consider crown molding for the top of your cabinets. This detail gives a professional finish.
Selecting the right hardware is crucial for both style and function. This includes knobs, handles, and hinges that complement your cabinet design.
By focusing on these aspects, you can ensure your kitchen cabinets are not only stylish but also functional.

After installing your kitchen cabinets, it’s time to focus on the finishing touches that enhance both functionality and appearance. This involves applying caulking and sealants to ensure a clean look and prevent moisture damage. Finally, a thorough cleaning and inspection will help make sure everything is in order.
Applying caulking and sealants is an essential step in kitchen cabinet installation. Start by choosing a high-quality caulk that matches your cabinets. A silicone-based caulk works well for its durability and flexibility.
Use a caulking gun to apply the sealant along the edges where the cabinets meet walls or countertops. Ensure you smooth it out with your finger or a caulking tool for a neat finish. After applying, allow it to cure according to the manufacturer’s instructions. This will help prevent water damage and improve the overall appearance of your cabinetry.
Once the caulking is done, conduct a final clean and inspection of the cabinets. Use a damp cloth to wipe down all surfaces, removing dust and debris from the installation. Pay special attention to edges and corners where dirt can accumulate.
Take this opportunity to check the alignment of the cabinets. Open and close doors and drawers to ensure they function smoothly. Look for any gaps or unevenness that may need addressing. This step guarantees that everything is perfect and ready for everyday use.
Installing kitchen cabinets requires careful planning and attention to detail. Start by measuring your space accurately to choose the right size cabinets. Consider the layout of your kitchen to optimize storage and workflow. If you need professional assistance, consider Kaminskiy Care and Repair for a perfect cabinet installation.
Before you start, remove old cabinets and clear the workspace. Measure the kitchen layout accurately to ensure new cabinets fit well. It’s also vital to check the wall studs’ locations for anchoring.
Begin by locating the wall studs. Use a stud finder to mark their positions. Then, attach a ledger board to support the cabinets while you secure them. Make sure each cabinet is level before finalizing the installation.
Start with the wall cabinets first. This allows you to work comfortably without the base cabinets in the way. After securing the wall cabinets, proceed to the base cabinets, ensuring they are aligned correctly with the wall units.
Once cabinets are installed, ensure they are level and secure. Measure the countertop space and cut the countertop material if needed. Then, place the countertop on top of the cabinets, securing it with screws or adhesive as required.
Take your time to measure accurately and double-check each step. Following a detailed guide can help you stay on track. Additionally, seeking advice or watching tutorials can boost your confidence and ensure a successful installation.
Stucco is a popular choice for home exteriors due to its durability and distinct look. With the right techniques, you can transform your stucco surface into a stunning feature of your home. Whether your stucco is new or showing wear, a fresh coat of paint can enhance its appeal and protect it from the elements. Preparing the surface and selecting quality materials are crucial steps in achieving a flawless finish. You will need to understand the unique characteristics of stucco to choose the right paint and tools. Mastering effective painting techniques ensures that your finished project lasts for years.

Proper preparation is essential when painting stucco. This involves inspecting, cleaning, patching, and priming the surface to ensure the best results. Each step plays a critical role in creating a beautiful and lasting finish.
Start by checking the stucco closely for any signs of damage. Look for hairline cracks, larger cracks, or even areas where the stucco has chipped away. Use your fingers to feel for rough patches or loose sections.
Make a note of all problem areas that need attention. Pay special attention to mold and mildew. Such growth can hide under layers of dirt and paint, affecting the finish. The goal is to ensure the surface is sound before applying any paint.
Next, thoroughly clean the stucco surface. Begin by removing dirt and debris with a stiff brush. This prepares the surface for deeper cleaning. A pressure washer is effective for removing stubborn dirt. Set the pressure to a maximum of 1500 PSI and maintain a distance of about 2 feet from the stucco. If you notice mold or mildew, mix a cleaning solution with water to help eliminate these issues. After washing, let the stucco dry completely.
You’ll need to patch any cracks or holes you found during the inspection. Use a stucco patching compound for hairline cracks or larger cracks.
For deeper damage, consider masonry caulk. Apply the patching compound with a putty knife, ensuring it fills the crack. Smooth the surface to match the surrounding area. Allow the patches to dry as per the manufacturer’s instructions.
After curing, check to ensure the patches blend seamlessly with the stucco texture.
Before you paint, you must prime the stucco. A primer is crucial, especially for unpainted stucco, as it is highly porous. It absorbs the first coat of paint quickly, so applying a primer helps create a solid base.
Choose a high-quality masonry primer that suits exterior use. Use a roller or brush to apply evenly, ensuring every area is covered. This step helps in achieving an even finish and enhances the durability of the paint. Allow the primer to dry before proceeding with the final paint coats.

To achieve a beautiful finish when painting stucco, you need to select quality paint and the right tools. Making informed choices in these areas will ensure better adhesion, durability, and an attractive appearance.
When painting stucco, acrylic latex paint is recommended. This type of paint allows the stucco to breathe, reducing moisture buildup. Choose a paint with a flat sheen for a more natural look.
It’s crucial to use a high-quality exterior acrylic latex paint for long-lasting results. Look for paints that offer excellent adhesion and weather resistance. An acrylic masonry primer is beneficial before applying the paint, especially if the stucco is new or has not been painted in a while. This helps to seal the surface and enhance the paint’s performance.
Using the right tools makes a significant difference in the painting process. You will need a paintbrush and a roller specifically designed for textured surfaces. Select a ¾-inch nap roller for even coverage on the stucco’s rough surface.
A paint sprayer can speed up the job and provide a smooth finish, but you’ll need to practice a bit to master its use.
Be sure to have drop cloths and tape on hand to protect areas you don’t want to paint. Proper tools will help ensure that your project runs smoothly and results in a beautiful finish.
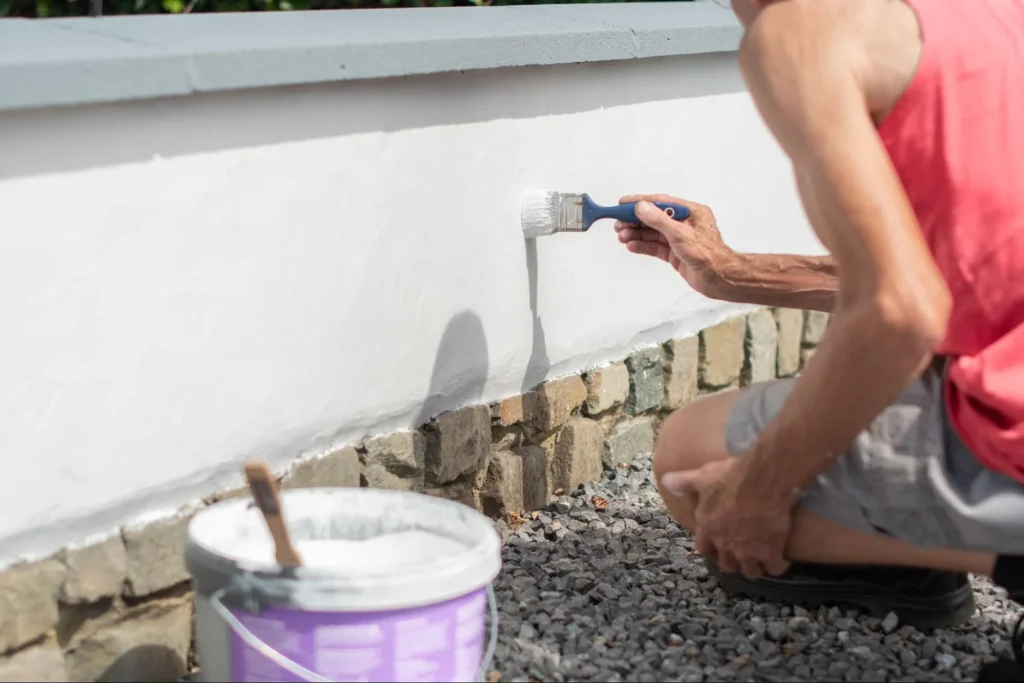
When painting stucco, using the right techniques is crucial for achieving a lasting and beautiful finish. Each step requires attention to detail, from applying the primer to mastering the final coat. Here are some effective methods you can use.
Start by cleaning the stucco surface to remove dirt and debris. This step ensures better adhesion of the primer and paint. Use a pressure washer if necessary, allowing the surface to dry completely.
Next, apply a quality primer designed for masonry surfaces. A primer helps seal the stucco and creates a uniform base. You can use a brush or roller for this step. If your surface is particularly rough, consider a paint sprayer for even coverage.
Once the primer dries, you’re ready to apply the first coat of paint. Choose a durable acrylic exterior paint for optimal results. Use a brush for edges—this technique is called cutting in. Then use a roller or sprayer to cover larger areas. Make sure to work in manageable sections to avoid drying marks.
The back-rolling method is essential when spraying paint on stucco. After applying paint with a sprayer, use a roller to create an even texture. This step is crucial for avoiding drips and ensuring proper coverage.
Use a roller with a thick nap to reach the texture of the stucco. As you roll, apply gentle pressure to ensure the paint fills in every crevice. This technique is effective because it helps push paint into the textured surface.
Keep your roller handy as you move along the wall. Make sure to blend each section while the paint is still wet to avoid lines. This will encourage a smooth finish across the entire surface.
Textured stucco can present unique challenges during painting. Use a quality paint sprayer that delivers a high PSI (pounds per square inch) for efficient application. This helps the paint reach into all the grooves of the texture.
Alternatively, you can dab paint onto the surface using a brush. This technique allows you to feather the edges and create a seamless finish. Use a stippling technique to add depth and enhance the overall appearance of the texture.
If needed, apply a second coat using the same techniques. Wait for the first coat to cure fully before applying the next. This ensures better adhesion and longevity for your finish.
The final coat is the most important step in painting stucco. After the previous layers have cured, apply a high-quality exterior paint. This coat enhances the durability and appearance of your project.
Similar to before, use a sprayer or roller for this step, but ensure an even application across the surface. Take special care with the areas that have been previously cut in. These sections should blend smoothly with the rest of the wall.
Finally, inspect the entire area for any missed spots or inconsistencies in coverage. Touch up as needed, and allow the paint to dry fully. Properly applied, your final coat will protect the stucco for years to come.
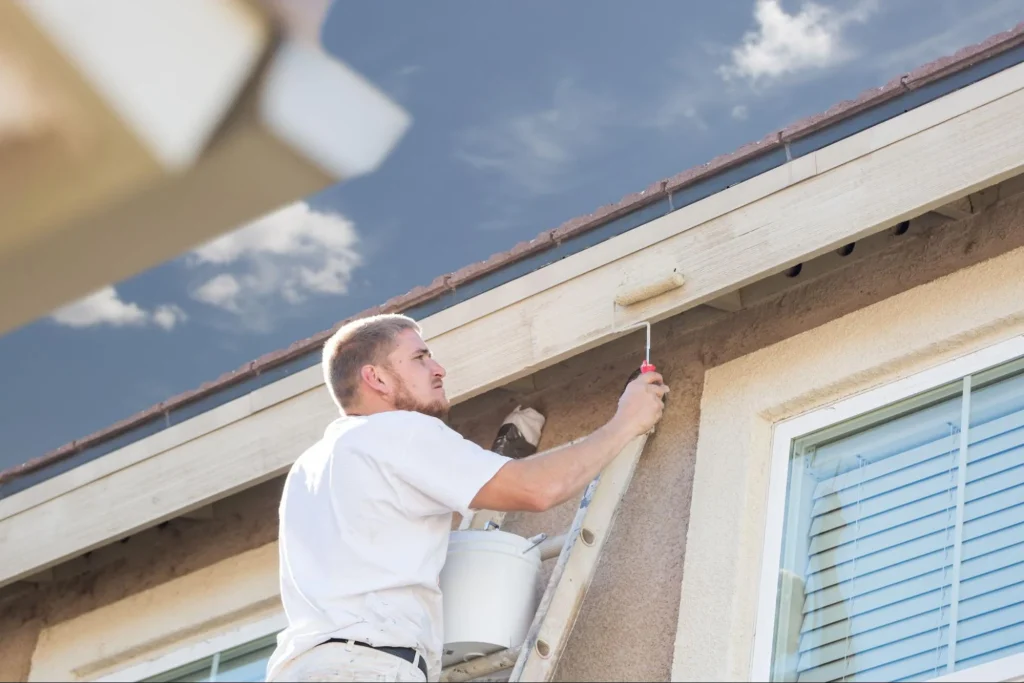
After painting your stucco exterior, it’s important to pay attention to the final details and ongoing care. These steps help ensure your home looks great and stays protected for years to come.
Once you have finished painting, take time to inspect the surface closely. Look for any drips or spots where the coverage may not be even. Use a paint sprayer for large areas, but hand brushes can give you more control in tight spots. A second coat might be necessary if you spot any imperfections.
Make sure to check corners and seams where coverage often misses. Touch up any areas that look tired or bare. A thorough inspection can save you from having to repaint sooner than expected.
Before painting, protect your surroundings with drop cloths and painter’s tape. Lay down drop cloths to avoid splatters on your landscaping or driveways. Use the painter’s tape on windows, doors, and edges for clean, sharp lines.
After painting, remove the tape carefully to prevent peeling the new paint. If drips occur, rinse any paint from unwanted areas with a garden hose. This keeps your home tidy and enhances its curb appeal, ensuring a professional finish that lasts.
To keep your newly painted stucco looking fresh, perform regular maintenance. Wash your surfaces with a gentle solution of soap and water every six months. Use a soft brush to avoid damaging the finish.
Check for cracks or fading as seasons change. If you notice any wear, apply a fresh coat of paint where needed. This will not only enhance aesthetics but also provide a low-maintenance solution for protecting your exterior against weather elements. Consistent upkeep helps your home maintain its charm.
When you decide to paint stucco, preparation is essential for a lasting finish. You’ll want to clean the surface thoroughly to remove dirt and dust. Using a pressure washer can help, but keep the pressure below 1500 PSI for safety. By following these practical steps, applying stucco painting for your home exterior will be an easy breeze.
Start by cleaning the stucco surface thoroughly. Use a pressure washer to remove dirt and loose paint. After that, caulk any cracks with a paintable exterior caulk. For application, using a roller with a thick nap can help reach the textured surface, while a sprayer can provide an even coat.
Both tools have their advantages. A sprayer allows for quick coverage and can efficiently reach difficult areas. However, a roller can give you better control and may reduce overspray, making it easier to fine-tune your work.
Inspect the stucco for cracks and damage before painting. Ensure that the stucco is clean and has cured properly, especially if it’s new. Additionally, consider the climate in your area, as it can affect the type of paint you choose.
Lead paint can pose serious health risks, especially in older homes built before 1978 when its use was banned. Learning how to safely remove lead paint is essential for protecting your family and maintaining a safe living environment. You can take steps to manage this hazard effectively, whether you’re planning a renovation or simply want to reduce risks in your home. By following safe removal techniques, you can minimize the dangers associated with lead exposure. With the right tools and knowledge, you can tackle this project confidently. Understanding the risks and the best practices for lead paint removal is the key to ensuring safety for you and your loved ones.
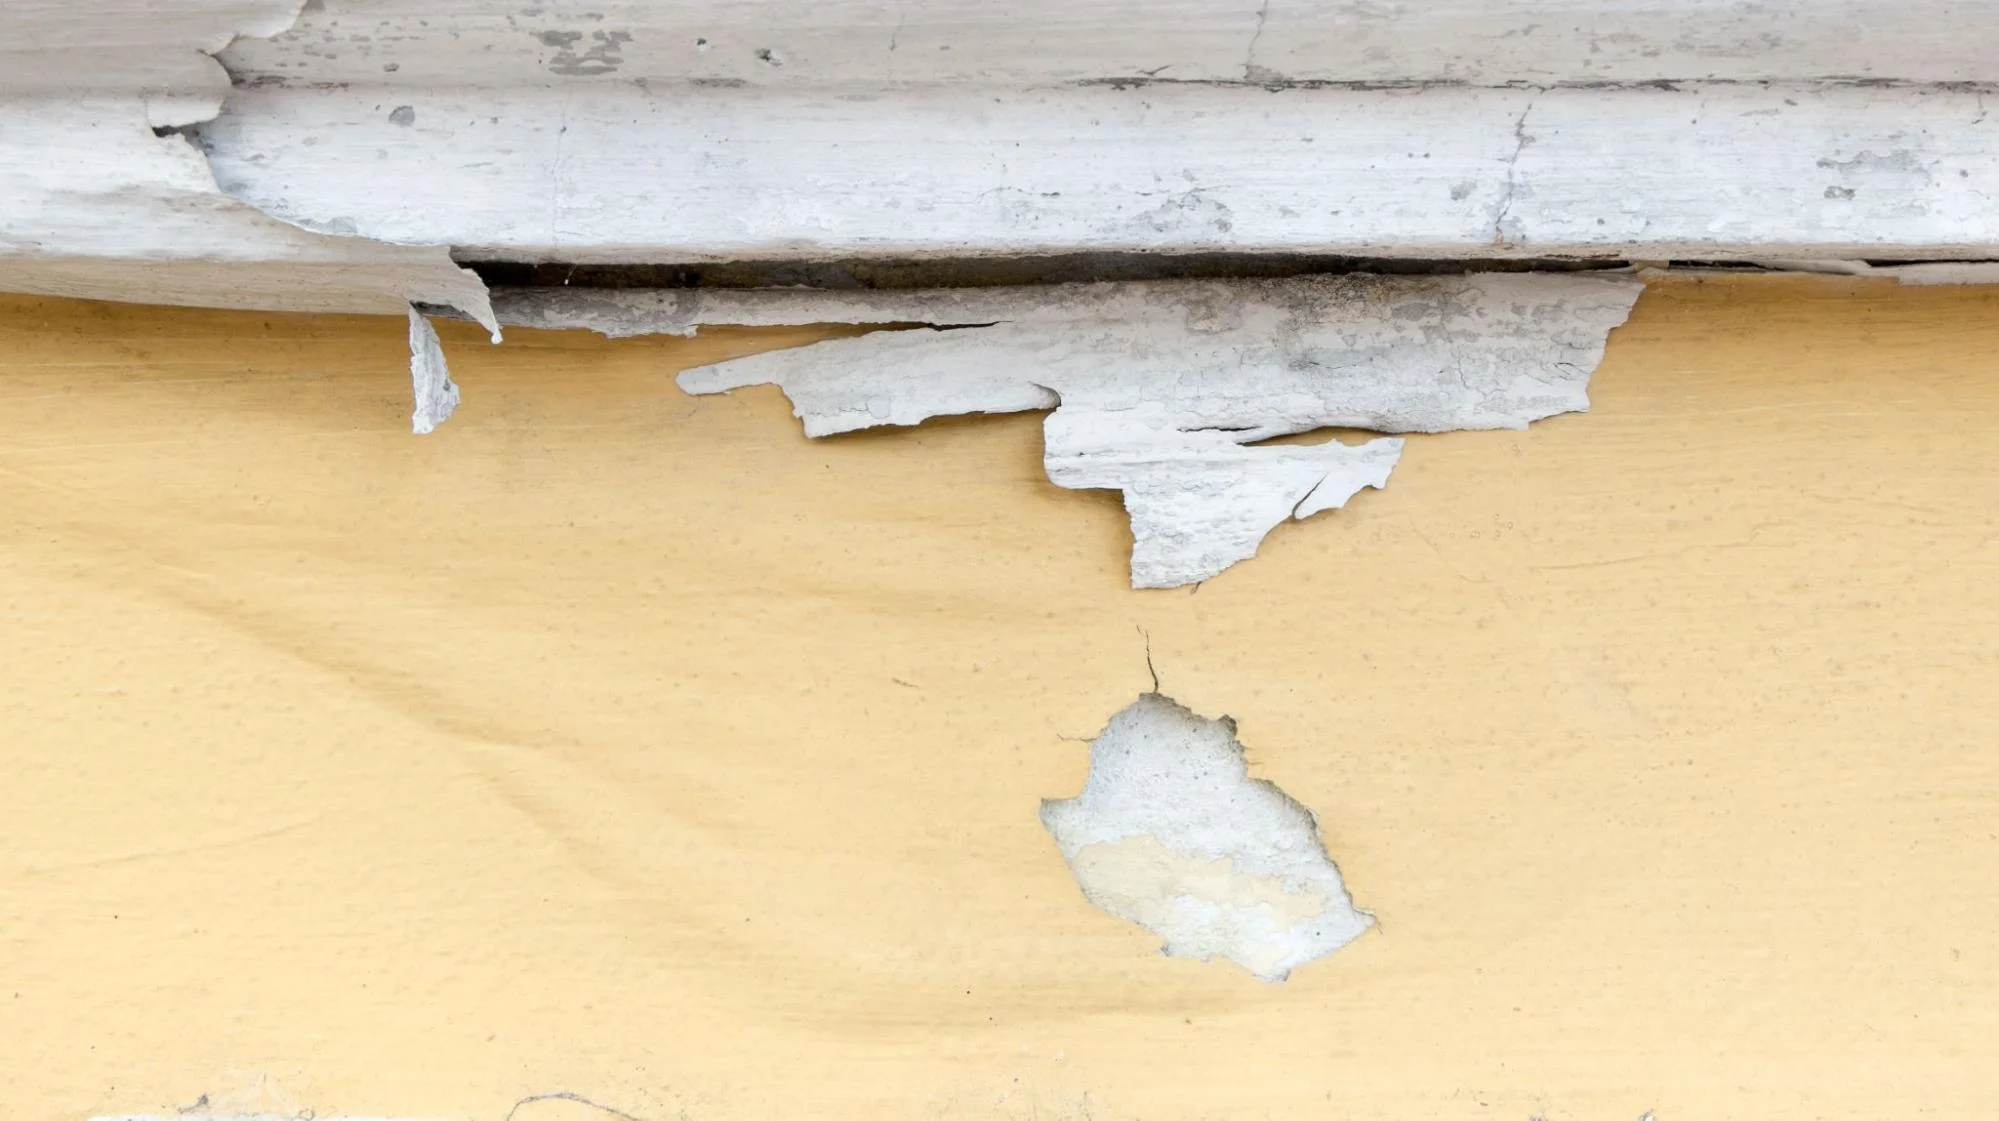
Lead paint presents serious risks to health and safety, especially in older homes. Understanding its history, health risks, and how to identify it in your home is essential for safe removal.
Lead has been used in paints for centuries. It was valued for its durability and ability to create vibrant colors. The use of lead in residential paints peaked in the early 20th century. However, awareness of its dangers grew over time.
In 1978, the U.S. government banned the use of lead in residential paints. Despite this ban, many homes built before this date still contain lead-based paint. Understanding when your home was built can help you assess the risk.
Lead exposure can lead to severe health problems. Even small amounts of lead can be harmful, especially to children. It can affect brain development, leading to learning disabilities and behavioral issues.
Adults can also suffer from health problems due to lead exposure. Symptoms may include high blood pressure, joint pain, and memory issues. Long-term exposure can lead to more serious conditions, such as kidney damage.
To minimize health risks, you should take lead exposure seriously. Regular screening for lead levels in children is recommended if you live in an older home.
To determine if your home contains lead-based paint, you have a few options. First, check the age of your home. Homes built in the 80s are more likely to contain lead paint.
You can conduct a lead test using home testing kits available at hardware stores. These kits can give you quick results. Alternatively, hiring a certified professional to test for lead is a safe choice, especially in larger areas.
If lead paint is detected, consider how it is layered and maintained. Peeling or chipping paint poses a higher risk and may need immediate attention. Knowing how to identify and assess lead paint will help you manage its risks effectively.
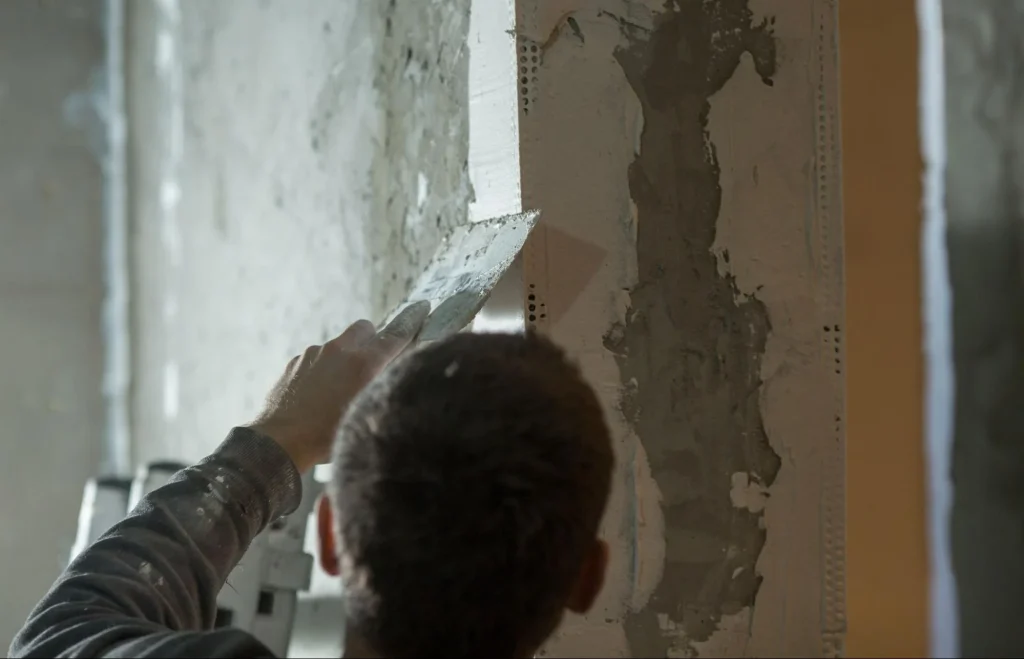
When you remove lead paint, you must take specific steps to protect yourself and others. Proper preparation, choosing the correct method, and ensuring a safe environment are critical for successful lead paint removal.
Before you begin, gather the necessary tools and protective gear. You’ll need gloves, a mask that can filter lead dust, and goggles to protect your eyes.
These steps will make the removal process safer and more efficient.
Different methods can be used to take off lead paint safely. Consider the following options:
Avoid using power sanders, as they can create significant dust, increasing the risk of lead exposure.
Proper containment is essential when removing lead paint. Here are strategies to consider:
These measures will create a safer space for you during the removal process.
Once lead paint is removed, it’s vital to clean up correctly. Follow these guidelines:
Begin by wearing protective gear, including gloves, goggles, and a mask rated for lead dust. Seal off the work area to prevent dust from spreading. Use damp methods to minimize dust and clean your tools afterward. Always dispose of debris according to local regulations.
Yes, homeowners can remove lead paint, but strict adherence to safety protocols is required. If you choose to do it yourself, be sure to educate yourself on proper techniques and safety measures. Consider consulting with a professional if you need clarification on any step.
To remove lead paint from wood, start with hand scraping instead of power tools. Use a chemical stripper designed for lead paint or a heat gun set at a safe temperature. Always maintain wet methods to control dust and ensure thorough cleanup after you finish the job.
No price games. You get a clear written quote before any work begins, backed by our workmanship warranty.